Appearance
Amazon SES
Amazon Simple Email Service (SES)
AWS's transactional email service. Cheapest at scale ($0.10 per 1,000 emails) but requires AWS account, region selection, and IAM-based credential setup.
SendGrail uses the SES API
SendGrail's Amazon SES integration uses the SES HTTP API with IAM access keys (not SMTP credentials). You'll generate an AKIA... access key + secret access key for an IAM user with AmazonSESFullAccess.
Prerequisites
- An AWS account. The Free Tier covers 62,000 outbound emails per month.
- A domain you can edit DNS records for (recommended — required for production sending). Single-email verification works for testing.
- WordPress admin access.
Setup overview
- Verify a sending identity (domain or email) in SES.
- Create an IAM user with SES permissions.
- Generate an access key + secret access key for that user.
- Request a sending-quota increase to leave the SES sandbox.
- Add the connection in SendGrail.
Step-by-step
Verify a sending identity
In your chosen region, open SES → Configuration → Identities → Create identity. Pick Domain for production sending (Easy DKIM gives you 3 CNAME records — paste them into your DNS) or Email address for a quick test (SES emails you a confirmation link).
This step doesn't have its own screenshot — the rest of this guide covers IAM and quota setup. Once your identity shows Verified, continue below.
Pick the region first
The region selector (top-right of the AWS console) decides everything: which SES endpoint hosts your identities, where IAM credentials are scoped, and what the SMTP host looks like (email-smtp.{region}.amazonaws.com). Stay in one region for the whole flow.
Open IAM Users
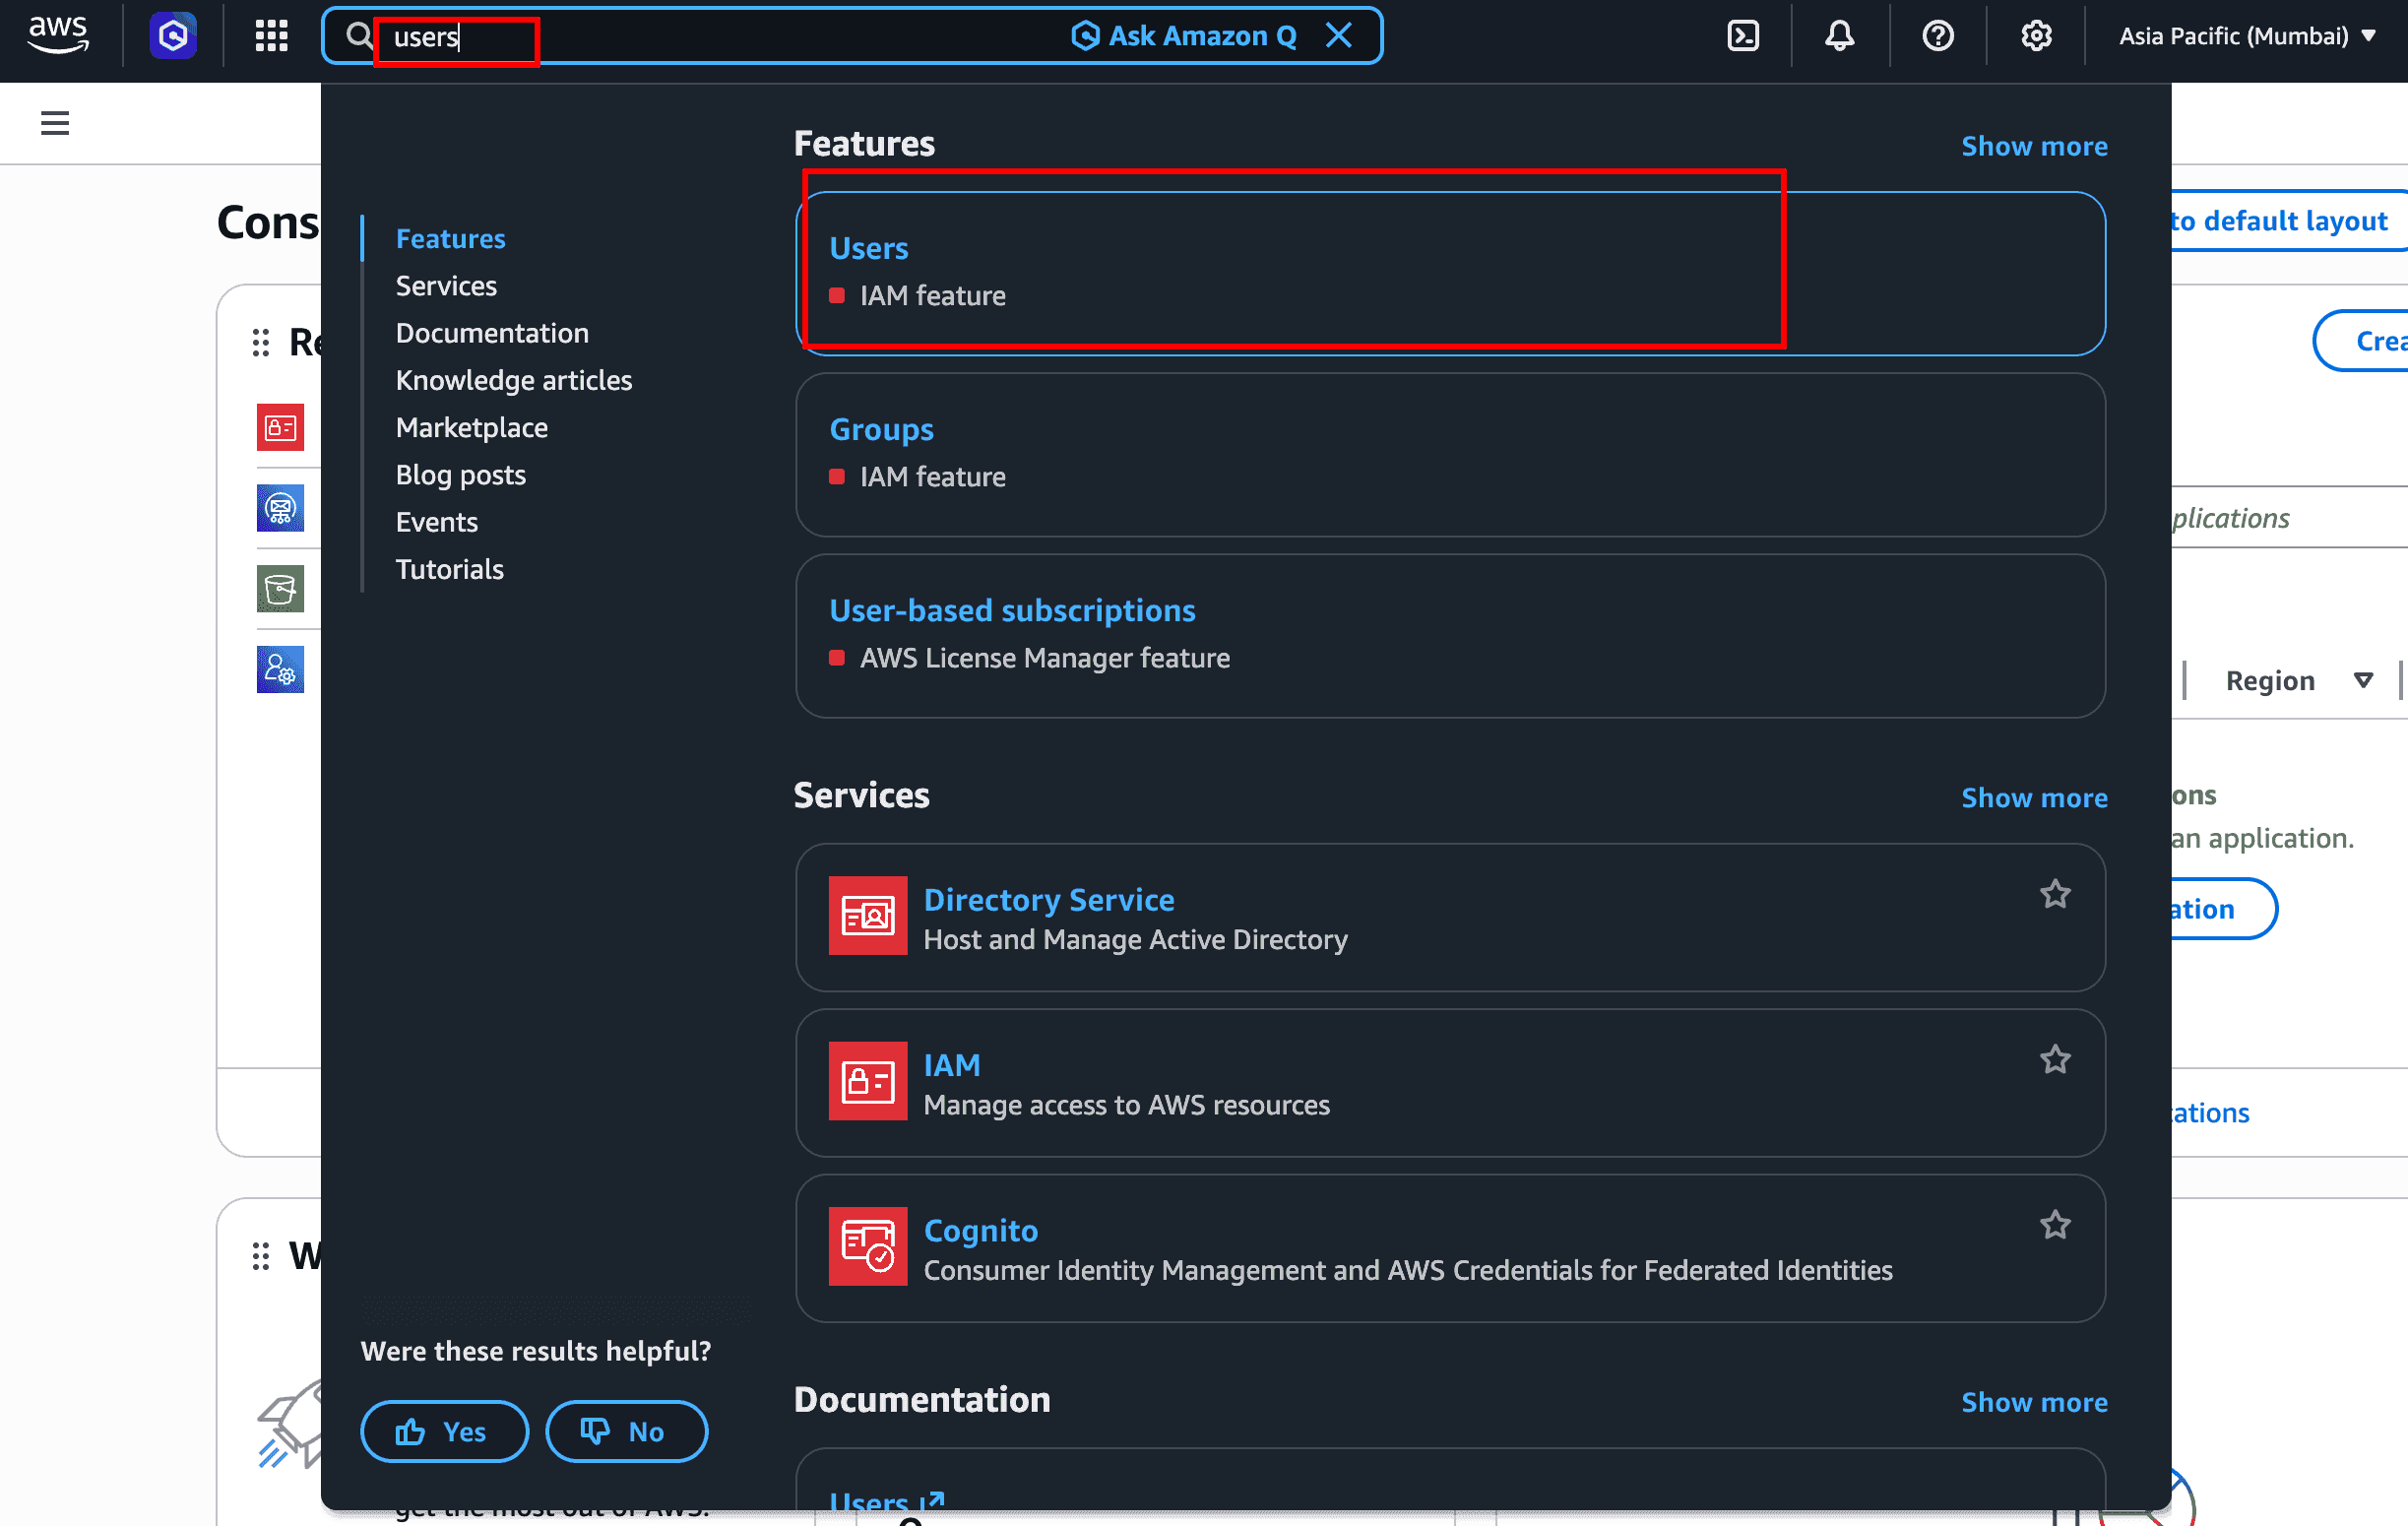
In the AWS console search bar, type users and click the Users result under Features (it's an IAM feature).
Click Create user
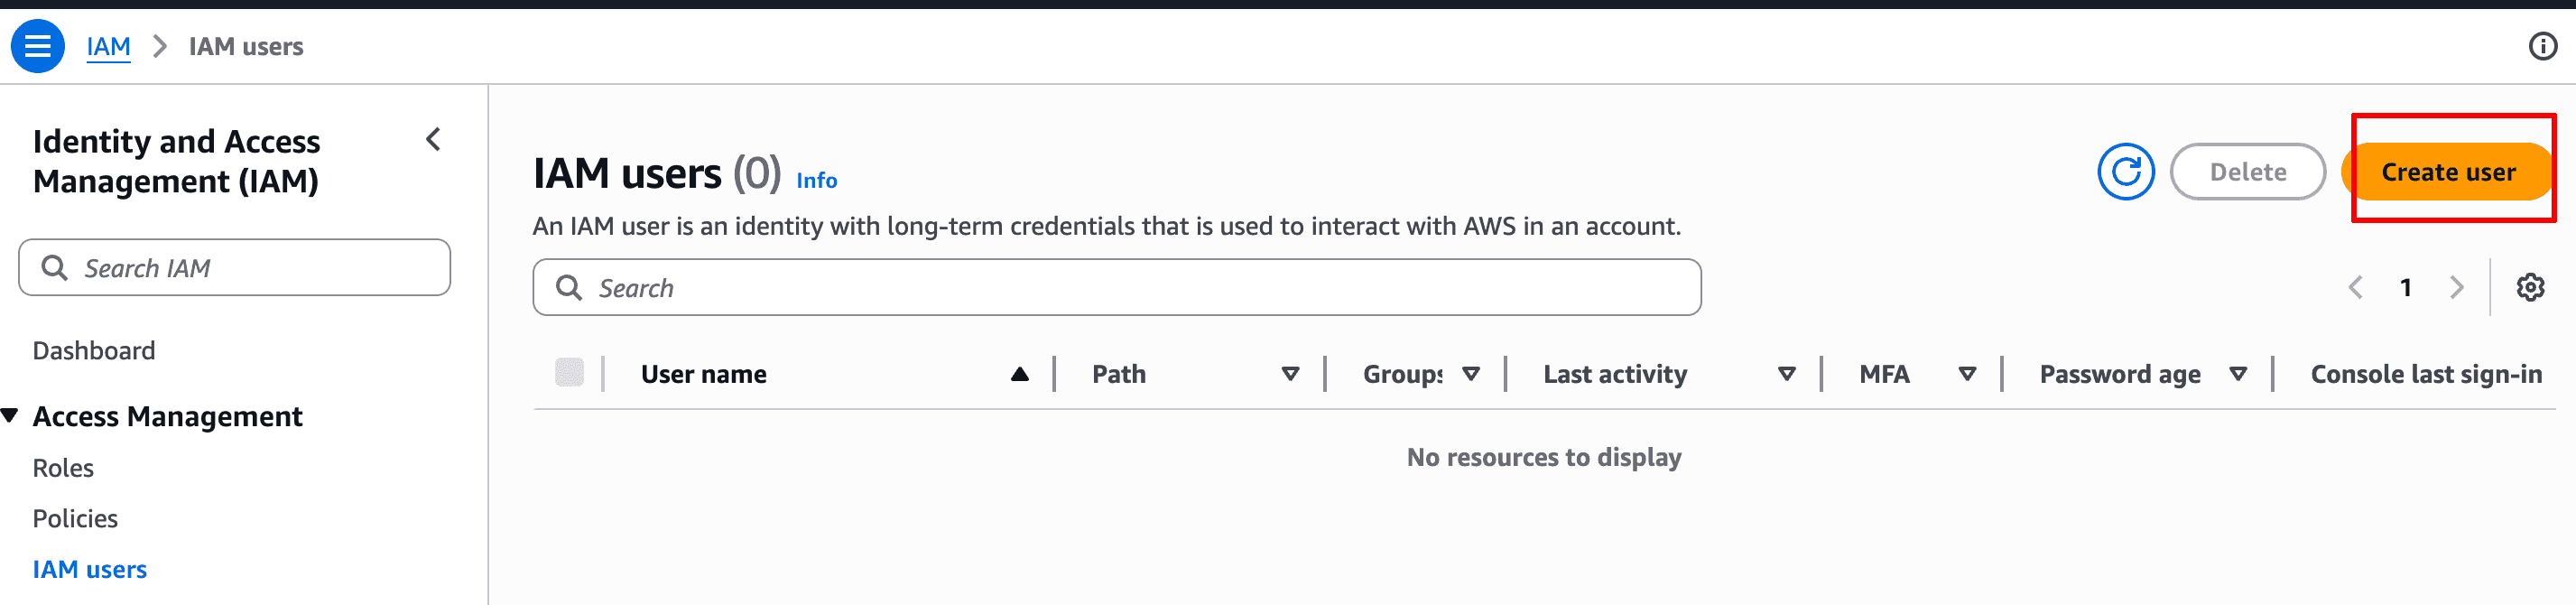
The IAM Users page opens with an empty list (or your existing users). Click Create user at the top right.
Specify user details
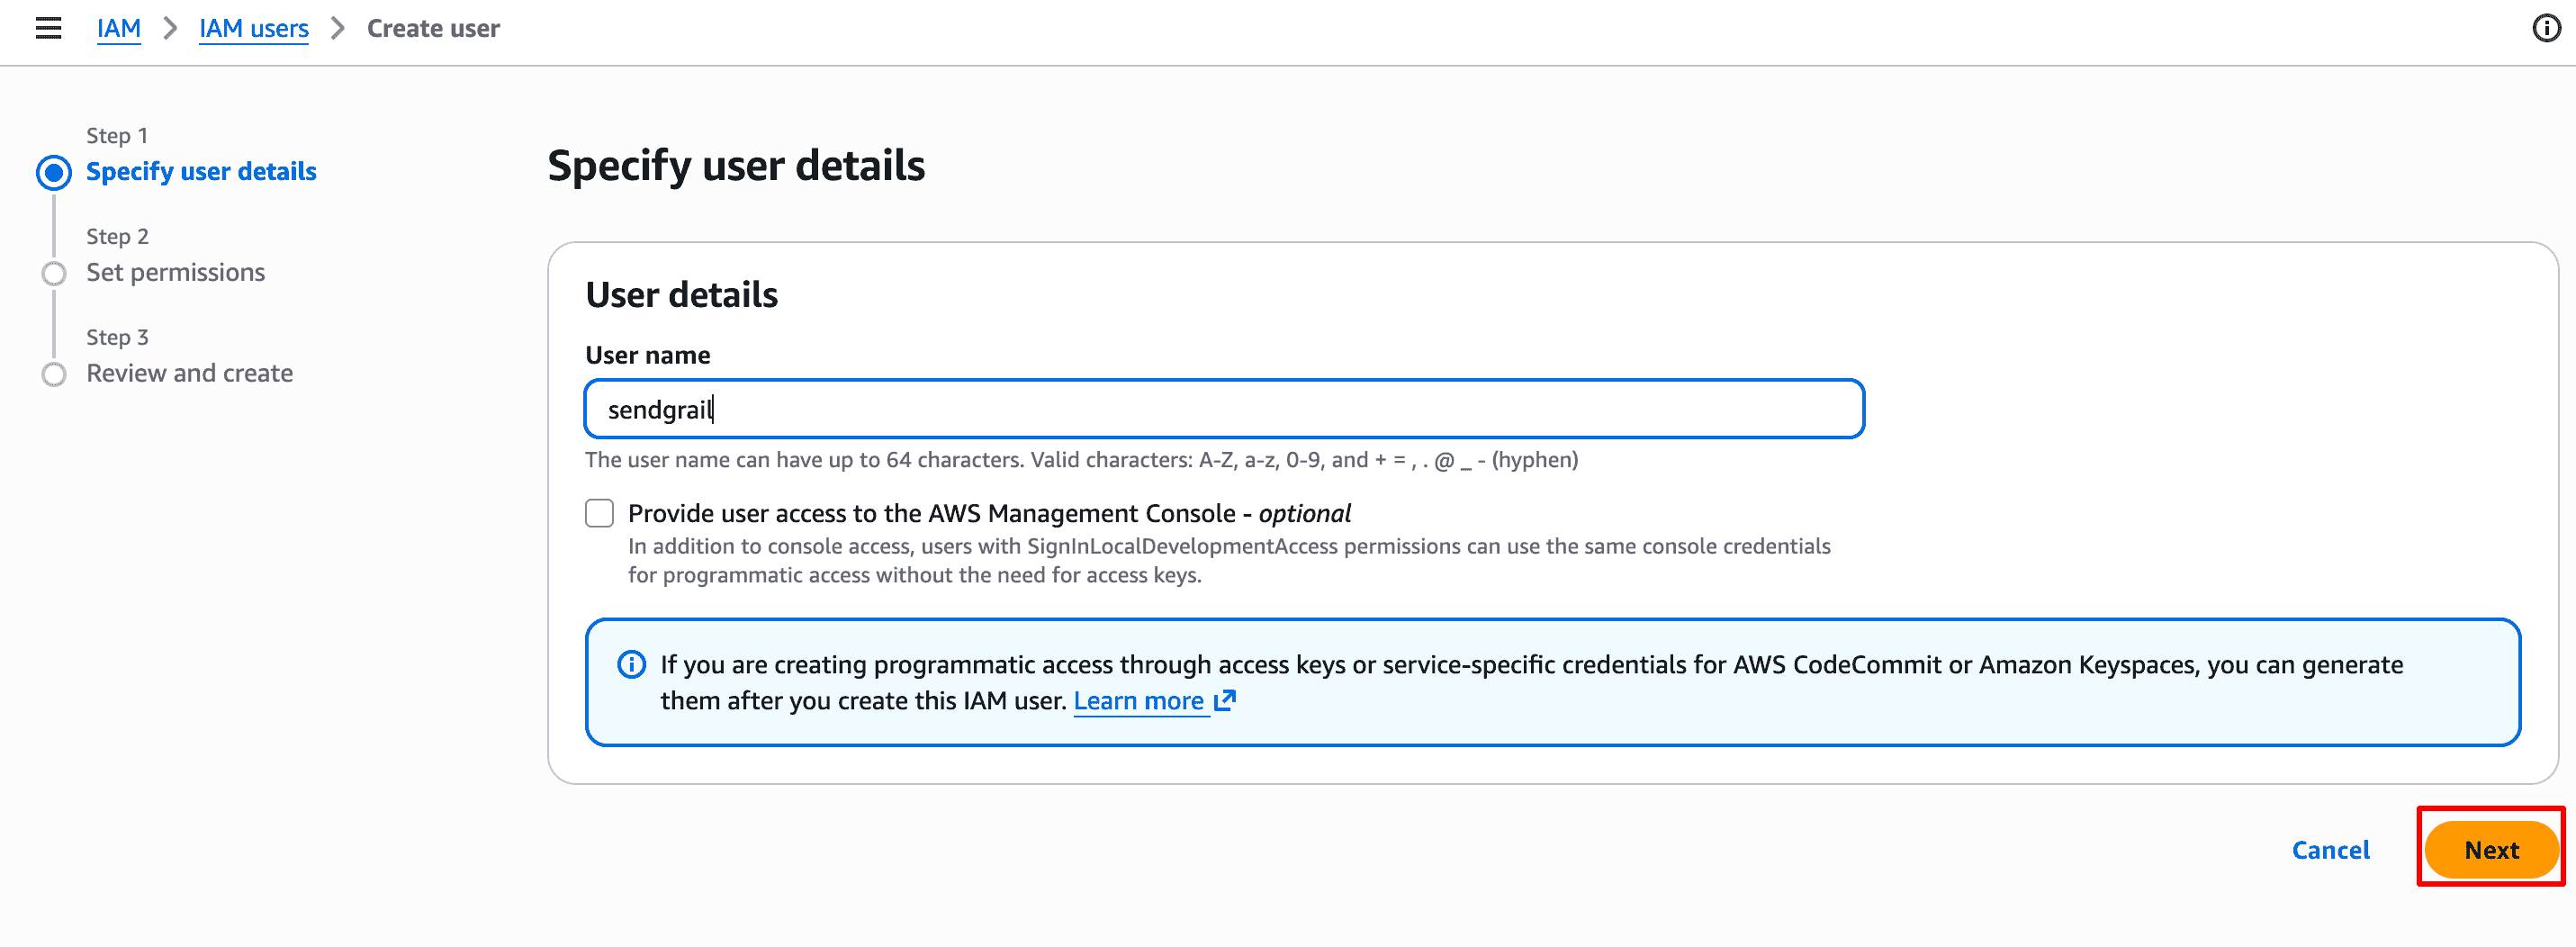
In Step 1 — Specify user details, enter a user name like sendgrail (or anything descriptive). Leave Provide user access to the AWS Management Console unchecked — this user only needs programmatic access. Click Next.
Attach the SES policy
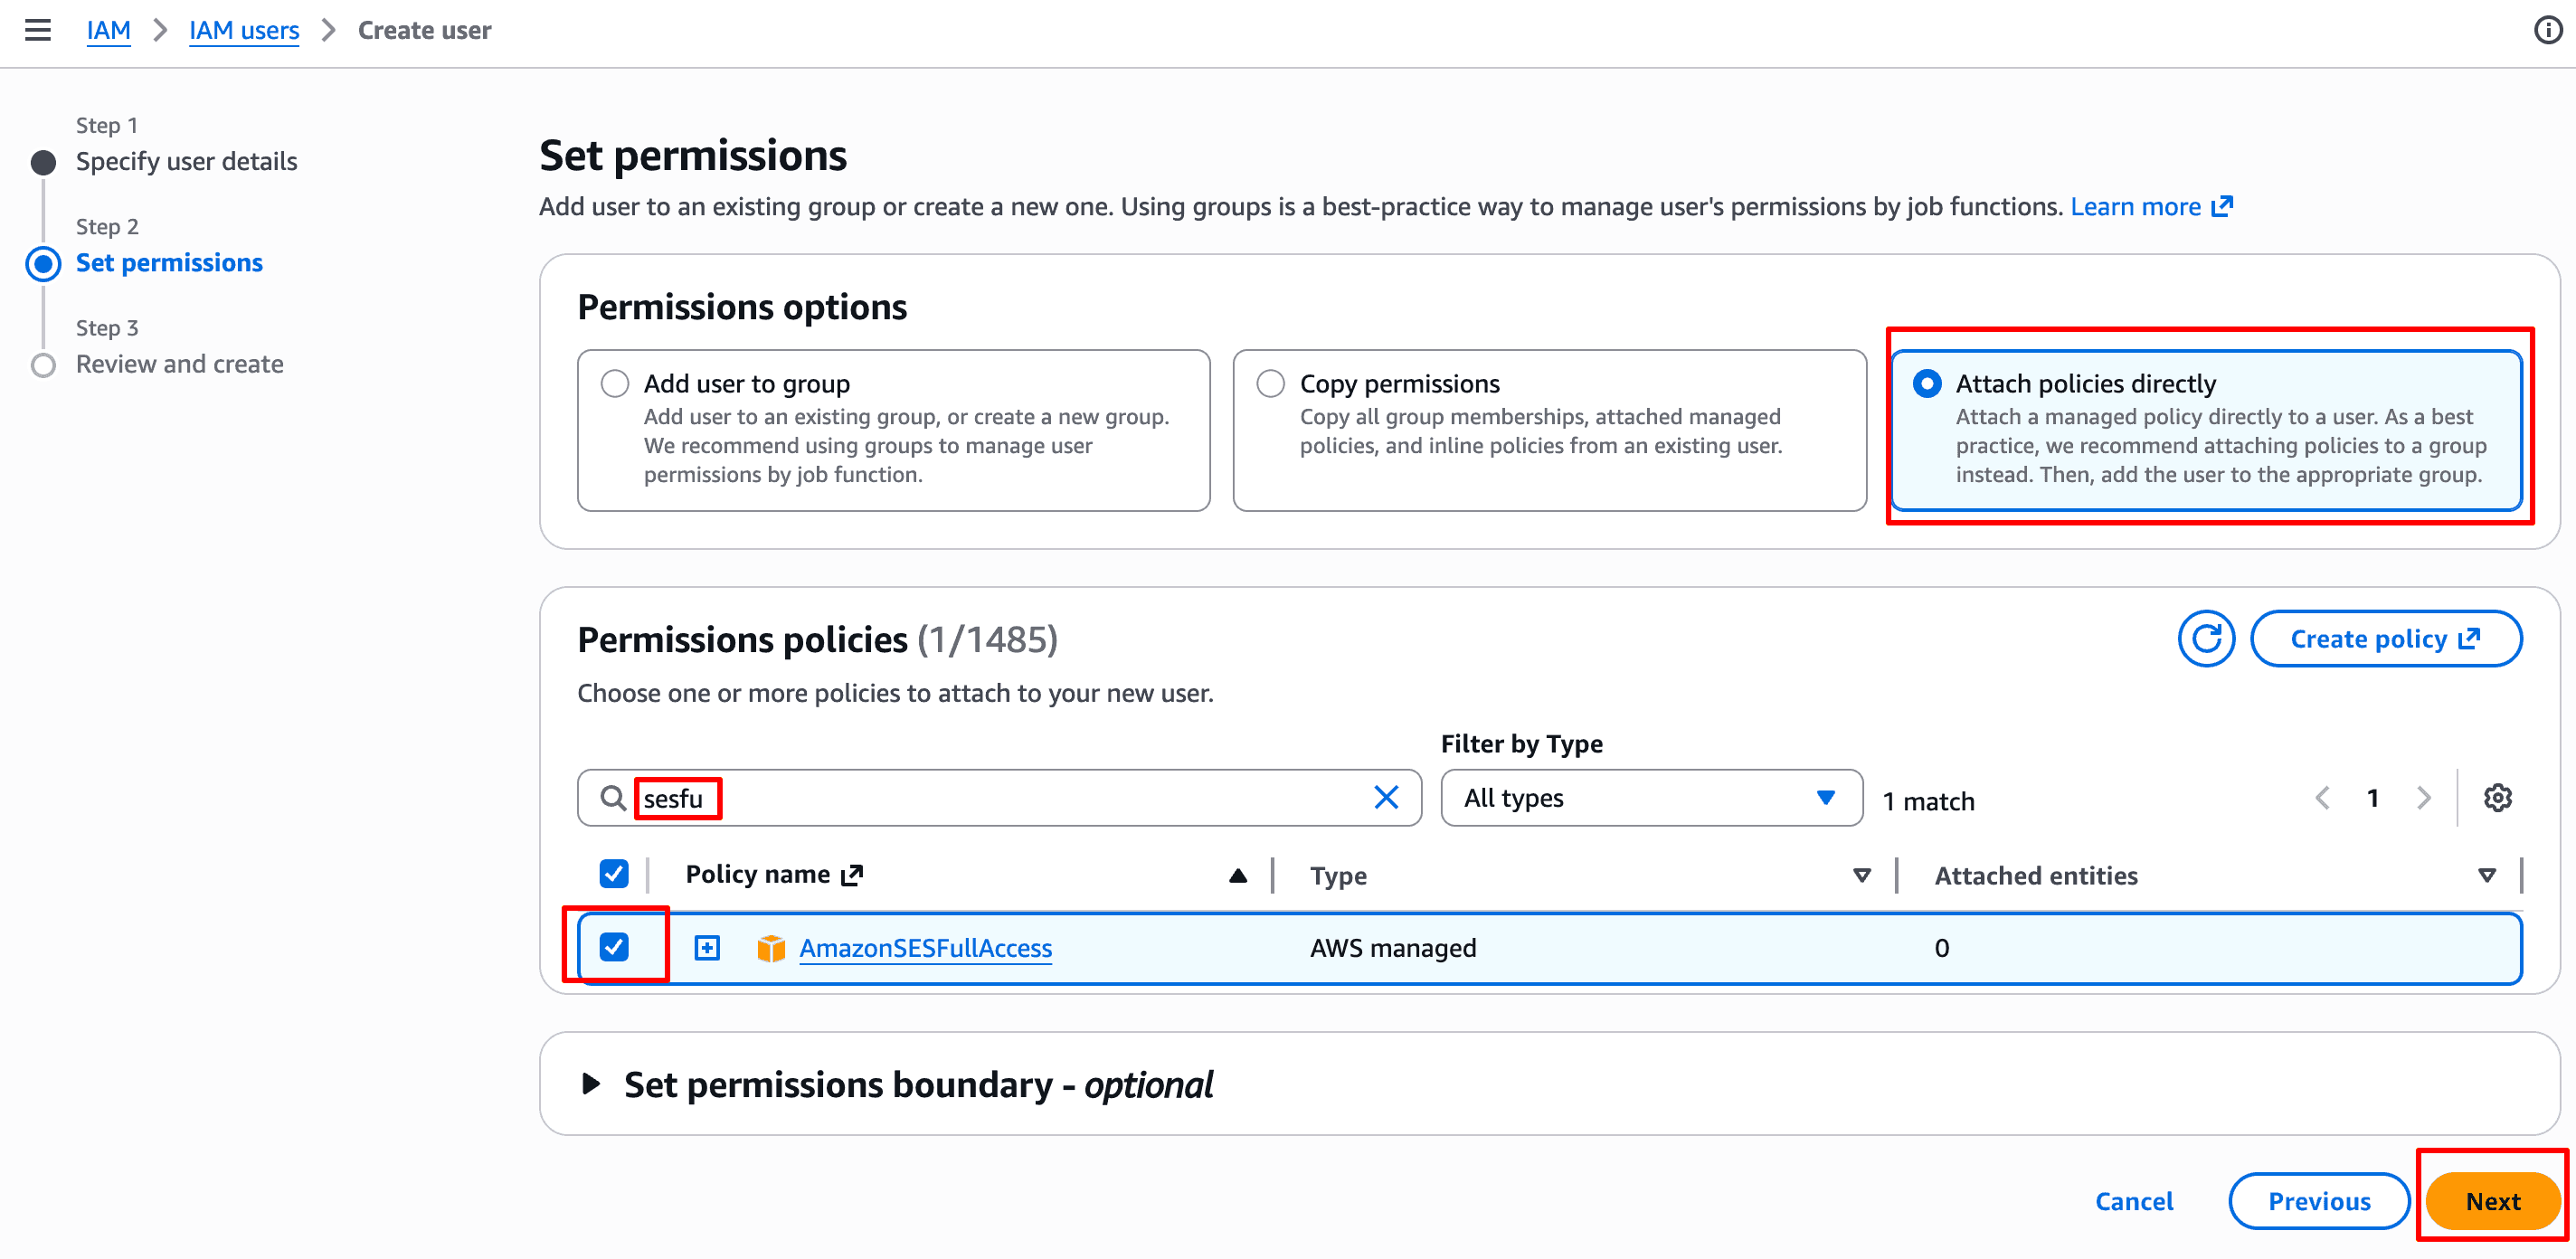
In Step 2 — Set permissions, pick Attach policies directly. Search for sesfu and tick AmazonSESFullAccess. Click Next.
Tighter scope
AmazonSESFullAccess works but is broad. For production you can swap it for a narrower inline policy granting only ses:SendEmail and ses:SendRawEmail on your verified identities — same outcome, smaller blast radius.
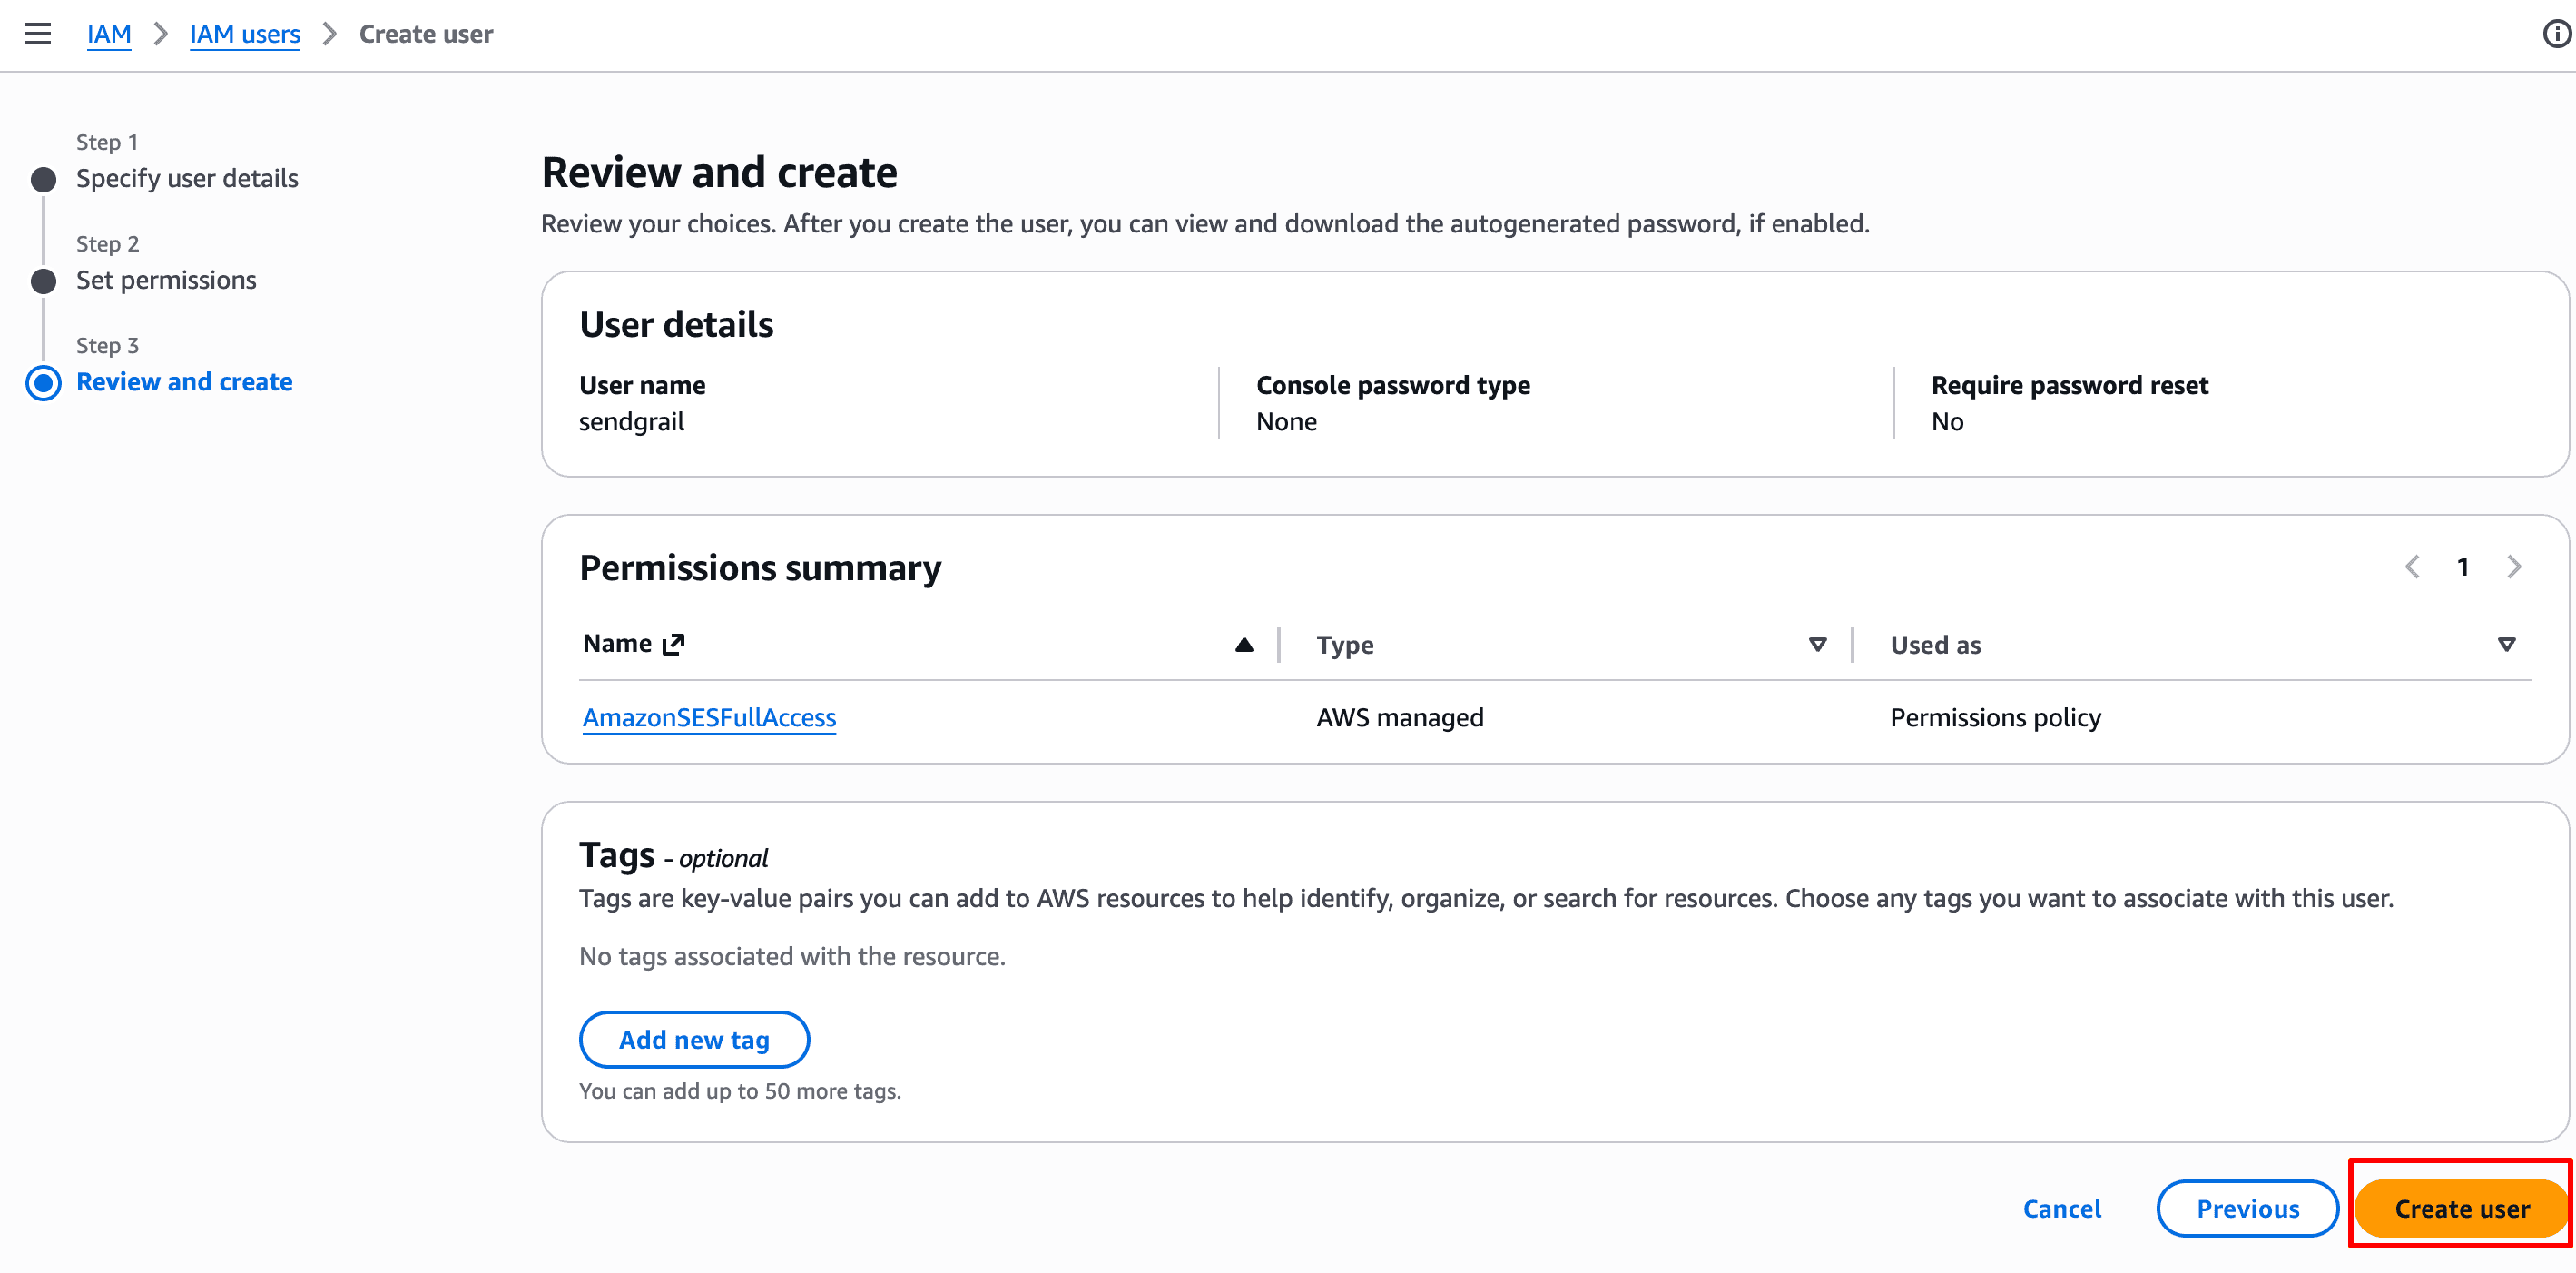
Review and create the user
Step 3 — Review and create shows a summary (User name, Permissions = AmazonSESFullAccess). Click Create user.
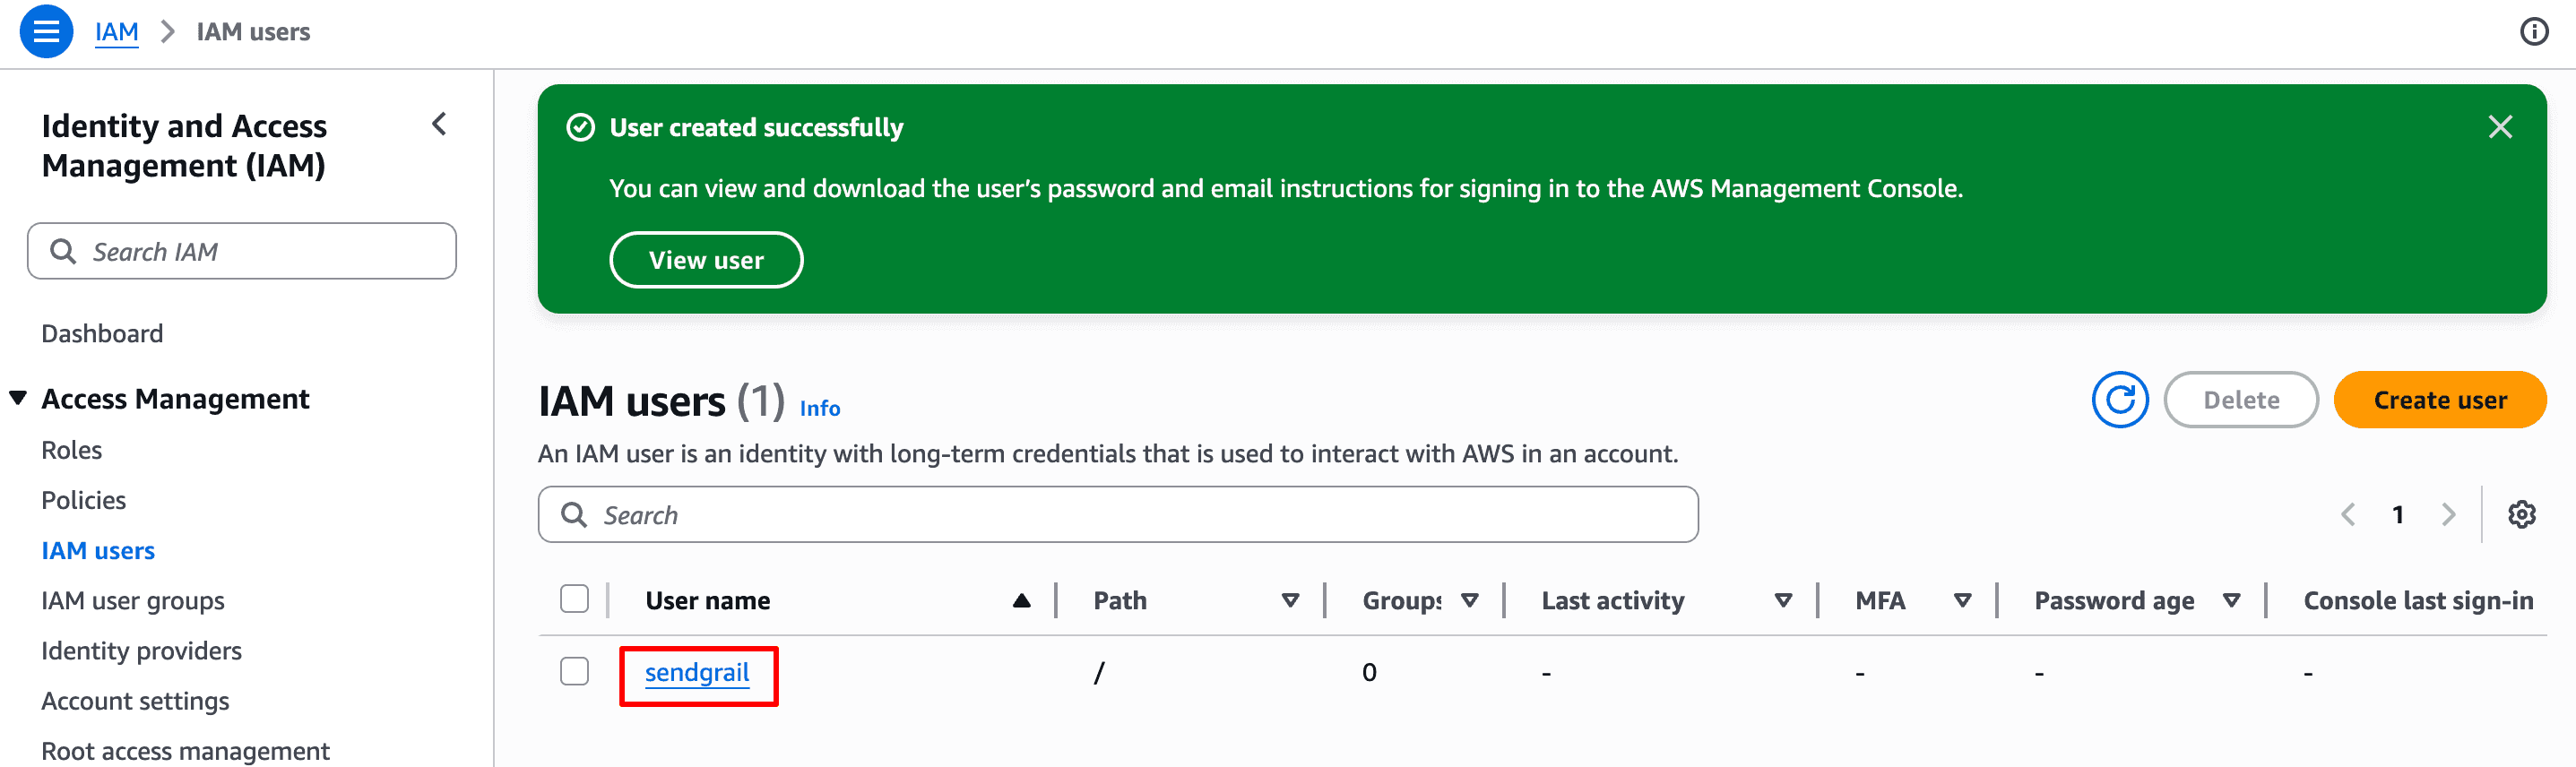
Open the new user
A green "User created successfully" banner appears and the IAM Users list now includes sendgrail. Click the user's name to open it.
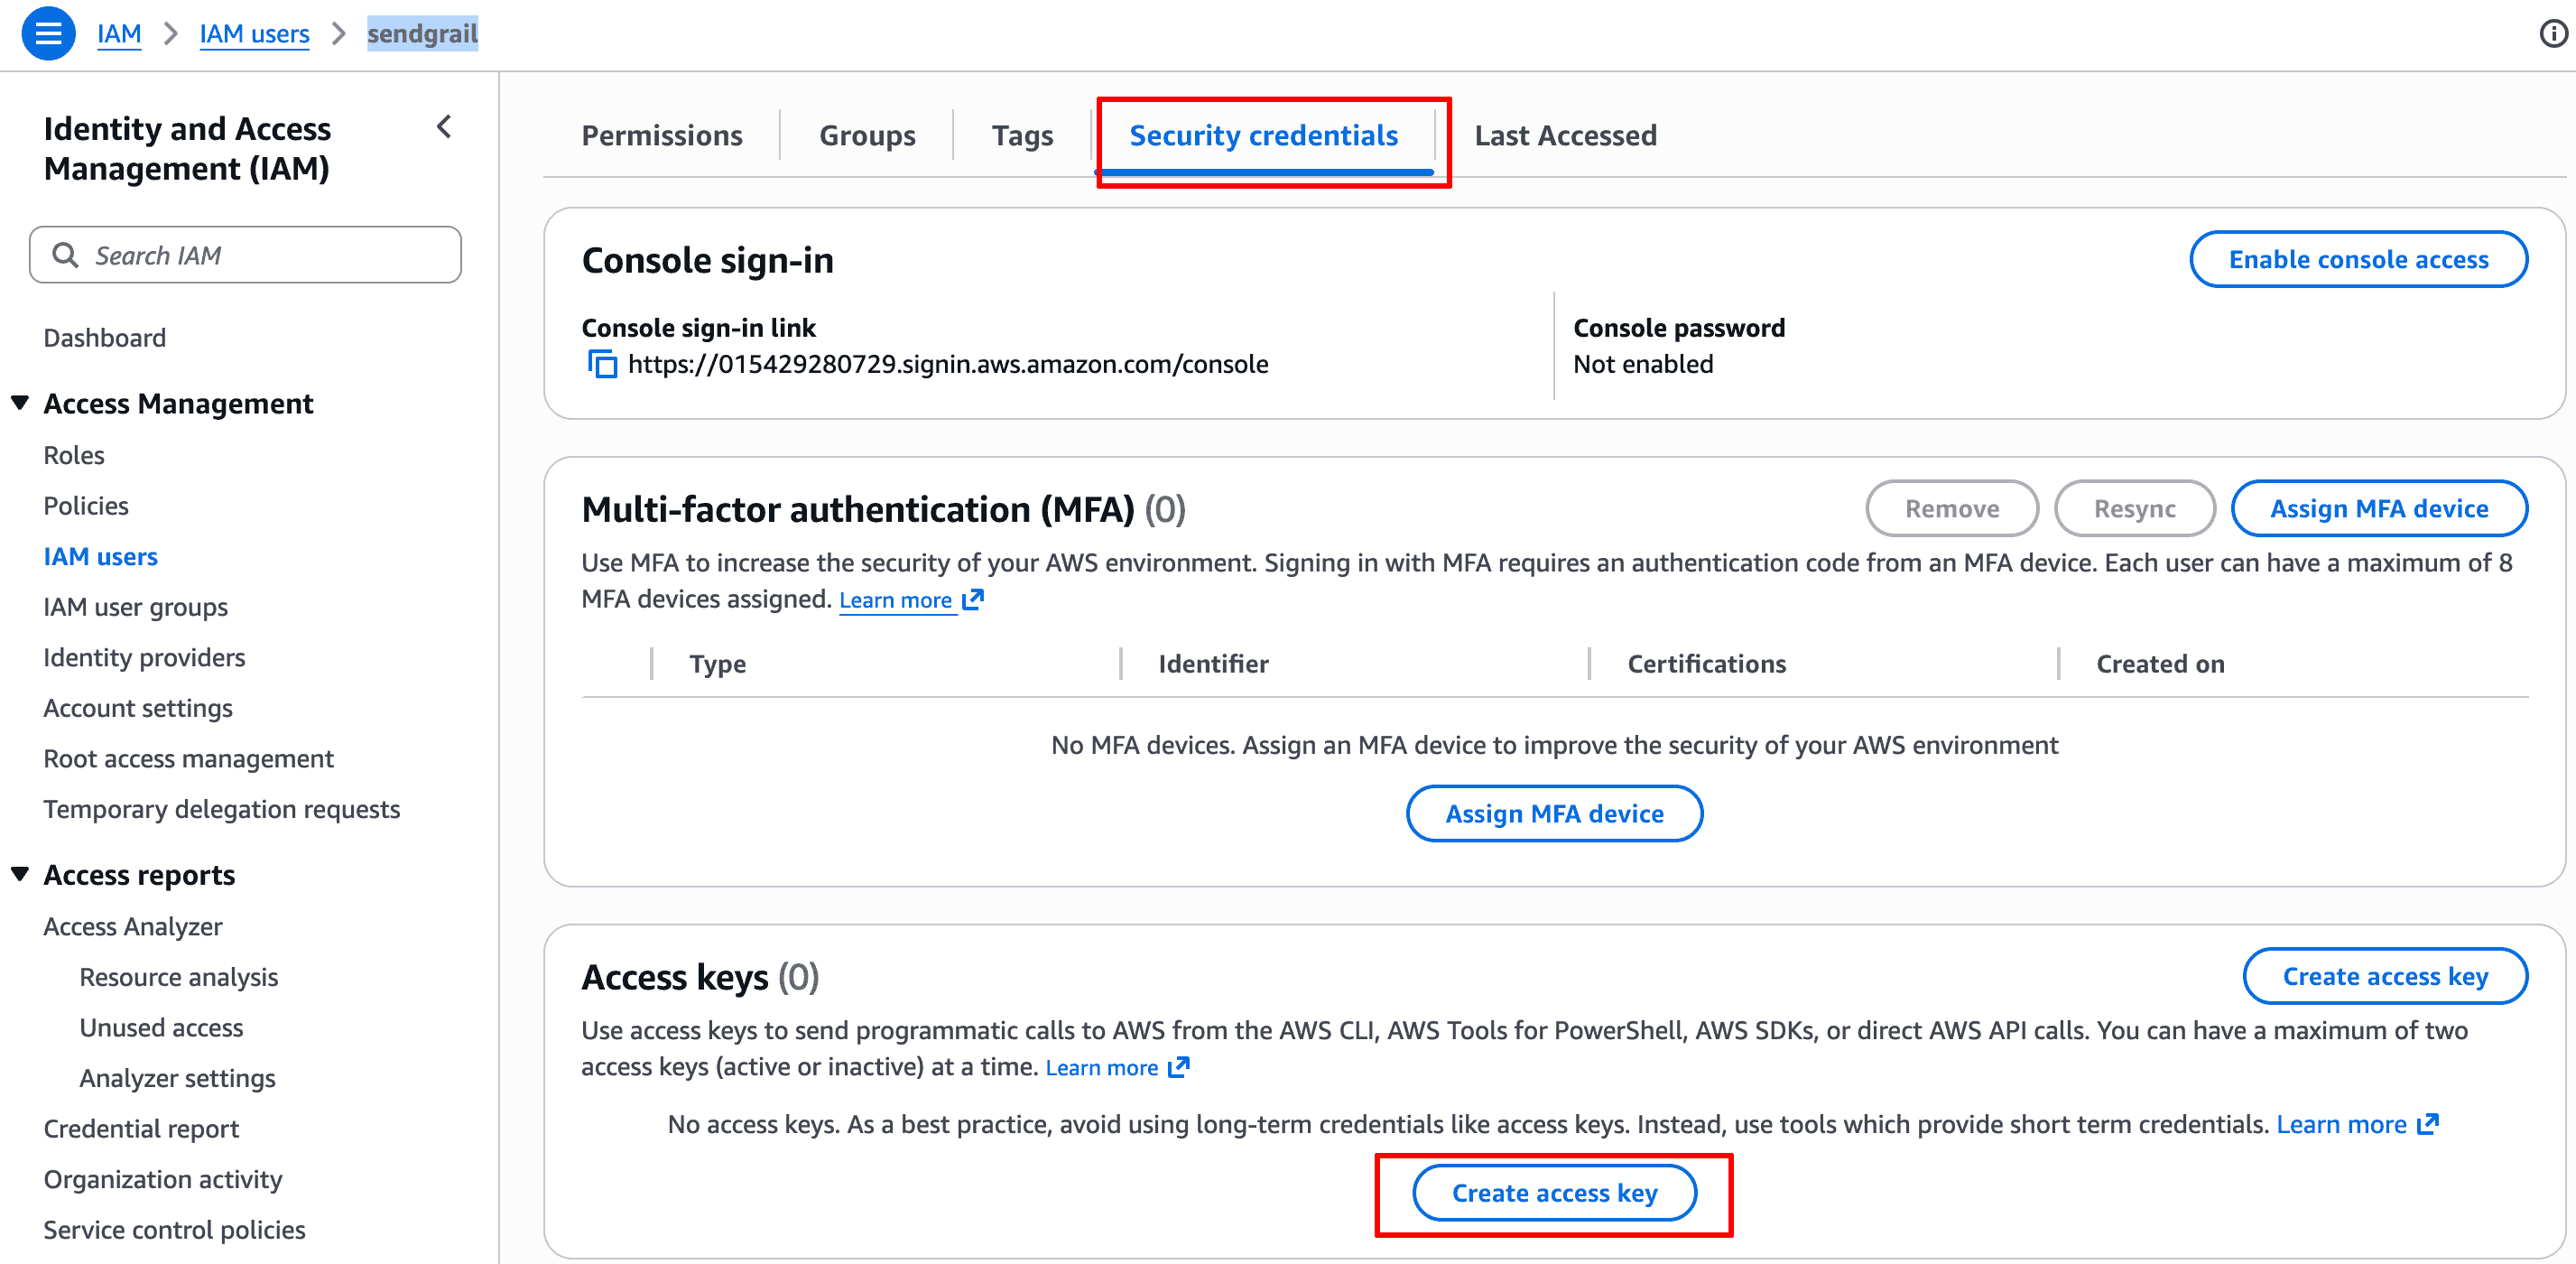
Open Security credentials
On the user's detail page, switch to the Security credentials tab. Scroll to the Access keys section — it'll be empty. Click Create access key.
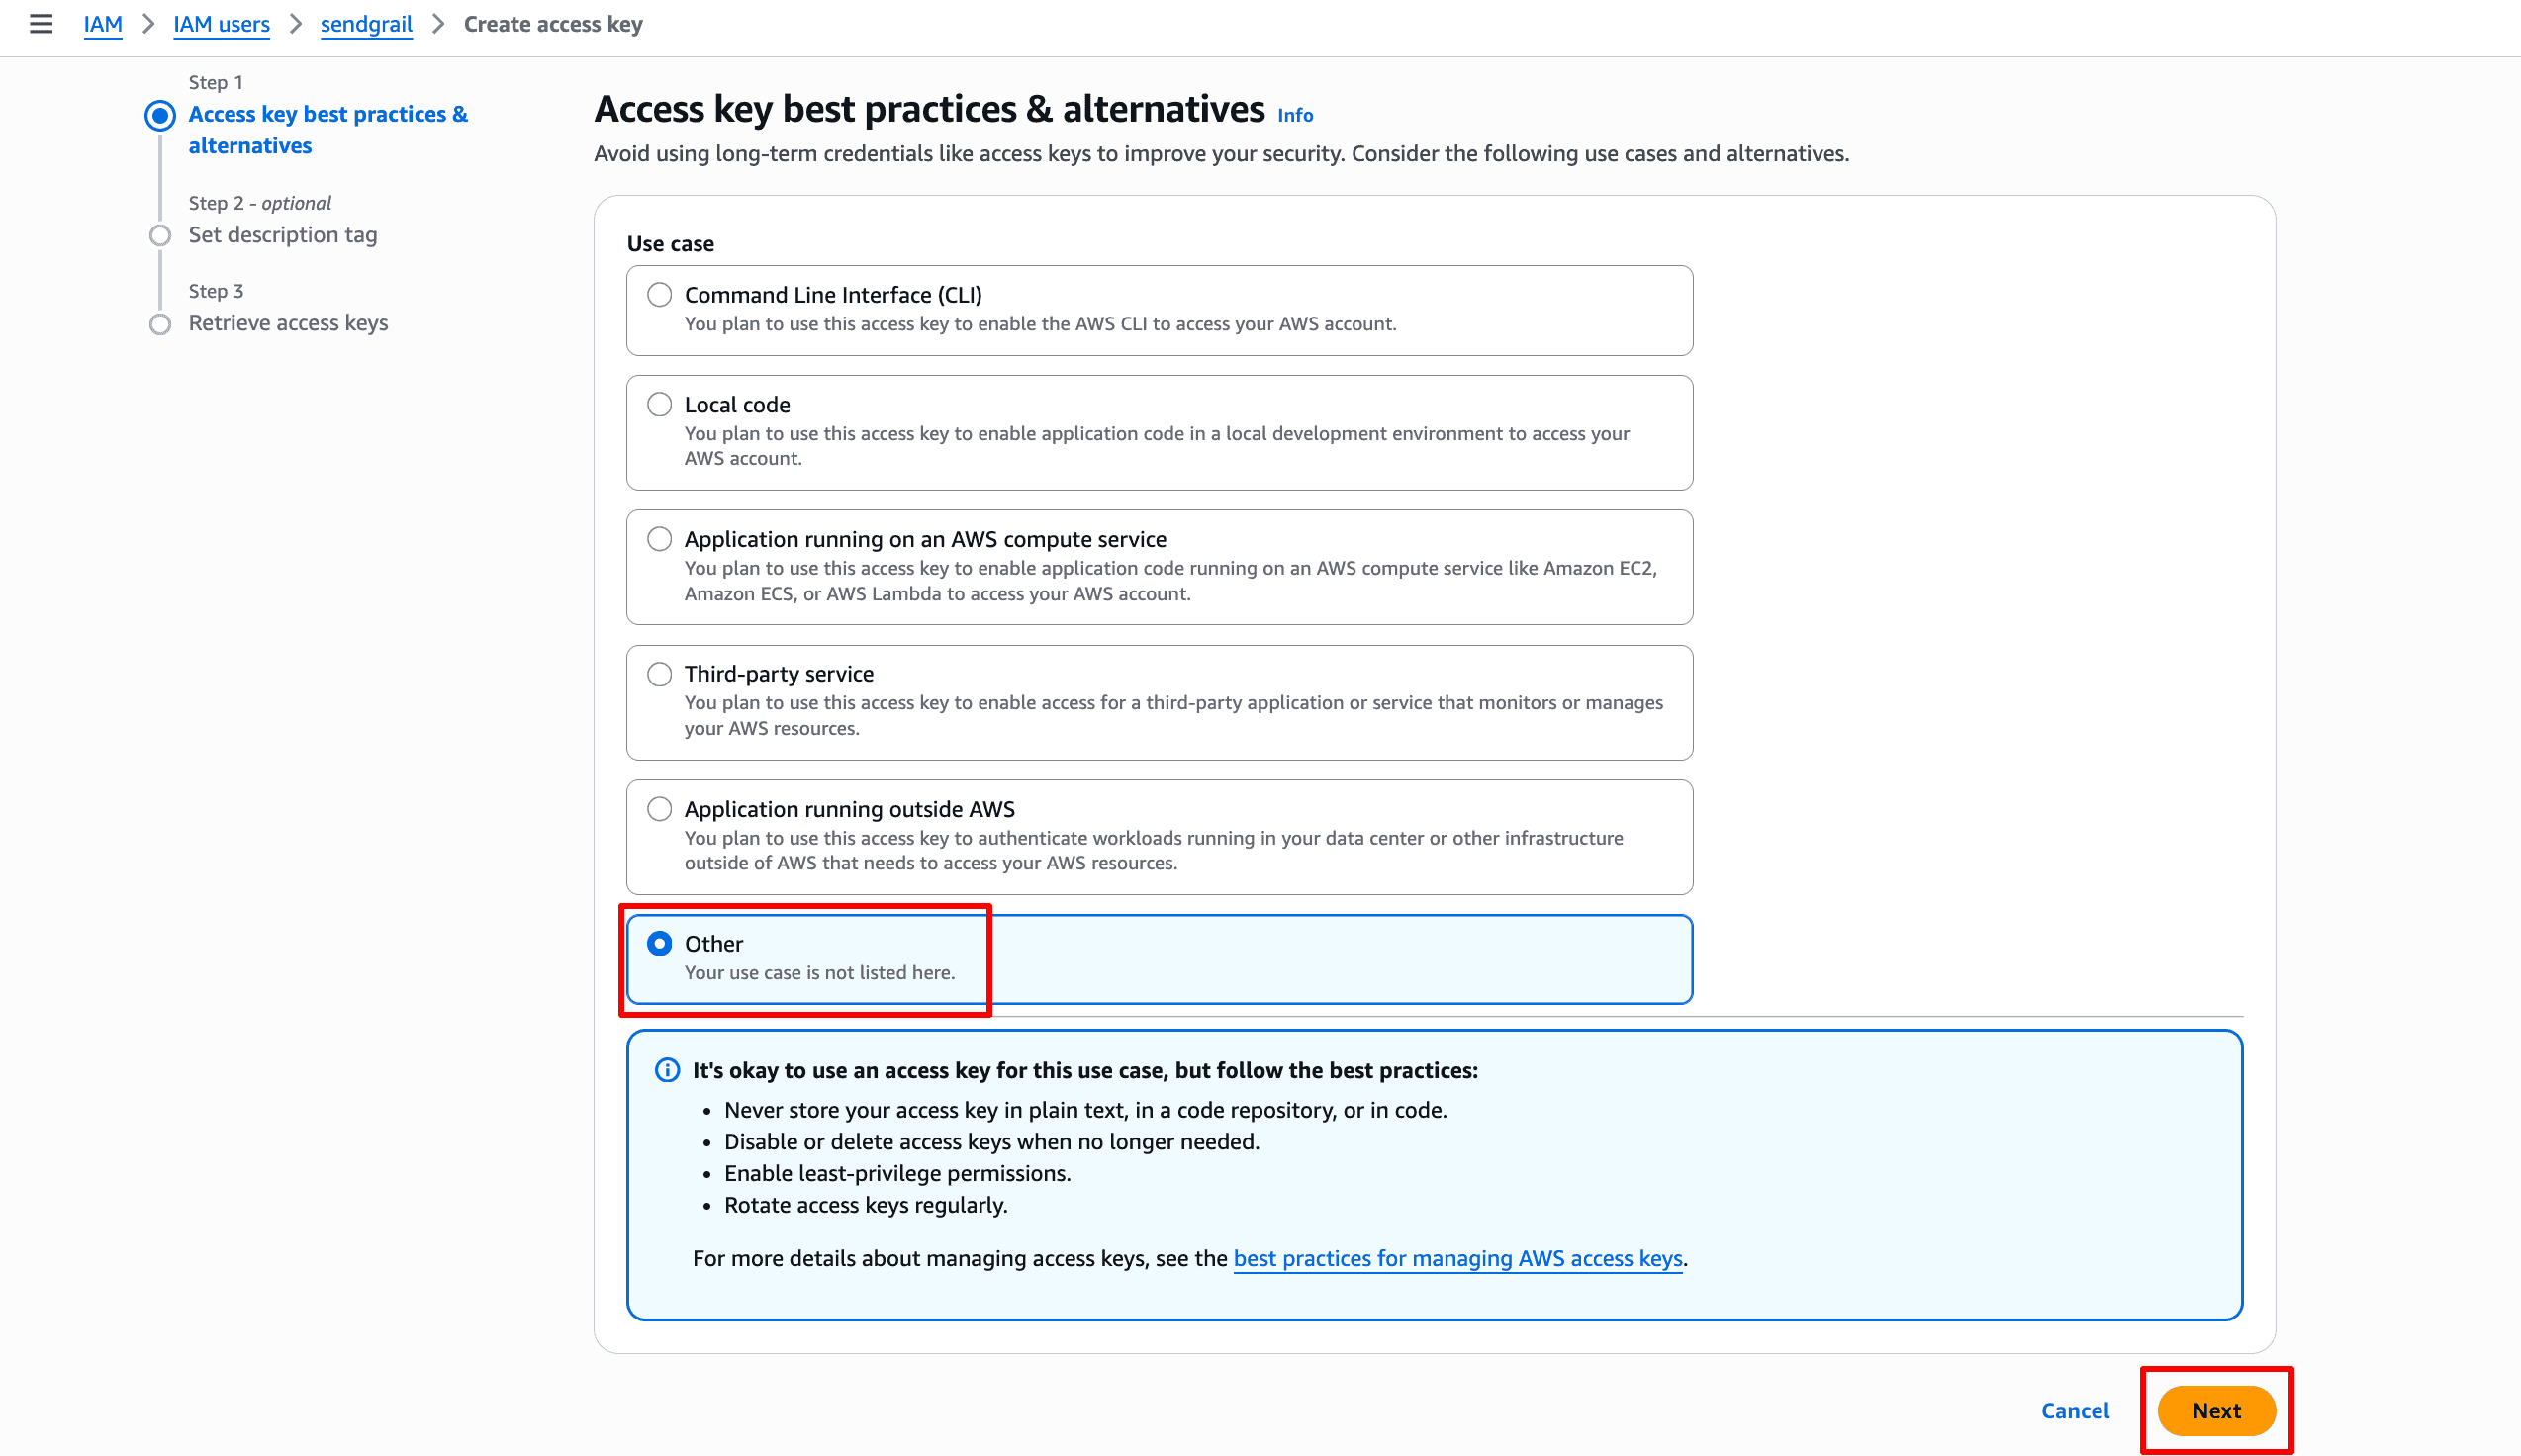
Choose access key use case
In Step 1 — Access key best practices & alternatives, AWS asks why you need an access key. Pick Other (the bottom option) — none of the other use cases match a third-party SMTP-replacement service. Click Next.
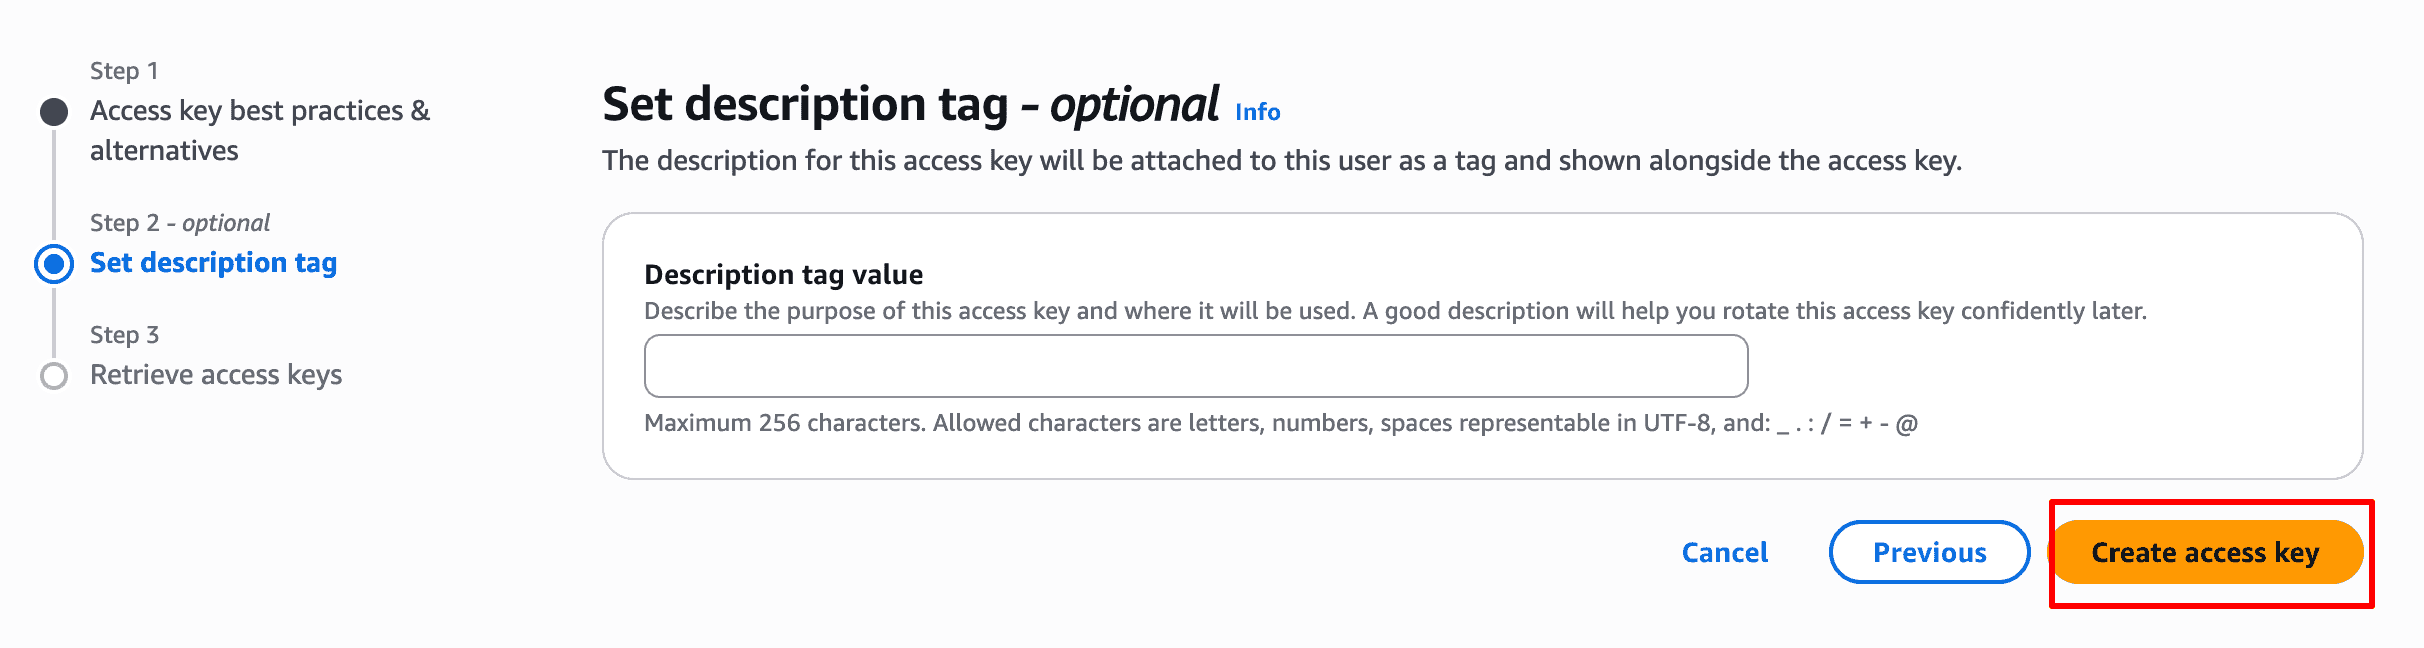
(Optional) set a description tag
Step 2 — Set description tag is optional. You can leave it blank or note something like SendGrail WordPress. Click Create access key.
Download the access keys
Step 3 — Retrieve access keys shows the Access key and Secret access key. The secret is hidden by default — click Show to reveal it, then click Download .csv file to save both.

Save them now
This is the only time AWS will show you the secret access key. If you lose it, you'd have to delete the access key and create a new one. The CSV download is the safest route.
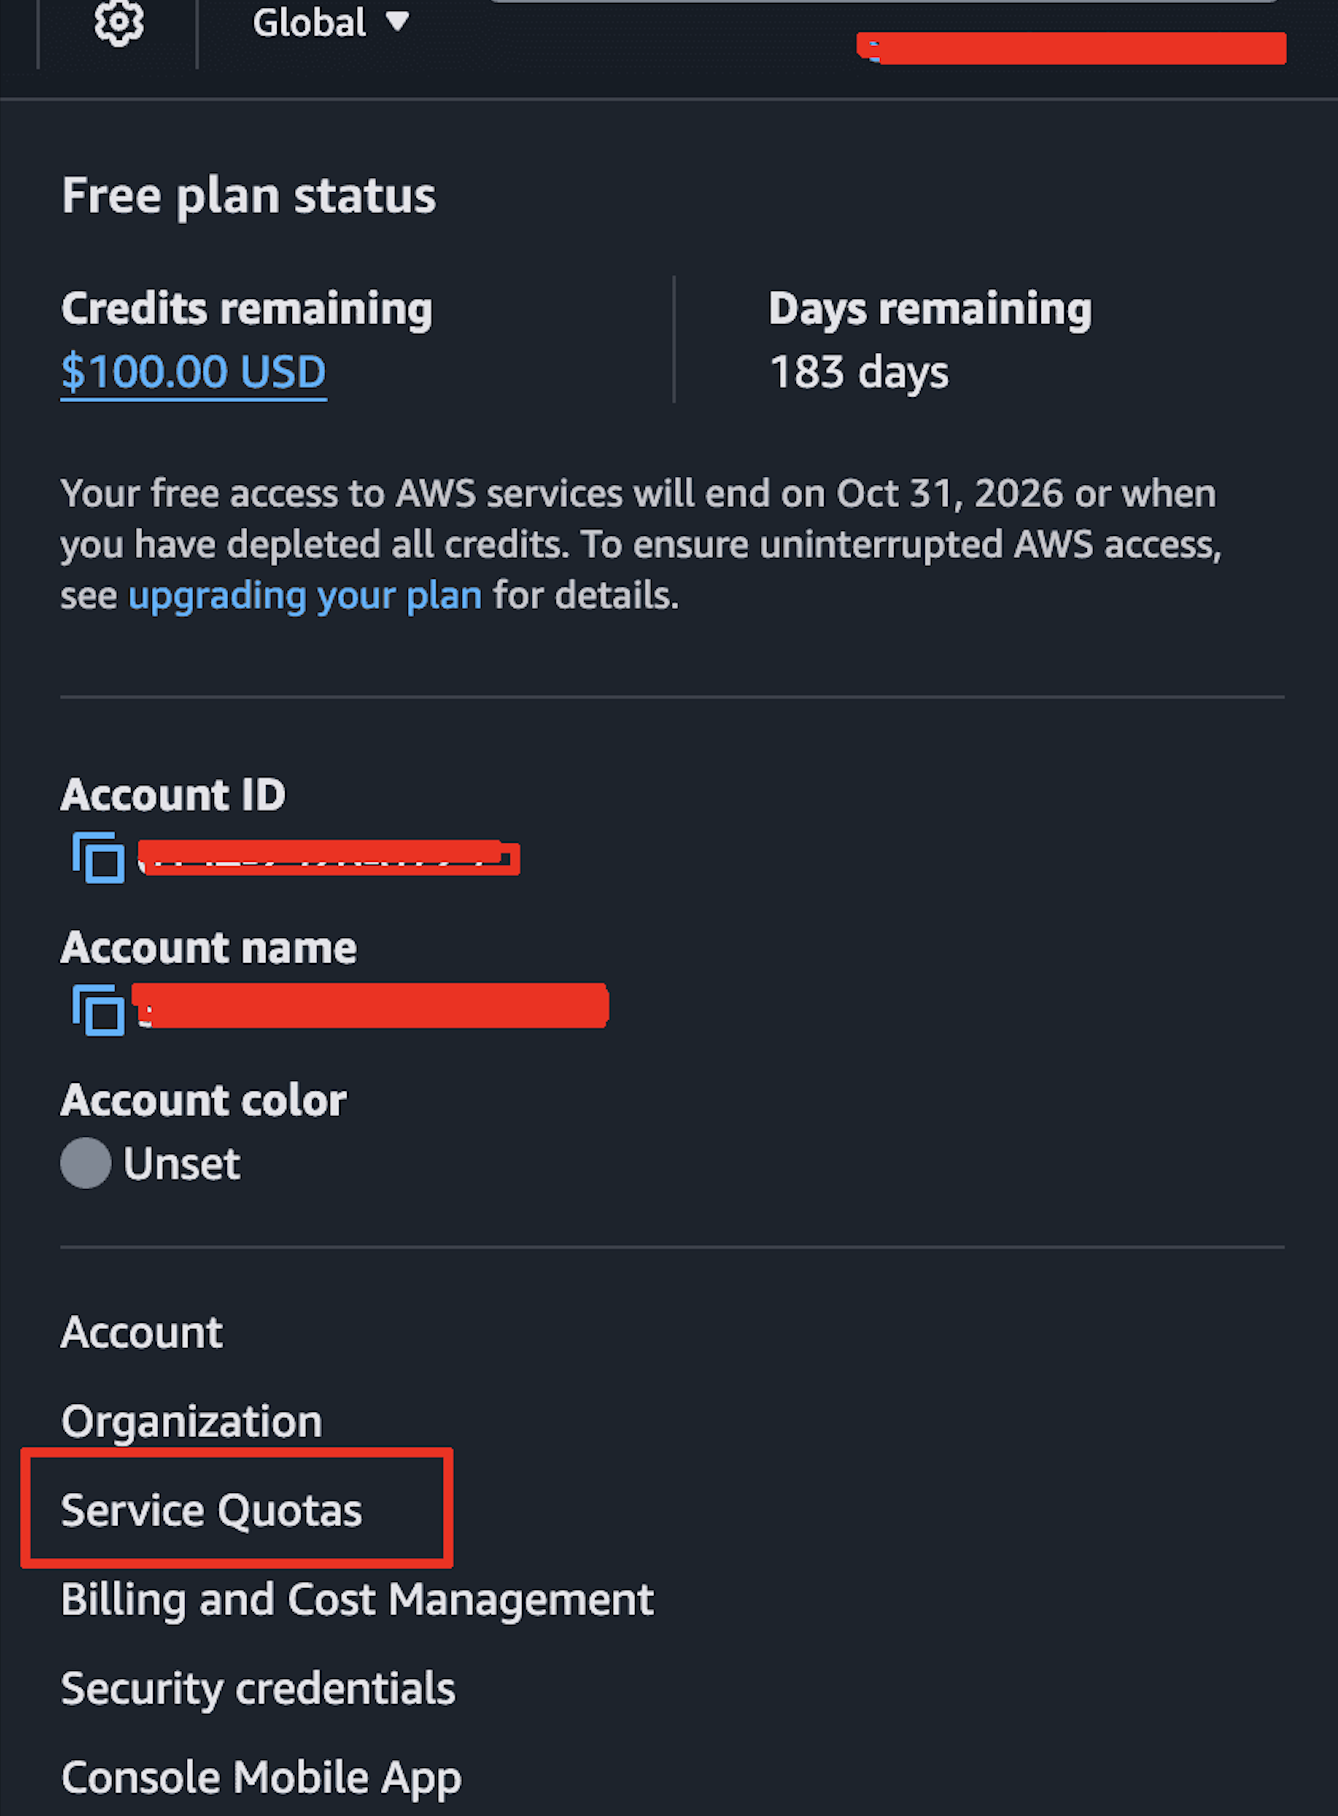
Open Service Quotas
By default, SES is in sandbox mode: 200 emails per 24 hours, only to verified addresses. To raise that, you increase the SES Sending quota via AWS Service Quotas.
In the top-right account dropdown, click Service Quotas.
Find Amazon SES quotas
In the Service Quotas dashboard, the right-hand Manage quotas panel has a service search field. Type Amazon Simple Email Service and click View quotas.

Region matters here too
Service Quotas are region-scoped — confirm the region selector (top-right) matches the region where you set up SES. A quota increase in us-east-1 doesn't help an SES setup in eu-west-1.
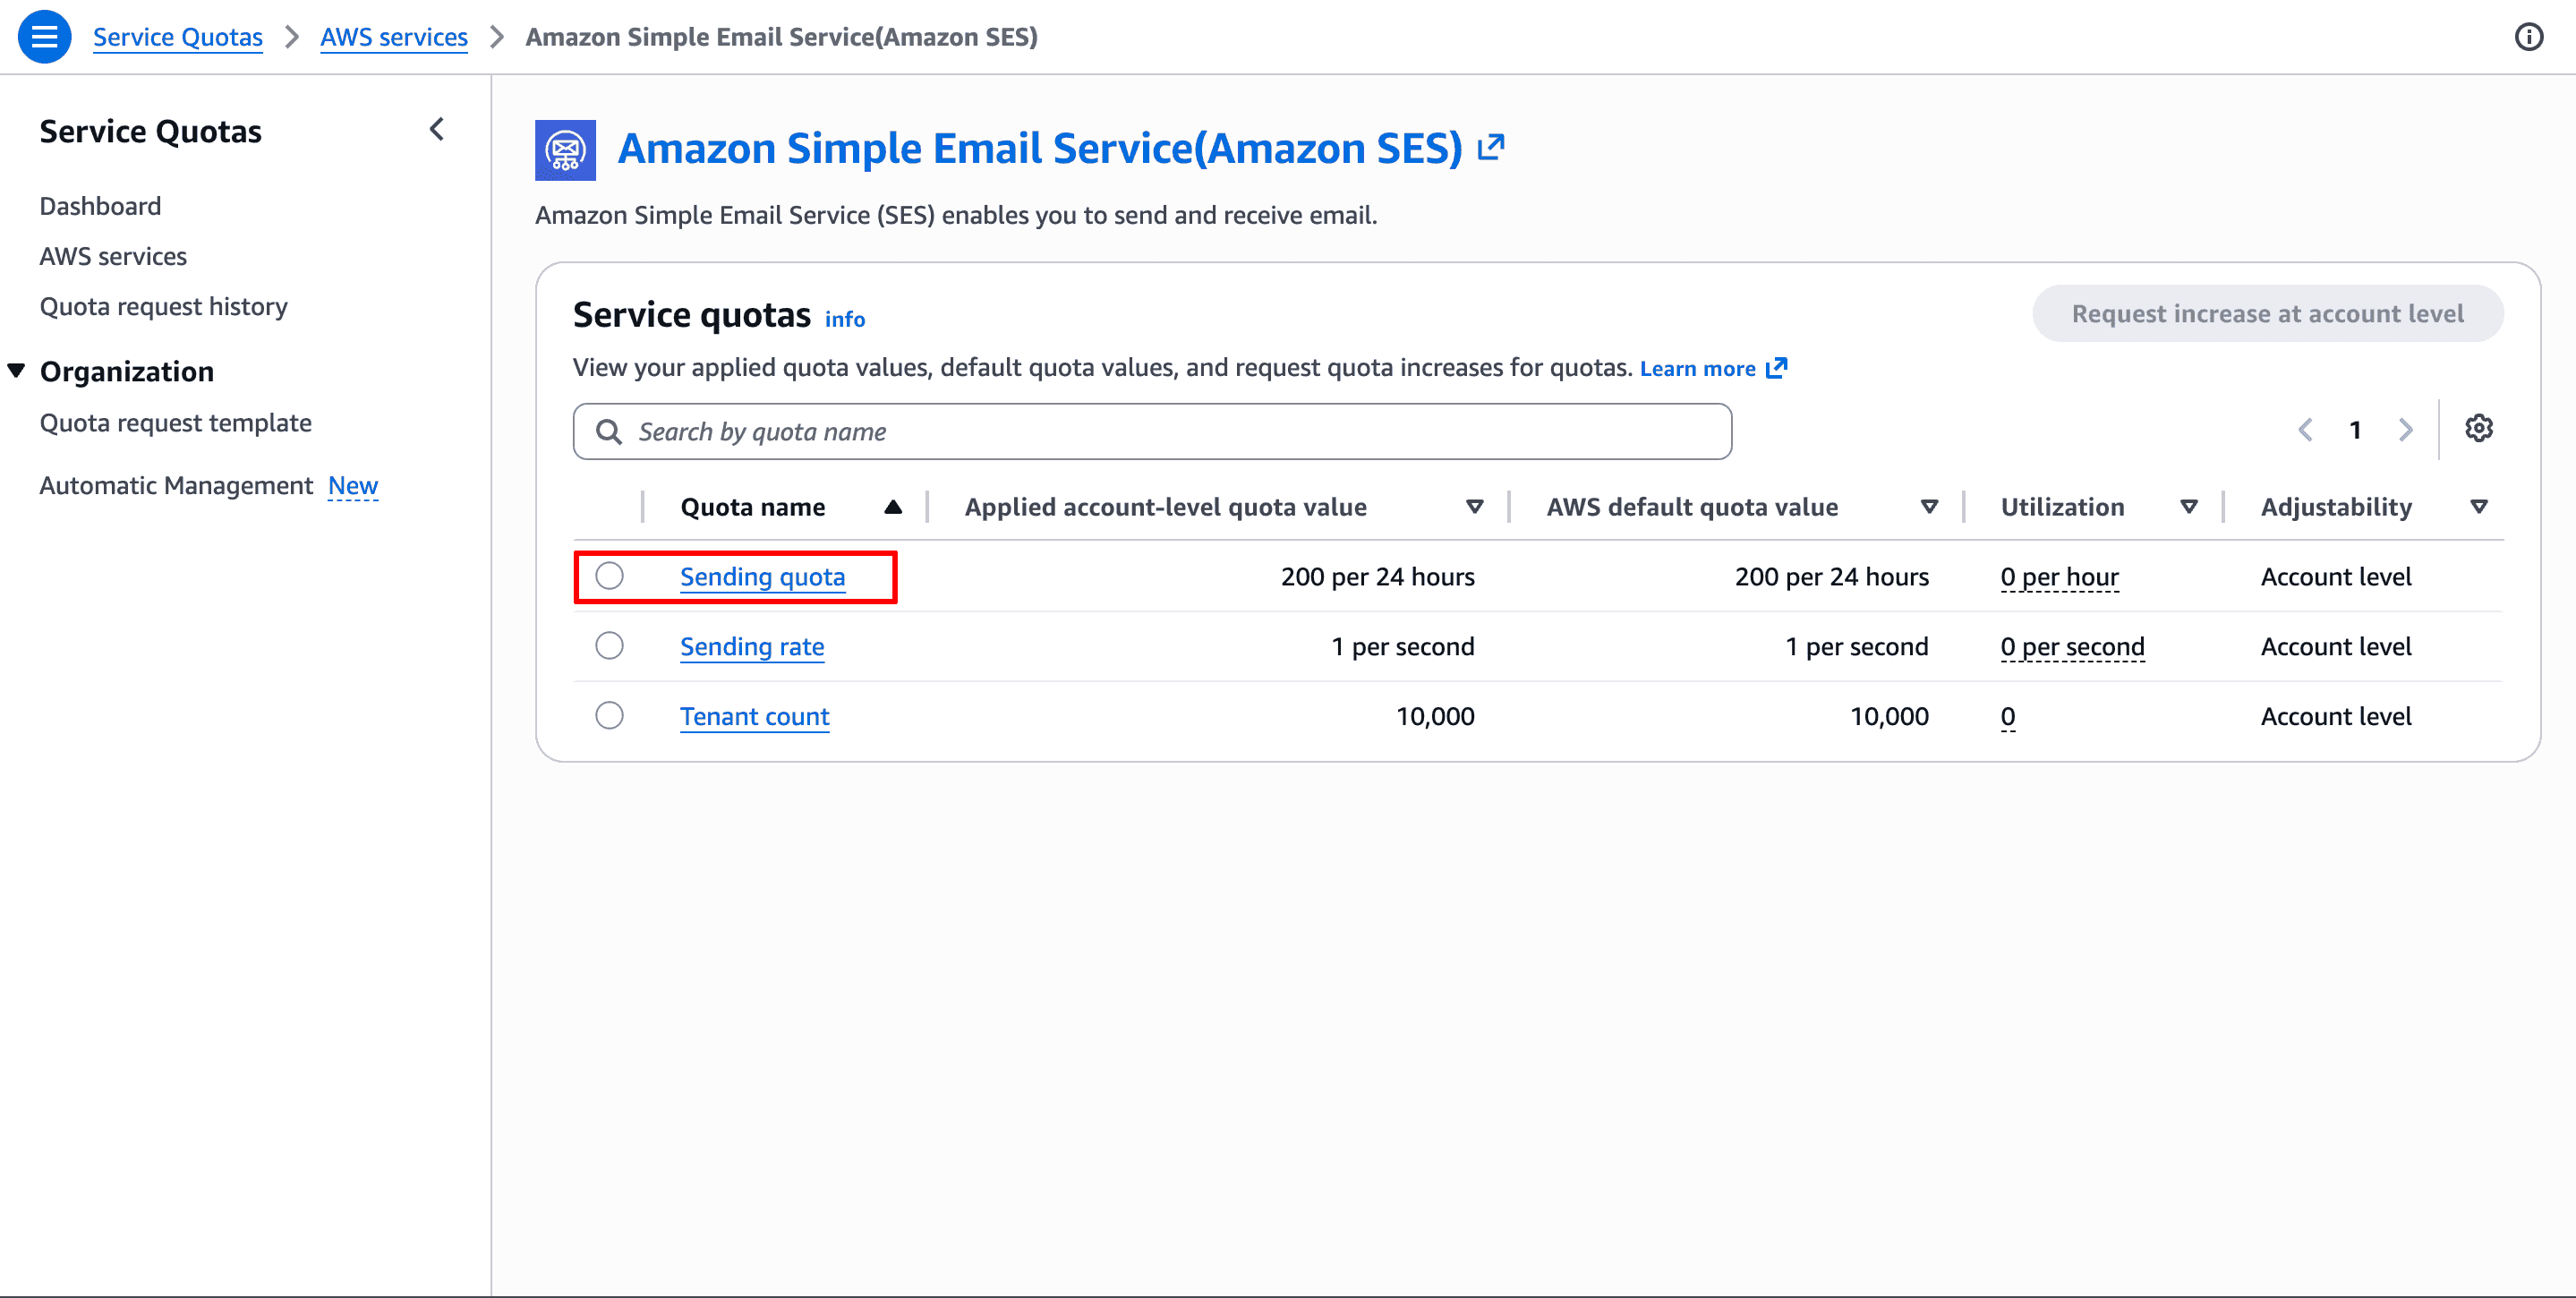
Pick the Sending quota
The Amazon SES quotas table lists three entries: Sending quota, Sending rate, and Tenant count. Click Sending quota (the daily-emails limit).
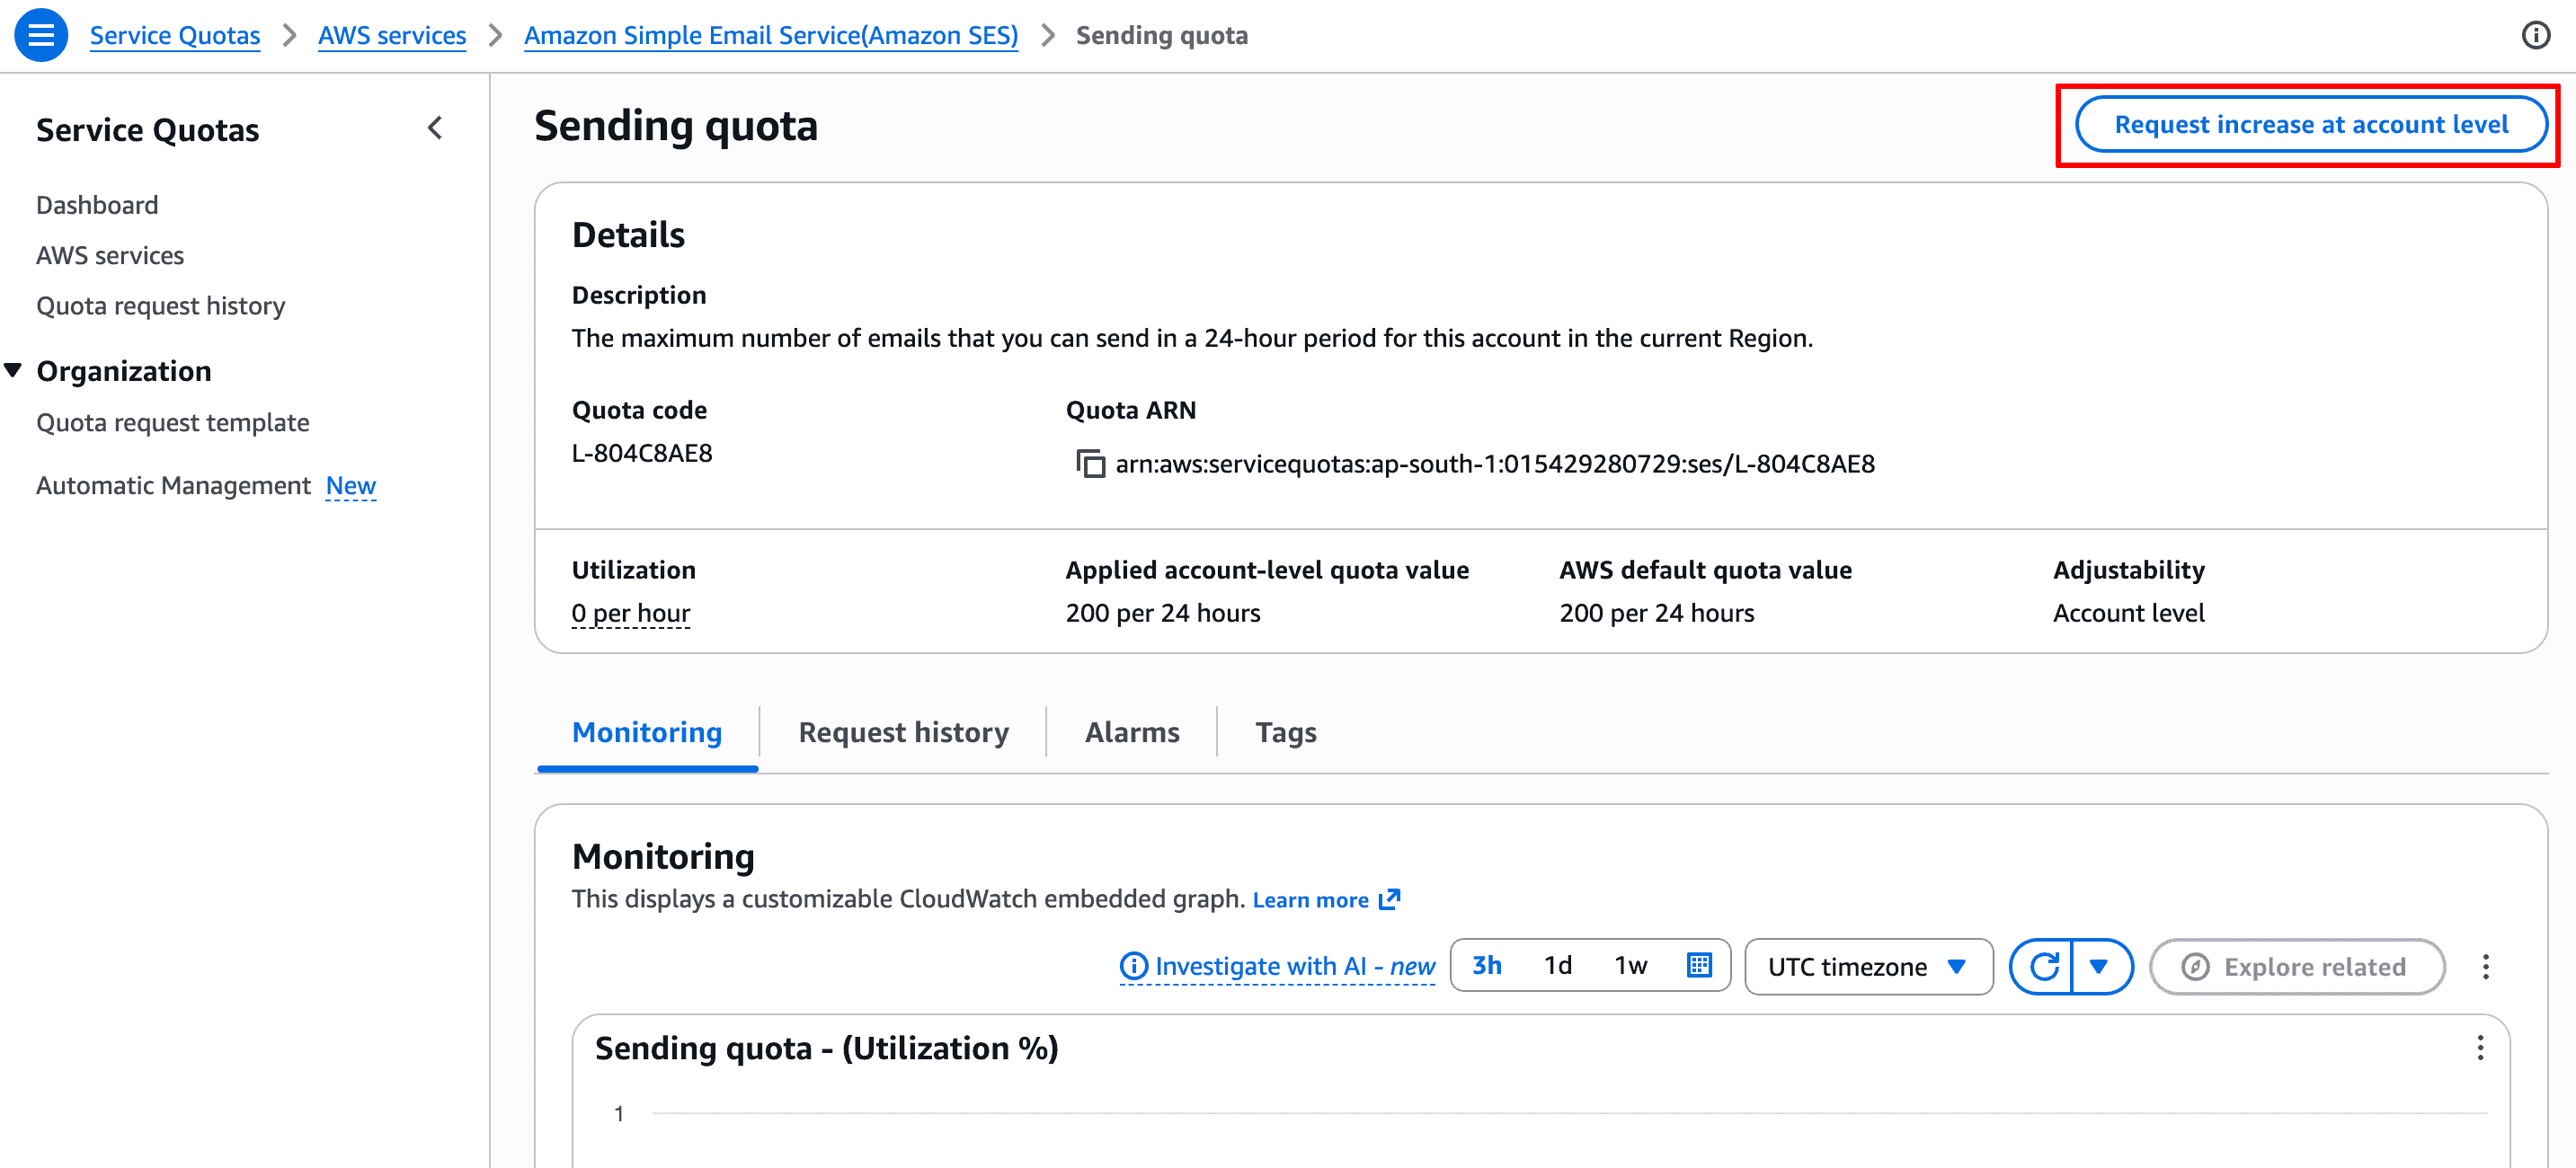
Request the increase
The Sending quota detail page shows your current limit (200 per 24 hours). Click Request increase at account level in the top-right.
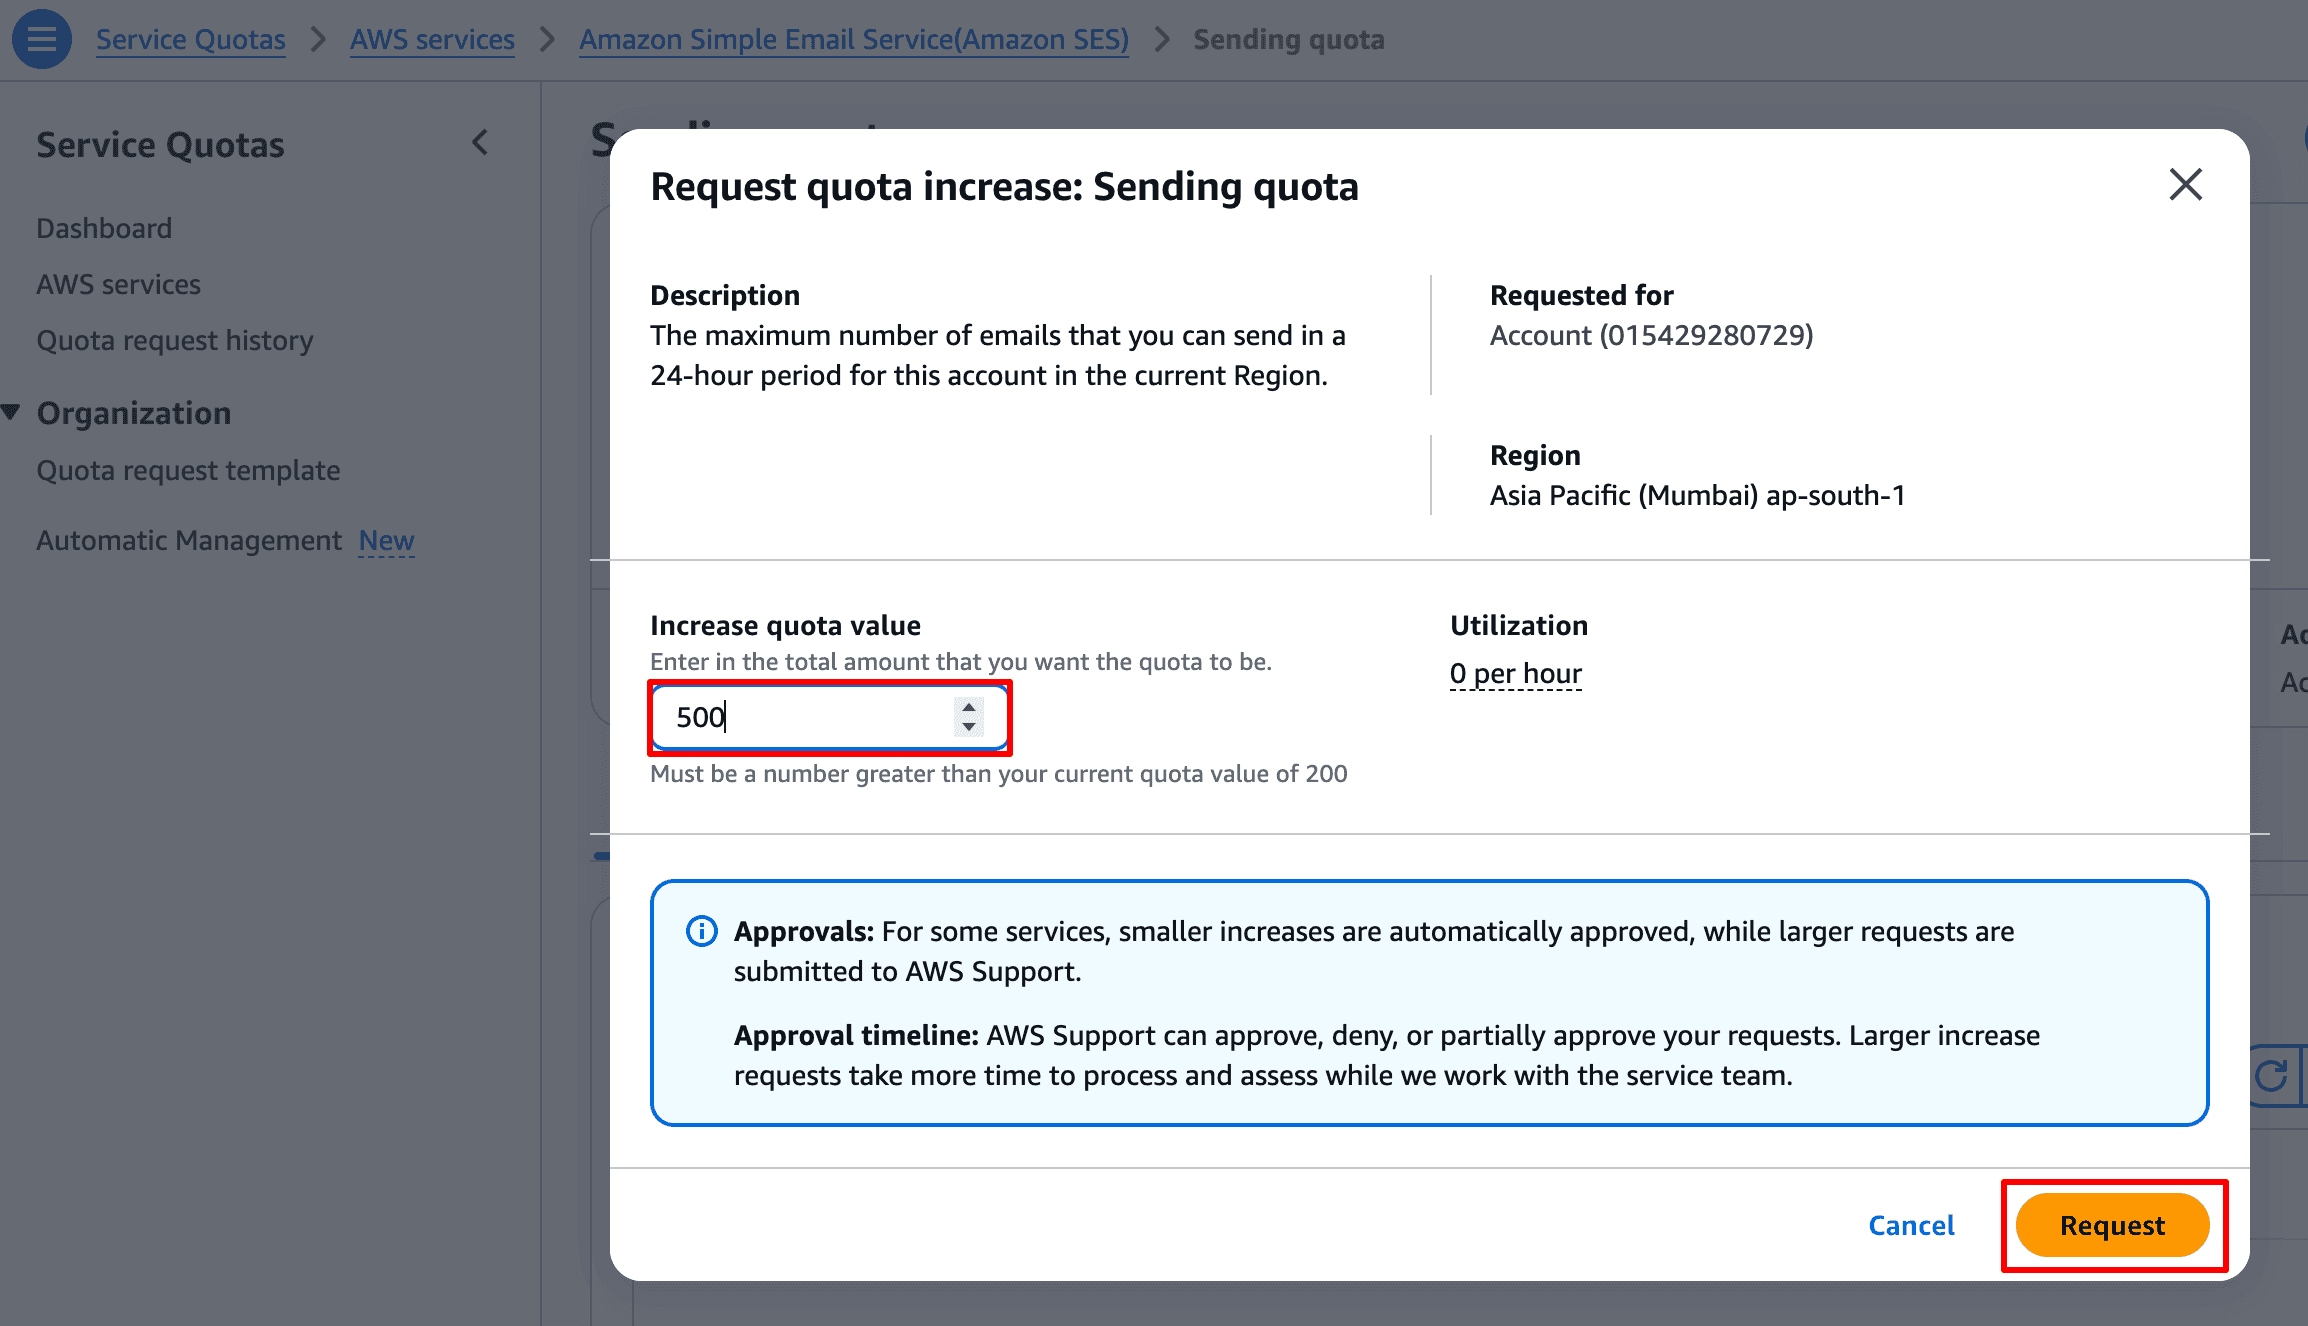
Submit the increase
In the Request quota increase modal, enter the new daily quota you want (e.g. 500, 5000, 50000) under Increase quota value. Click Request.
How long approvals take
Small increases (under ~1,000/day) often auto-approve within minutes. Larger ones go to AWS Support — typically approved within 24 hours if your use case is clear (transactional emails, opted-in recipients, bounce/complaint handling). State all three in the description.
Add the connection in SendGrail
WordPress admin → SendGrail → Connections → Add Connection → pick Amazon SES.
Fill in:
- Connection Name:
Amazon SES. - AWS Region: the region you set up SES in (e.g.
us-east-1,ap-south-1). The host auto-fills. - From Email: an address on your verified domain (or the verified email itself).
- From Name: display name shown to recipients.
- Access Key: the
AKIA...value from the CSV in step 11. - Secret Key: the secret access key from the CSV in step 11.
Click Save.
Test
SendGrail → Test Email → pick the SES connection → send.
If your account is still in sandbox mode (quota increase pending), send to a verified address (yourself). Once the quota increase is approved, you can send to anyone.
Troubleshooting
MessageRejected: Email address is not verified
You're still in sandbox mode and trying to send to an unverified recipient. Either verify the recipient address (Identities → Create identity → Email), or wait for your quota-increase request (steps 12–16) to be approved.
InvalidClientTokenId / SignatureDoesNotMatch
Your Access Key or Secret Access Key is wrong, or you're hitting an SES endpoint in a different region than the IAM user was scoped against. Re-check the AWS Region setting on the connection — it must match the region you used during setup.
Could not connect to host: email-smtp.us-east-1.amazonaws.com
Old config still pointing at SMTP. SendGrail's SES integration uses the API; this error usually means the connection has a stale host override. Re-save the connection and let SendGrail rebuild the endpoint from the Region setting.
Production quota request denied
AWS denies vague or marketing-heavy use cases. Re-submit with:
- A clear description of what you'll send (e.g. "WooCommerce order confirmations and password reset emails").
- Confirmation that marketing recipients are opted-in.
- A bounce/complaint handling plan (e.g. "SES SNS notifications hooked into our list cleanup process").
Bounces / complaints climbing
SES tracks bounce + complaint rates. Above 5% bounces or 0.1% complaints, AWS pauses your account. Configure SNS topics for bounce notifications and clean your list regularly.
Cost reference
- First 62,000 emails/month (from EC2 or sent via the SES API): free.
- After that: $0.10 per 1,000 emails.
- Inbound: $0.10 per 1,000 received.
- Attachments: $0.12 per GB transferred.
For most WordPress sites, SES is effectively free.
What's next
- Email Routing — route specific email types (transactional vs marketing) through different SES configurations.
- Failure Alerts — get notified if SES bounces start spiking.
- Test & Simulate — preview which emails go through SES without actually sending.