Appearance
Google Workspace / Gmail (OAuth)
Gmail via OAuth 2.0
Send through any Google mailbox — Workspace (custom-domain) or personal @gmail.com — using a Google Cloud OAuth client. No SMTP password, no App Password, automatic token refresh.
Daily send caps
Personal @gmail.com accounts cap at 500 messages / 24h. Google Workspace mailboxes cap at 2,000 / 24h. Hitting the cap returns 421 daily message limit exceeded — switch to a dedicated transactional provider (SendGrid, SES) if you send more.
Why OAuth (not App Password)?
Workspace organizations often disable App Passwords through admin policy. OAuth is also more secure: tokens are scoped to a specific Google Cloud project, can be revoked anytime, and rotate automatically without user intervention.
The trade-off: setup is longer (creating a Google Cloud project + OAuth client). But you do it once — additional mailboxes just authorize against the same client.
Personal @gmail.com users can pick either OAuth (this page) or App Password (simpler setup, but requires 2FA on the account).
Prerequisites
- A Google Workspace account (custom domain Gmail) or a personal
@gmail.comaccount. The OAuth flow is the same for both — the only difference is the consent screen's "User type" choice in step 3 (Internal for Workspace, External for personal). - Permission to create OAuth clients in Google Cloud Console (your own account is enough).
- WordPress admin access.
- About 10 minutes of focused setup time.
Setup overview
- Create a Google Cloud project.
- Enable the Gmail API on that project.
- Configure the OAuth consent screen (Google Auth Platform).
- Create OAuth client credentials (Web application).
- Add yourself as a Test User.
- Add the connection in SendGrail and authenticate.
Step-by-step
Create a new Google Cloud project
Sign into console.cloud.google.com with the Google account that owns the mailbox you want to send from.
In the top bar, click the project picker (it'll say Select a project) and click + New project in the modal.
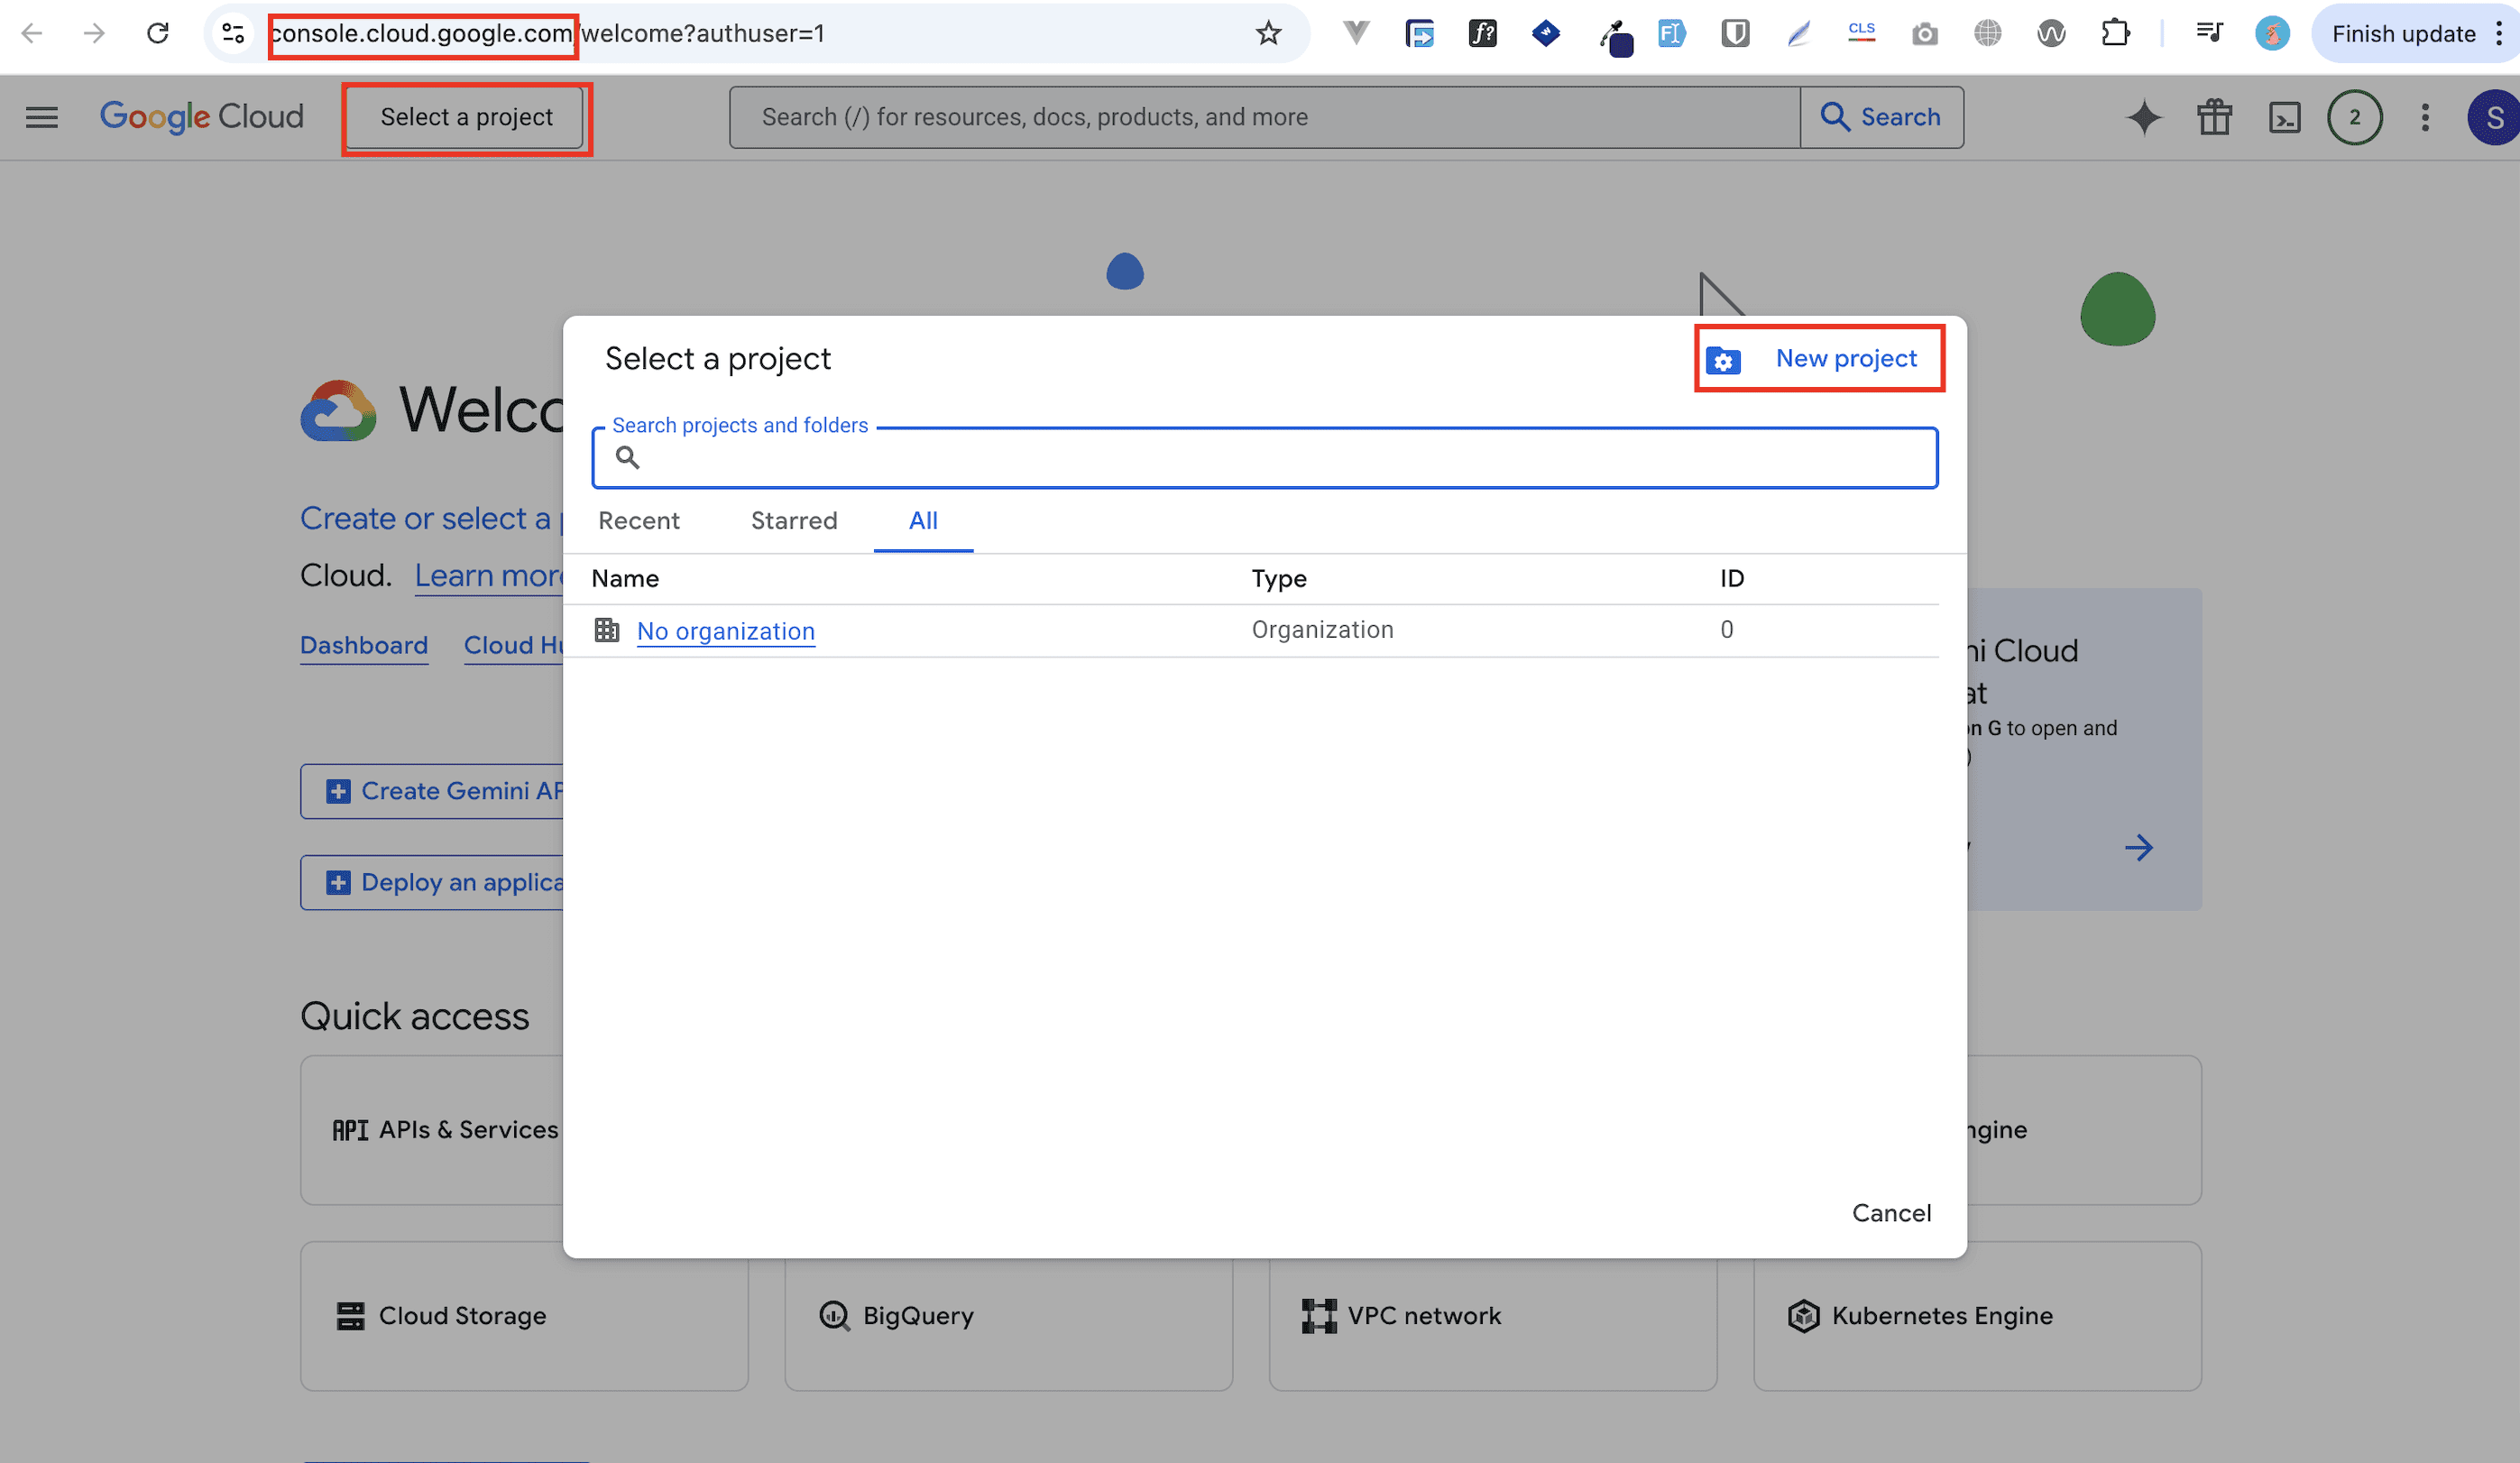
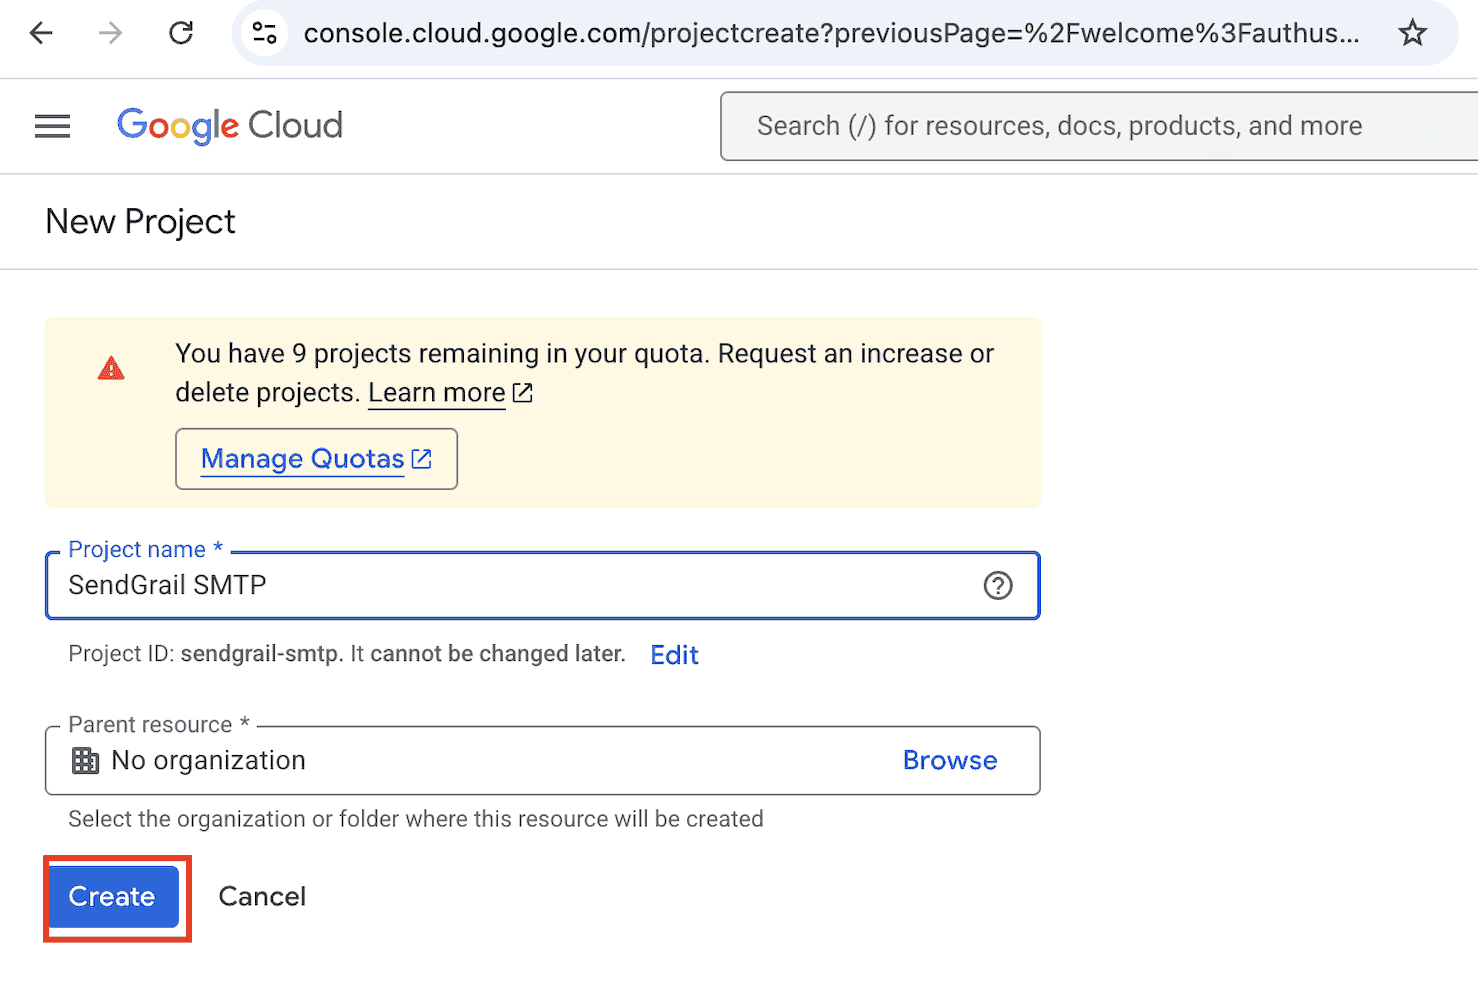
Name the project SendGrail SMTP (or anything you like) and click Create.
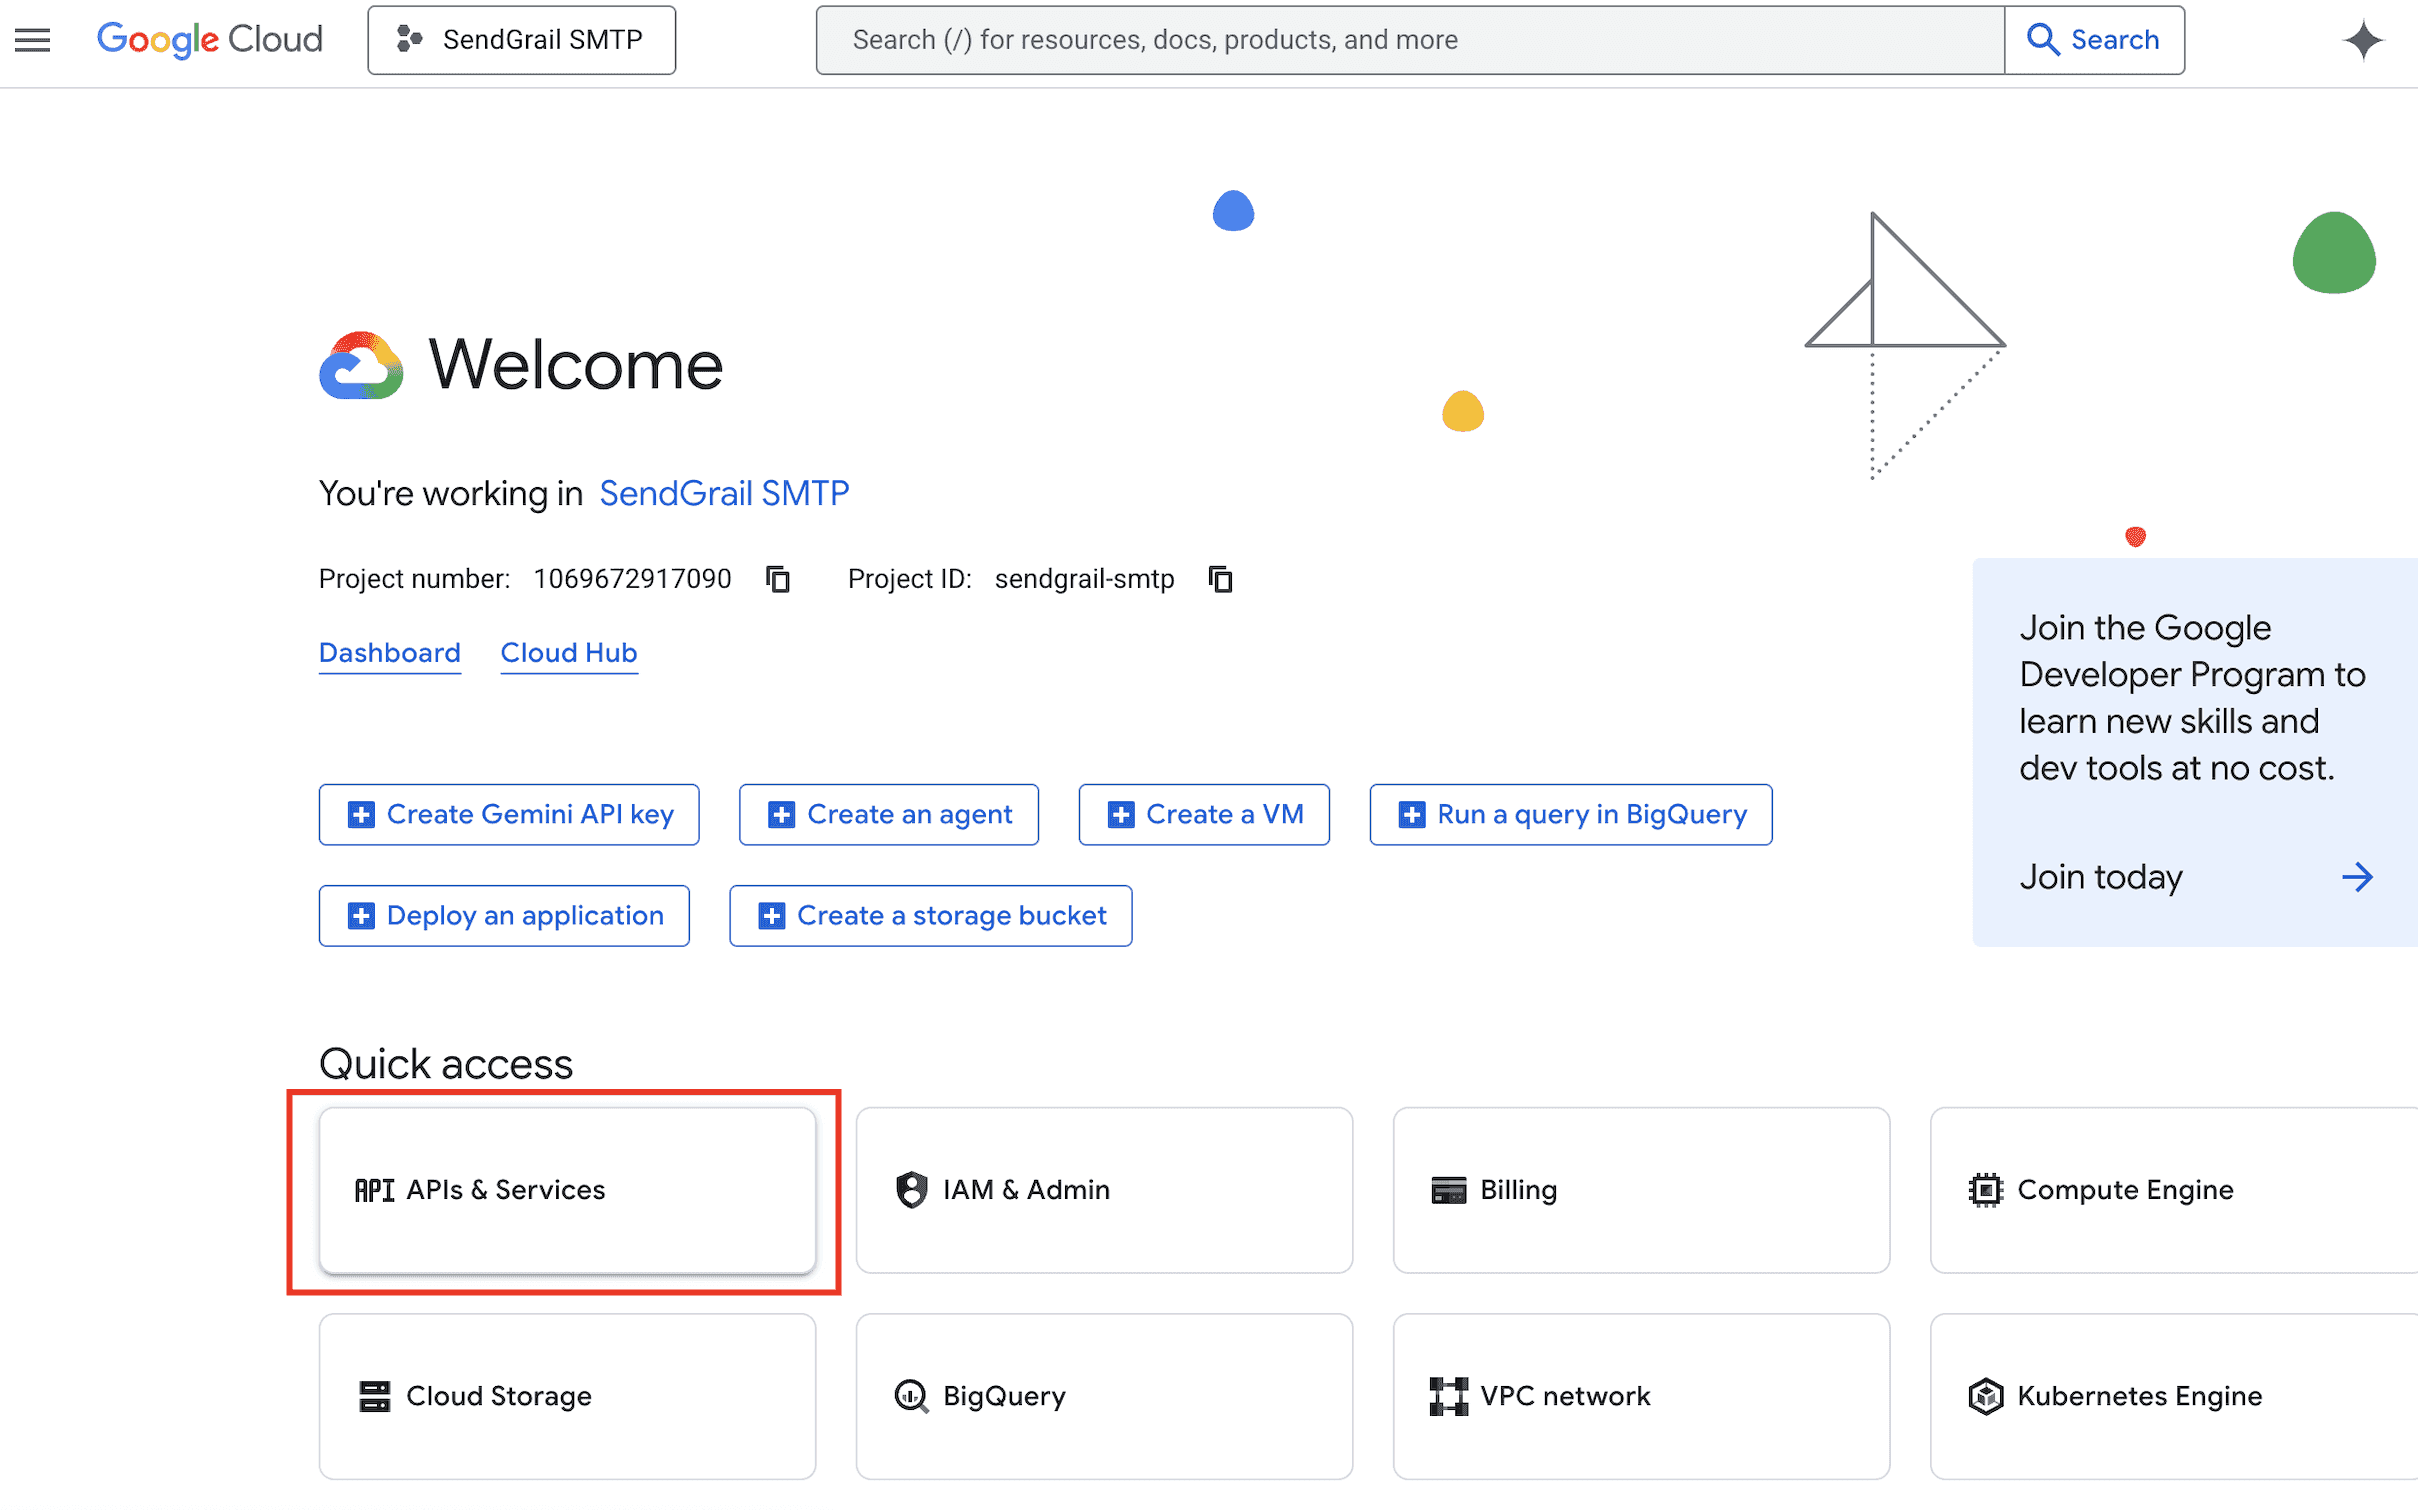
Select the new project
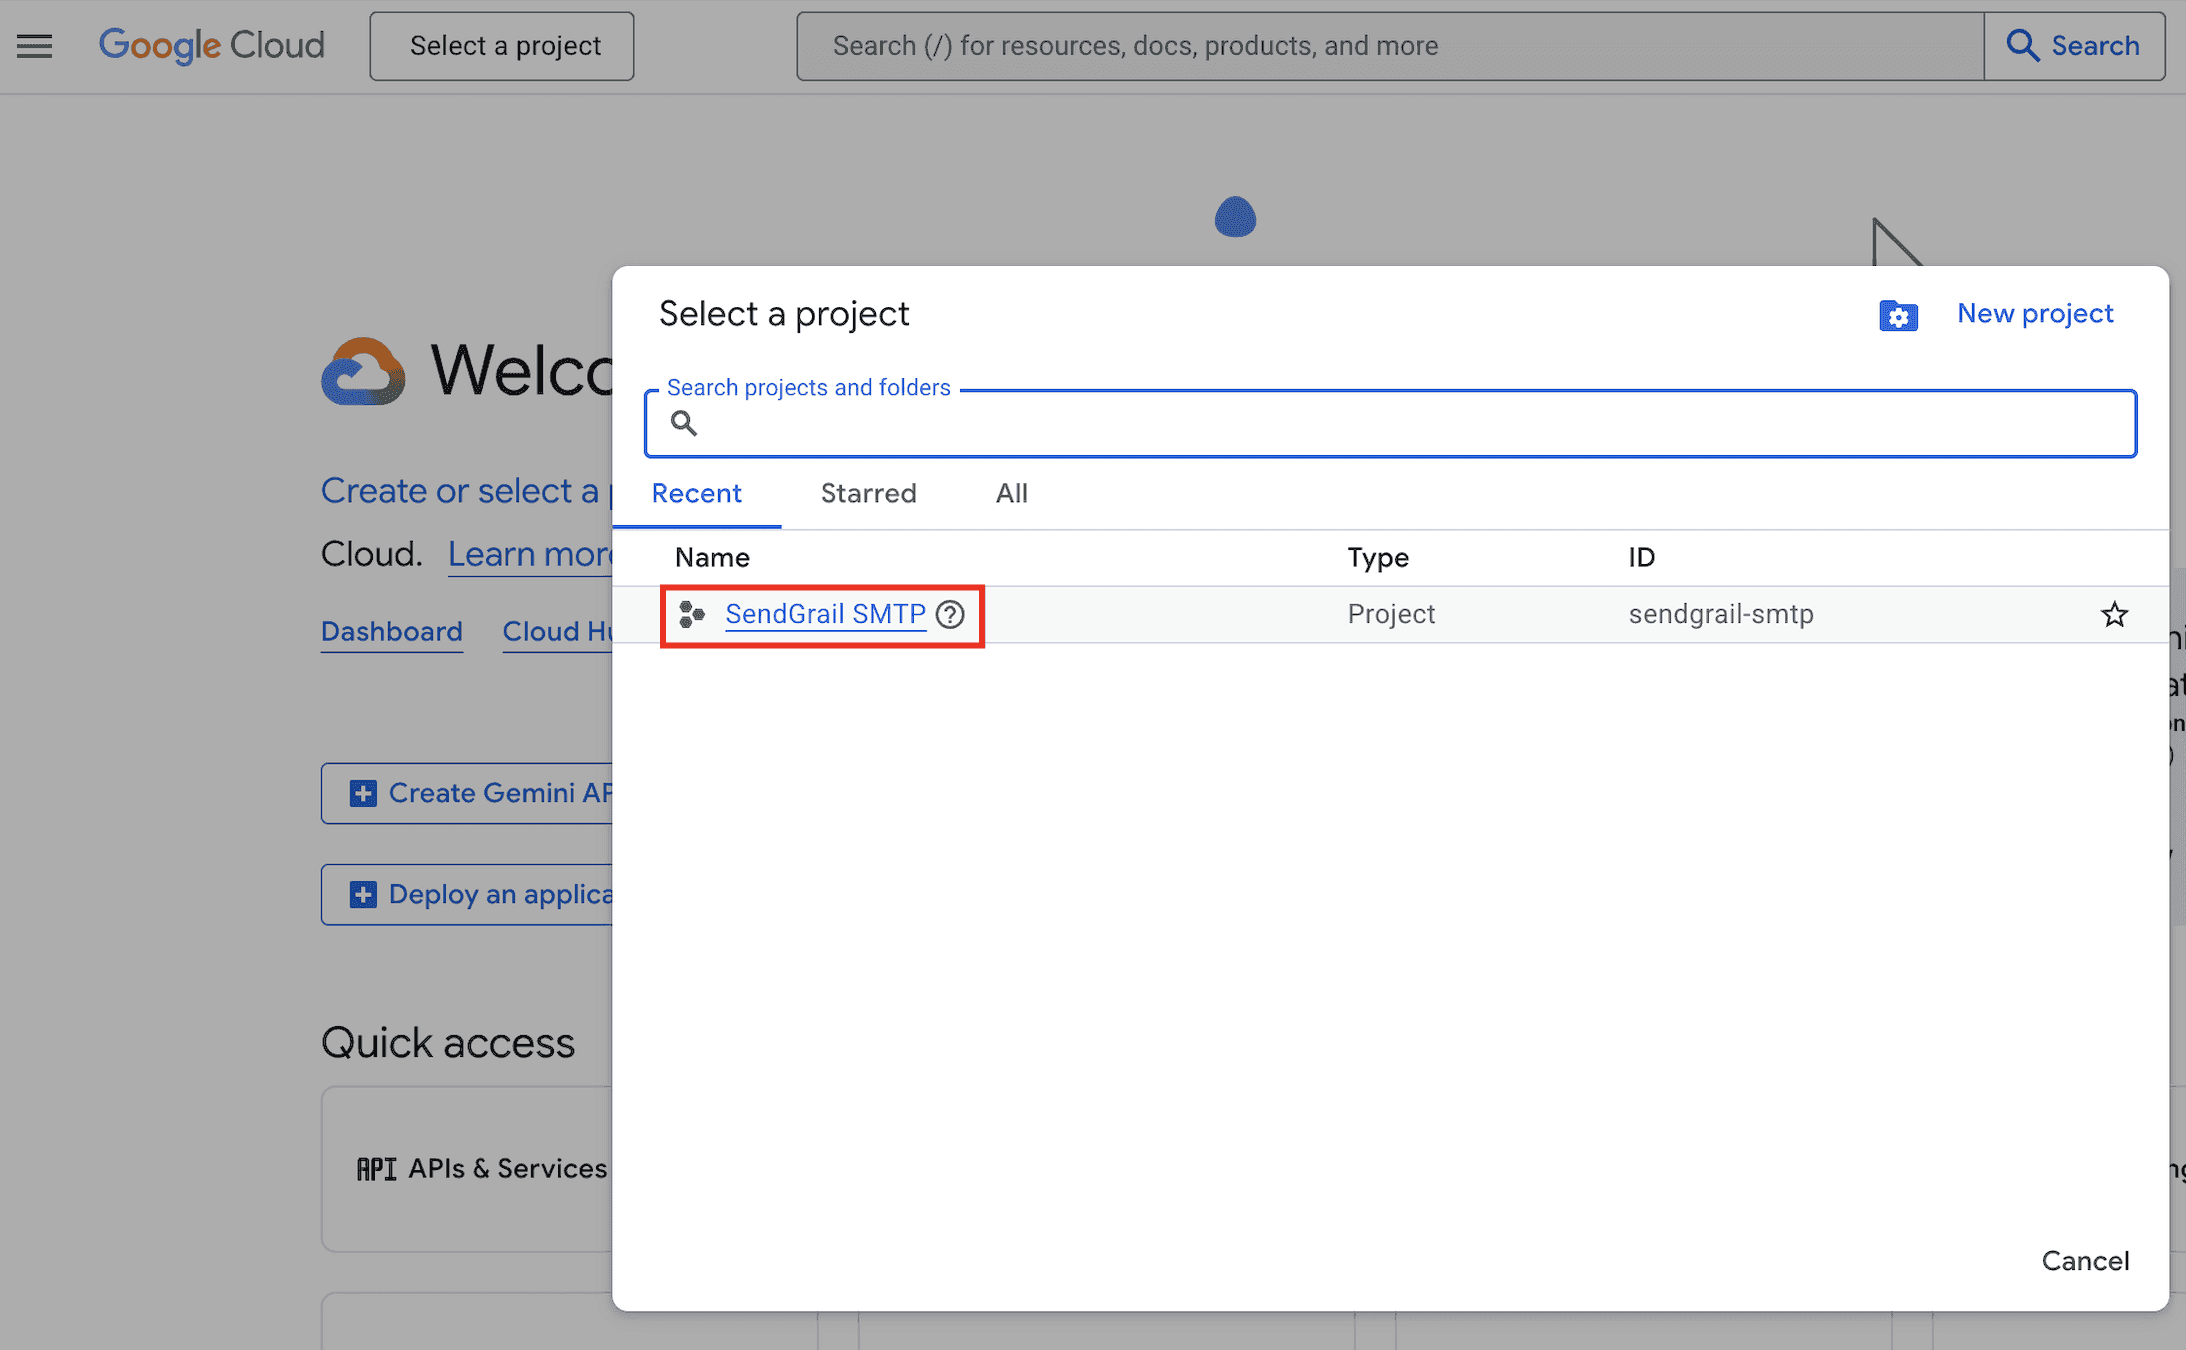
Open the project picker again from the top bar.
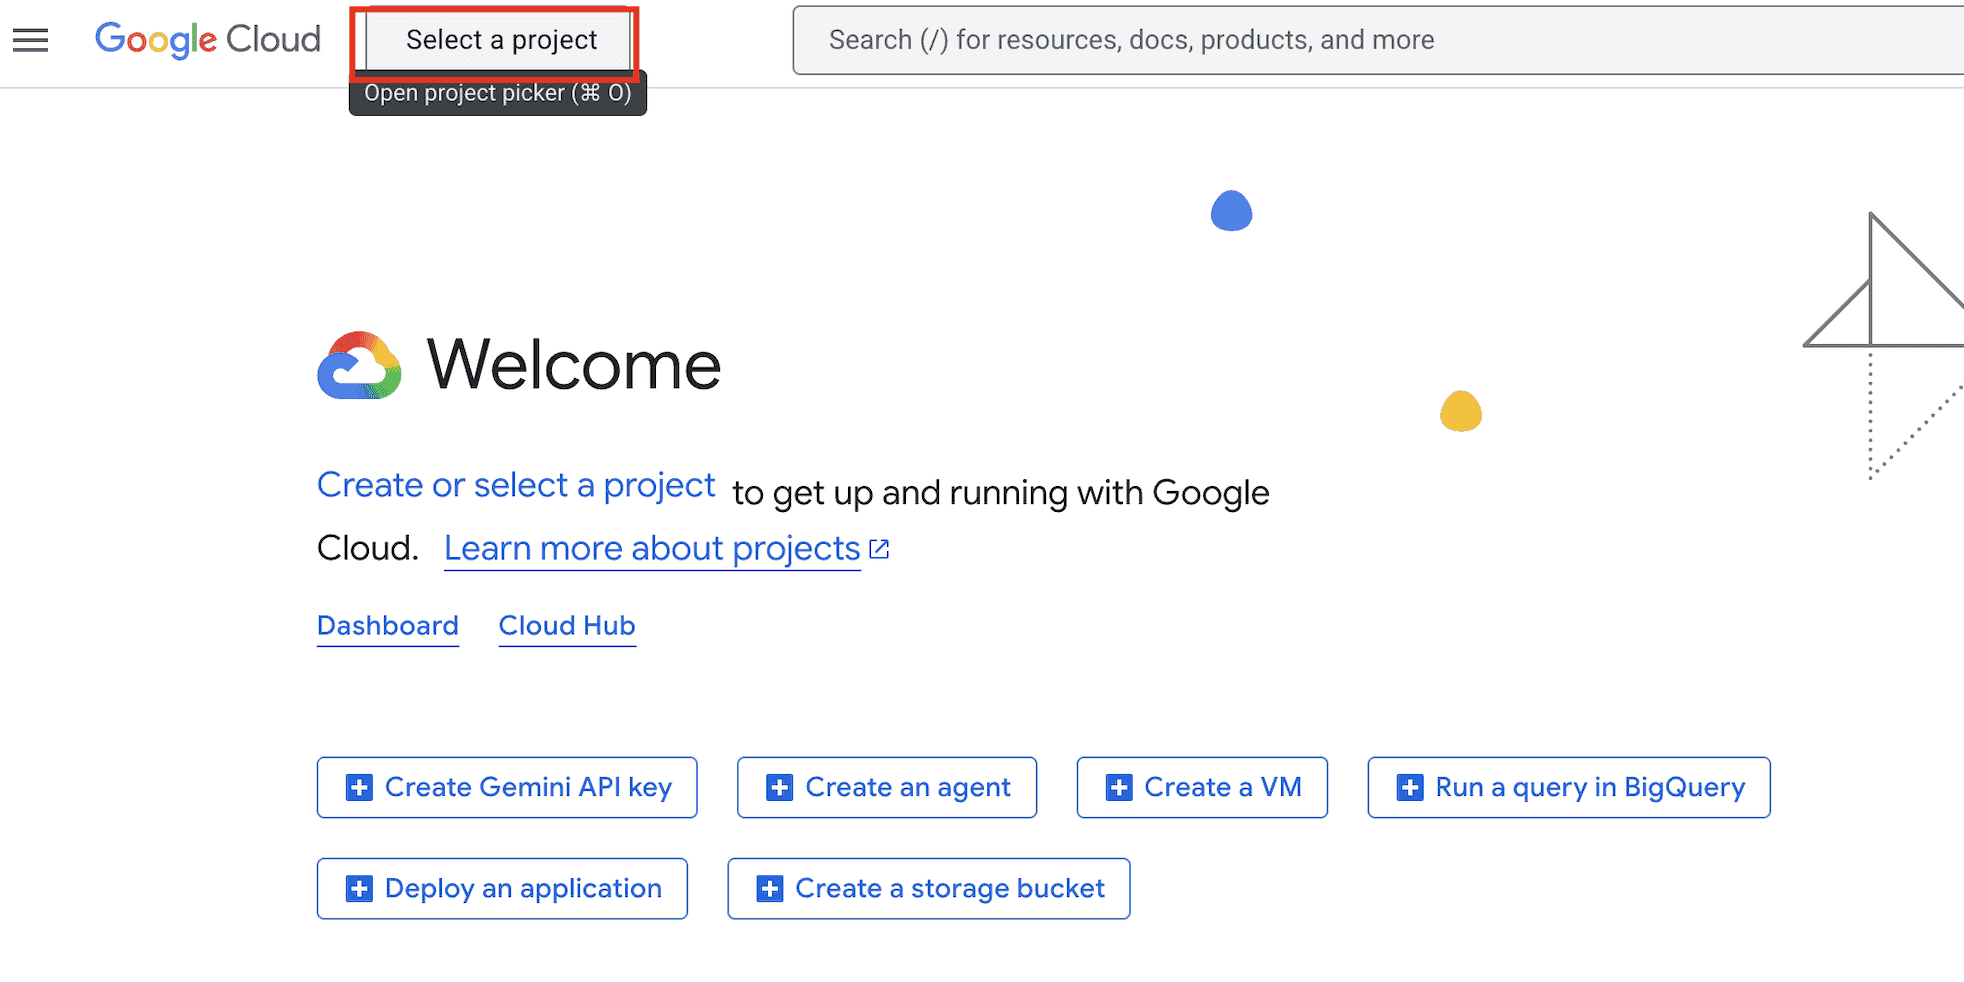
Pick SendGrail SMTP from the Recent list. The Welcome page now shows "You're working in SendGrail SMTP" — confirming the project is active.
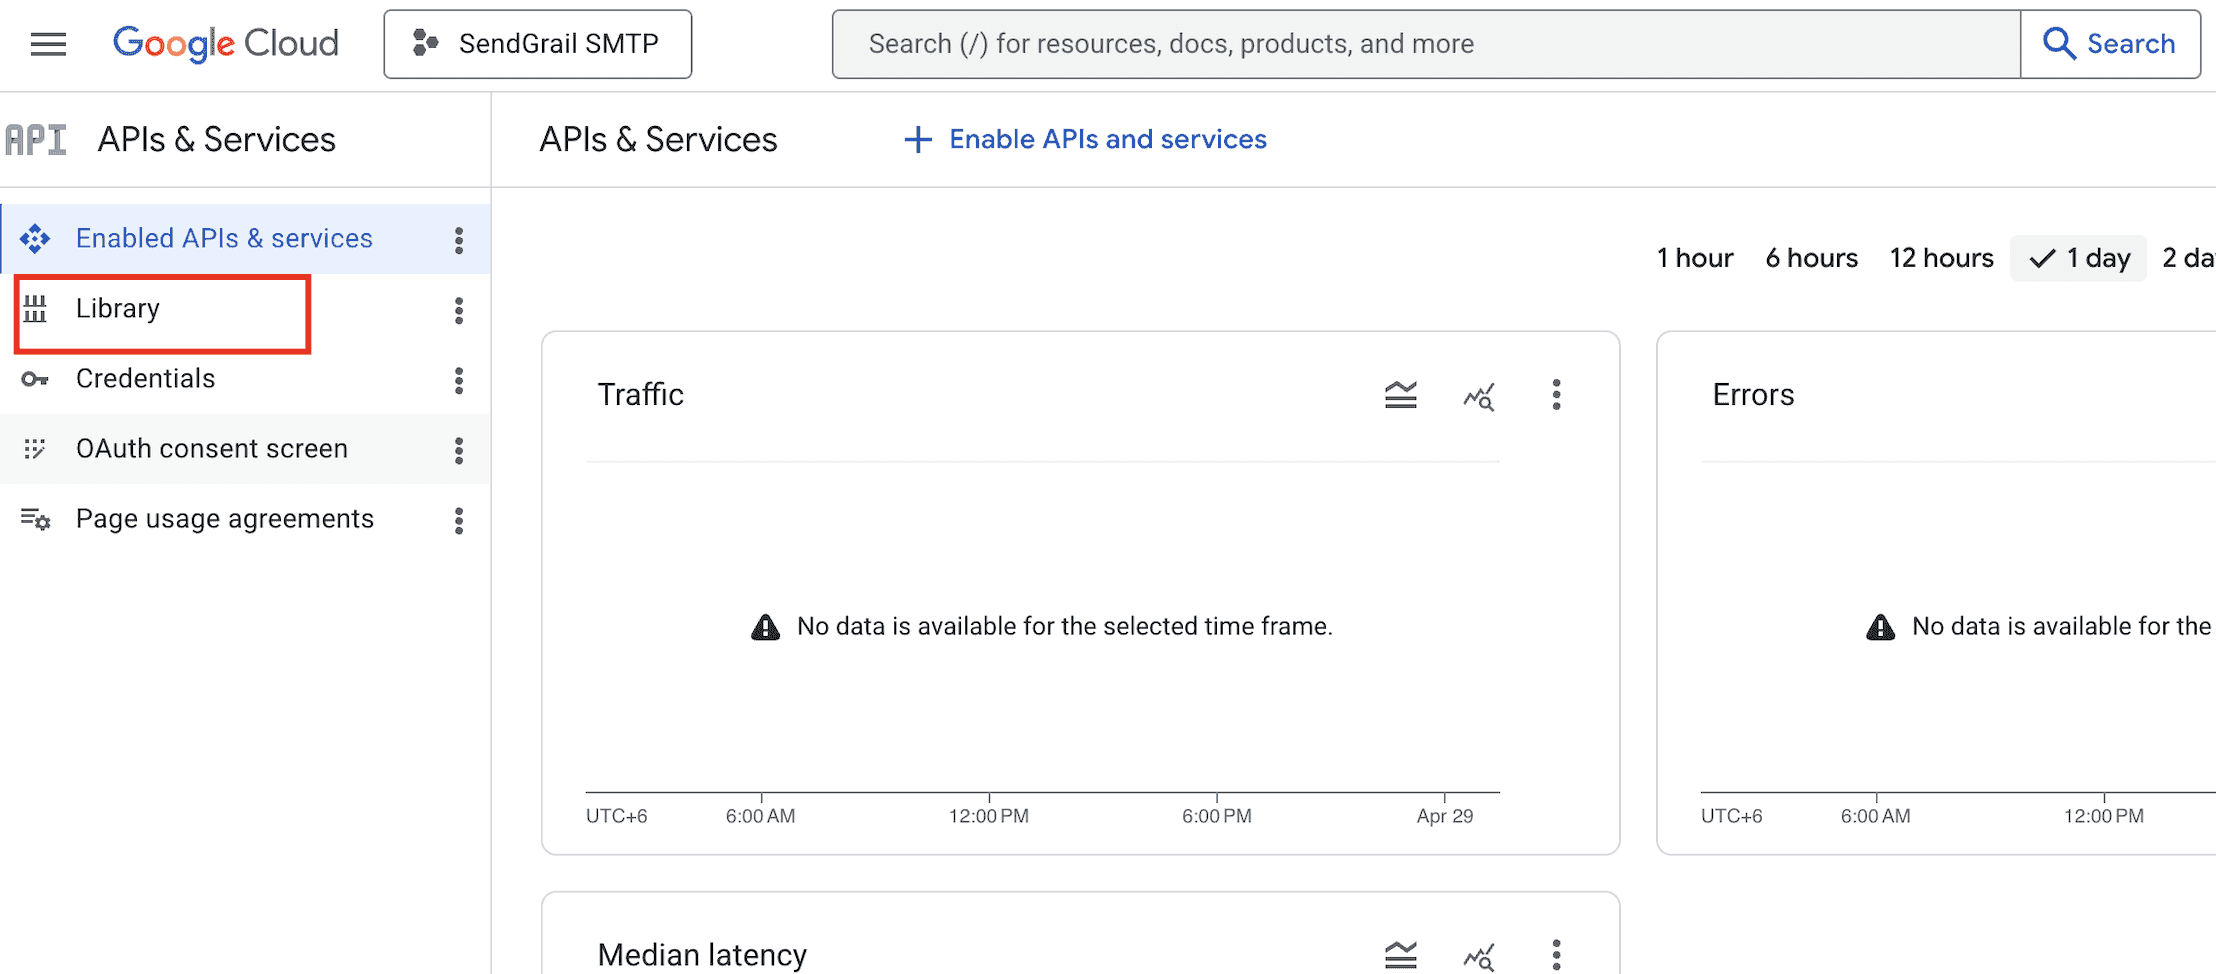
Find the Gmail API
In the Library search field, type gmail api and click the Gmail API card in the results.

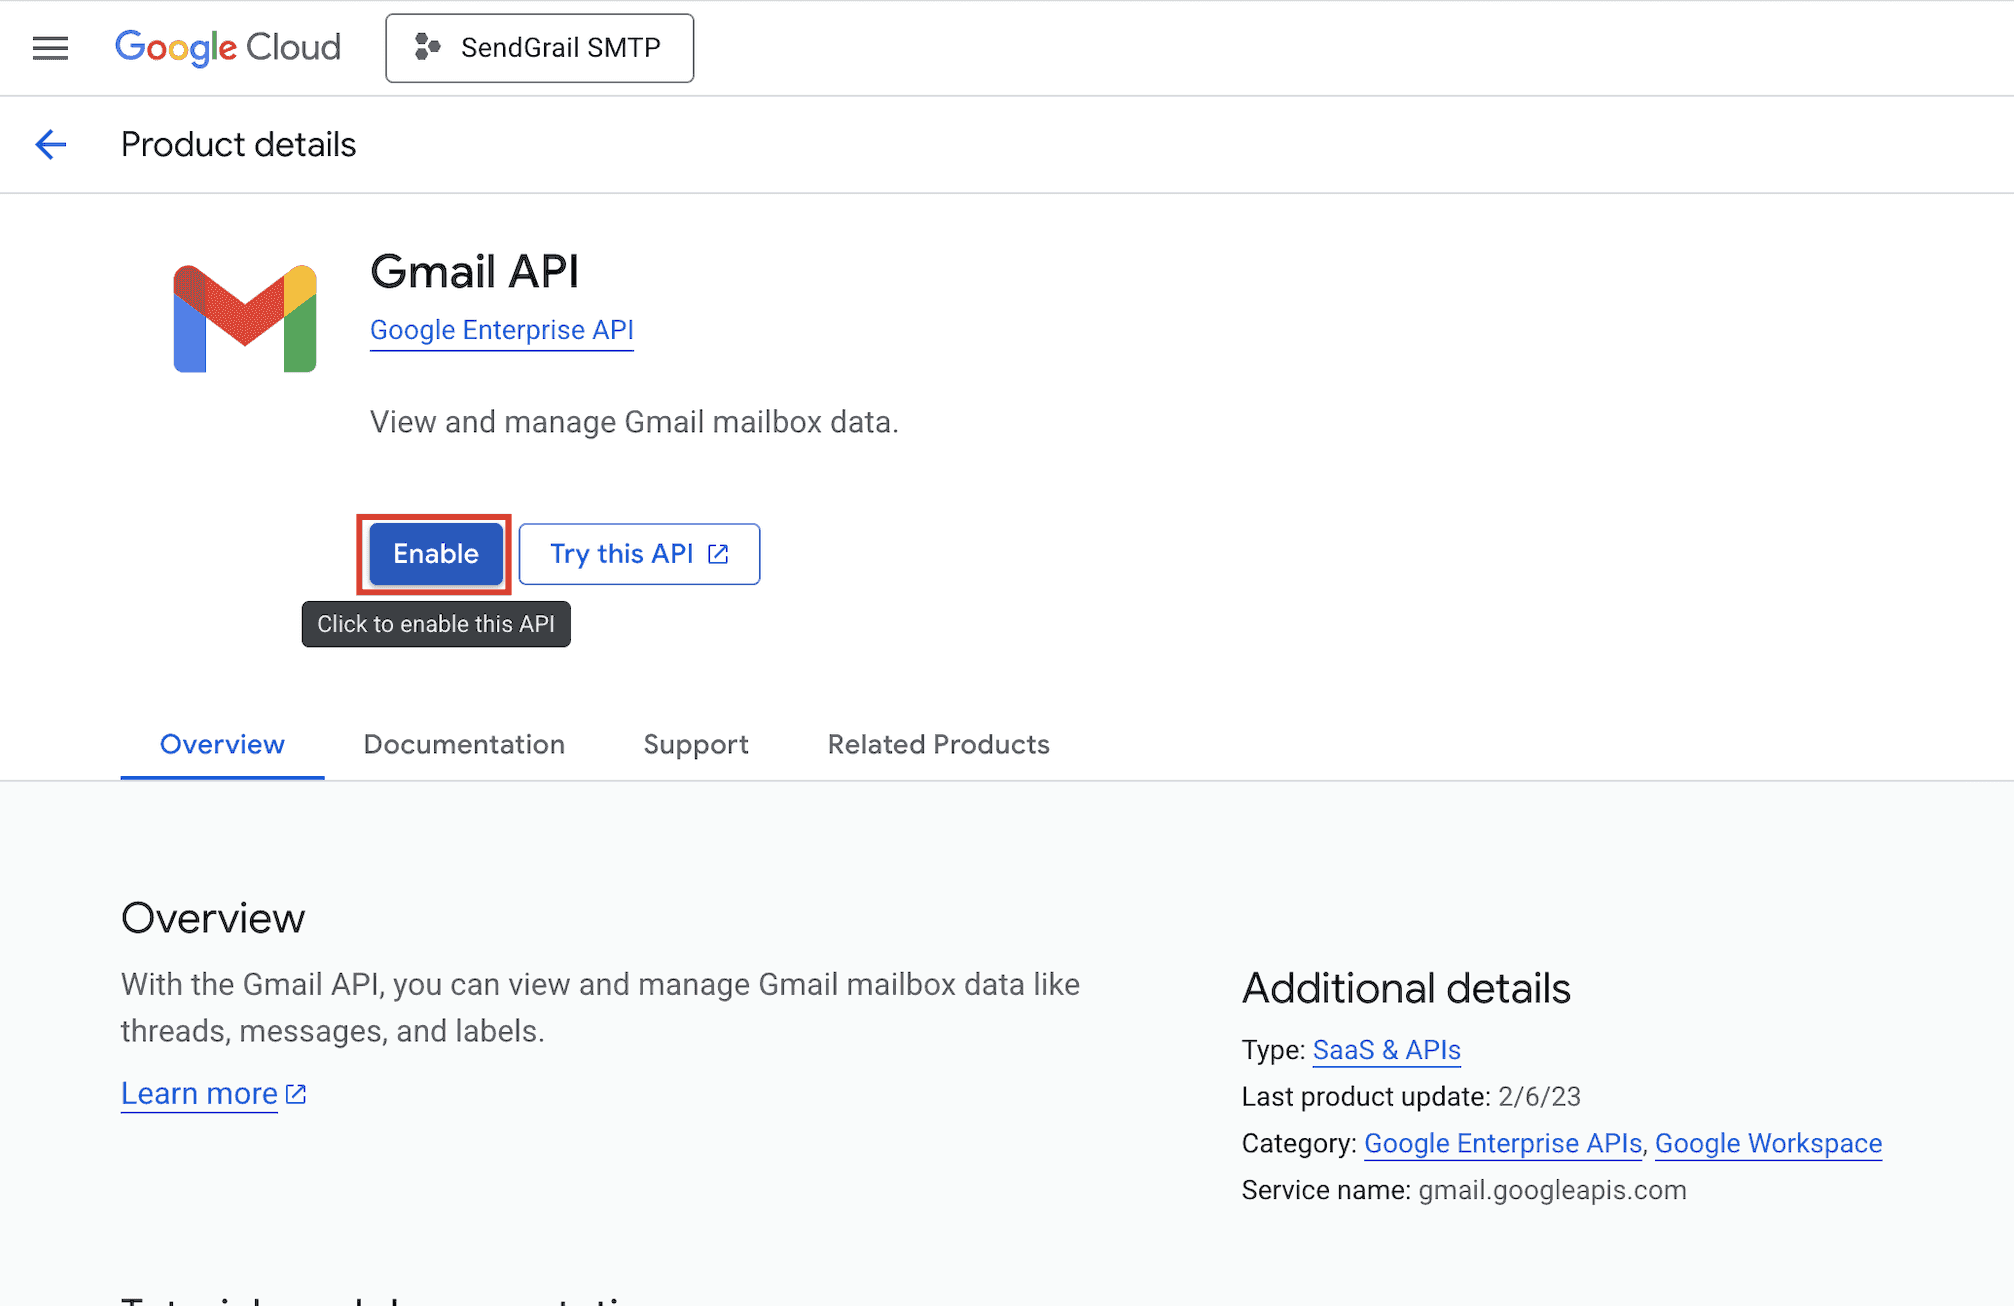
Enable the Gmail API
On the Gmail API product page, click Enable. Wait a few seconds for activation.
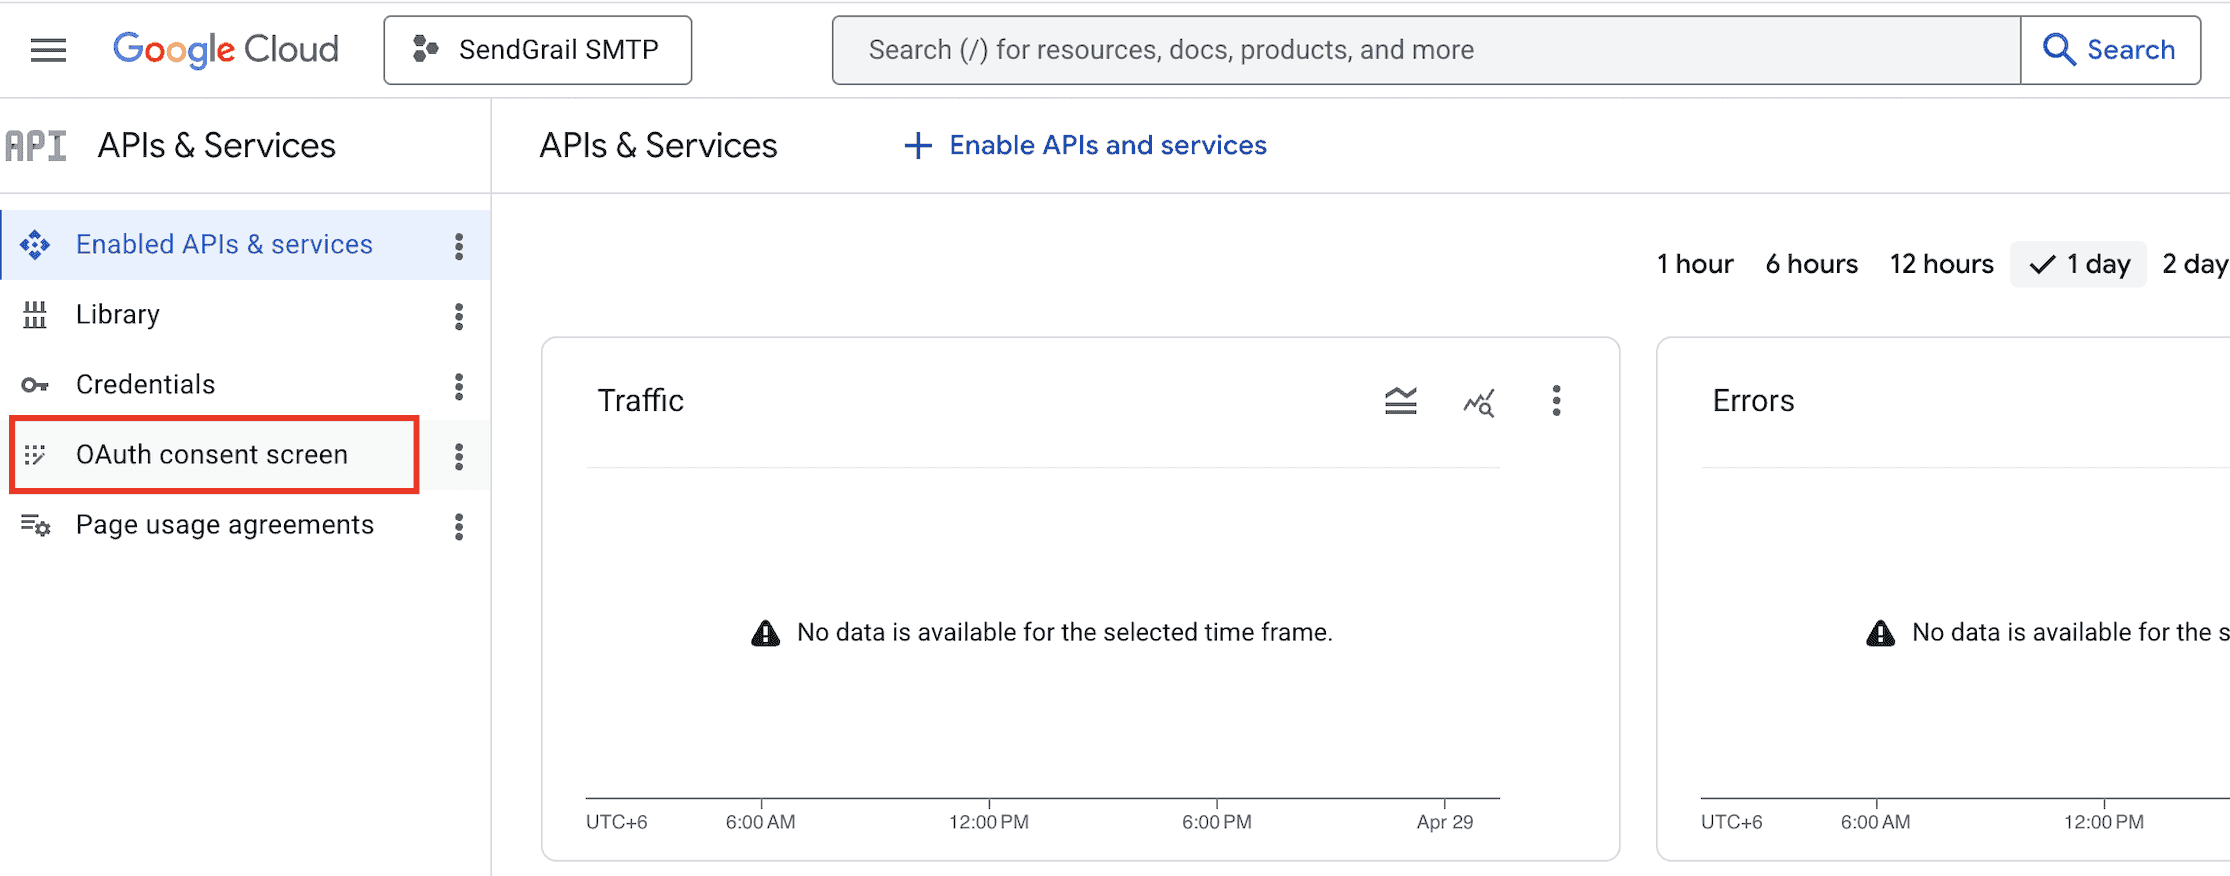
Open the OAuth consent screen
After enabling, return to APIs & Services and click OAuth consent screen in the left sidebar.
Start the Google Auth Platform setup
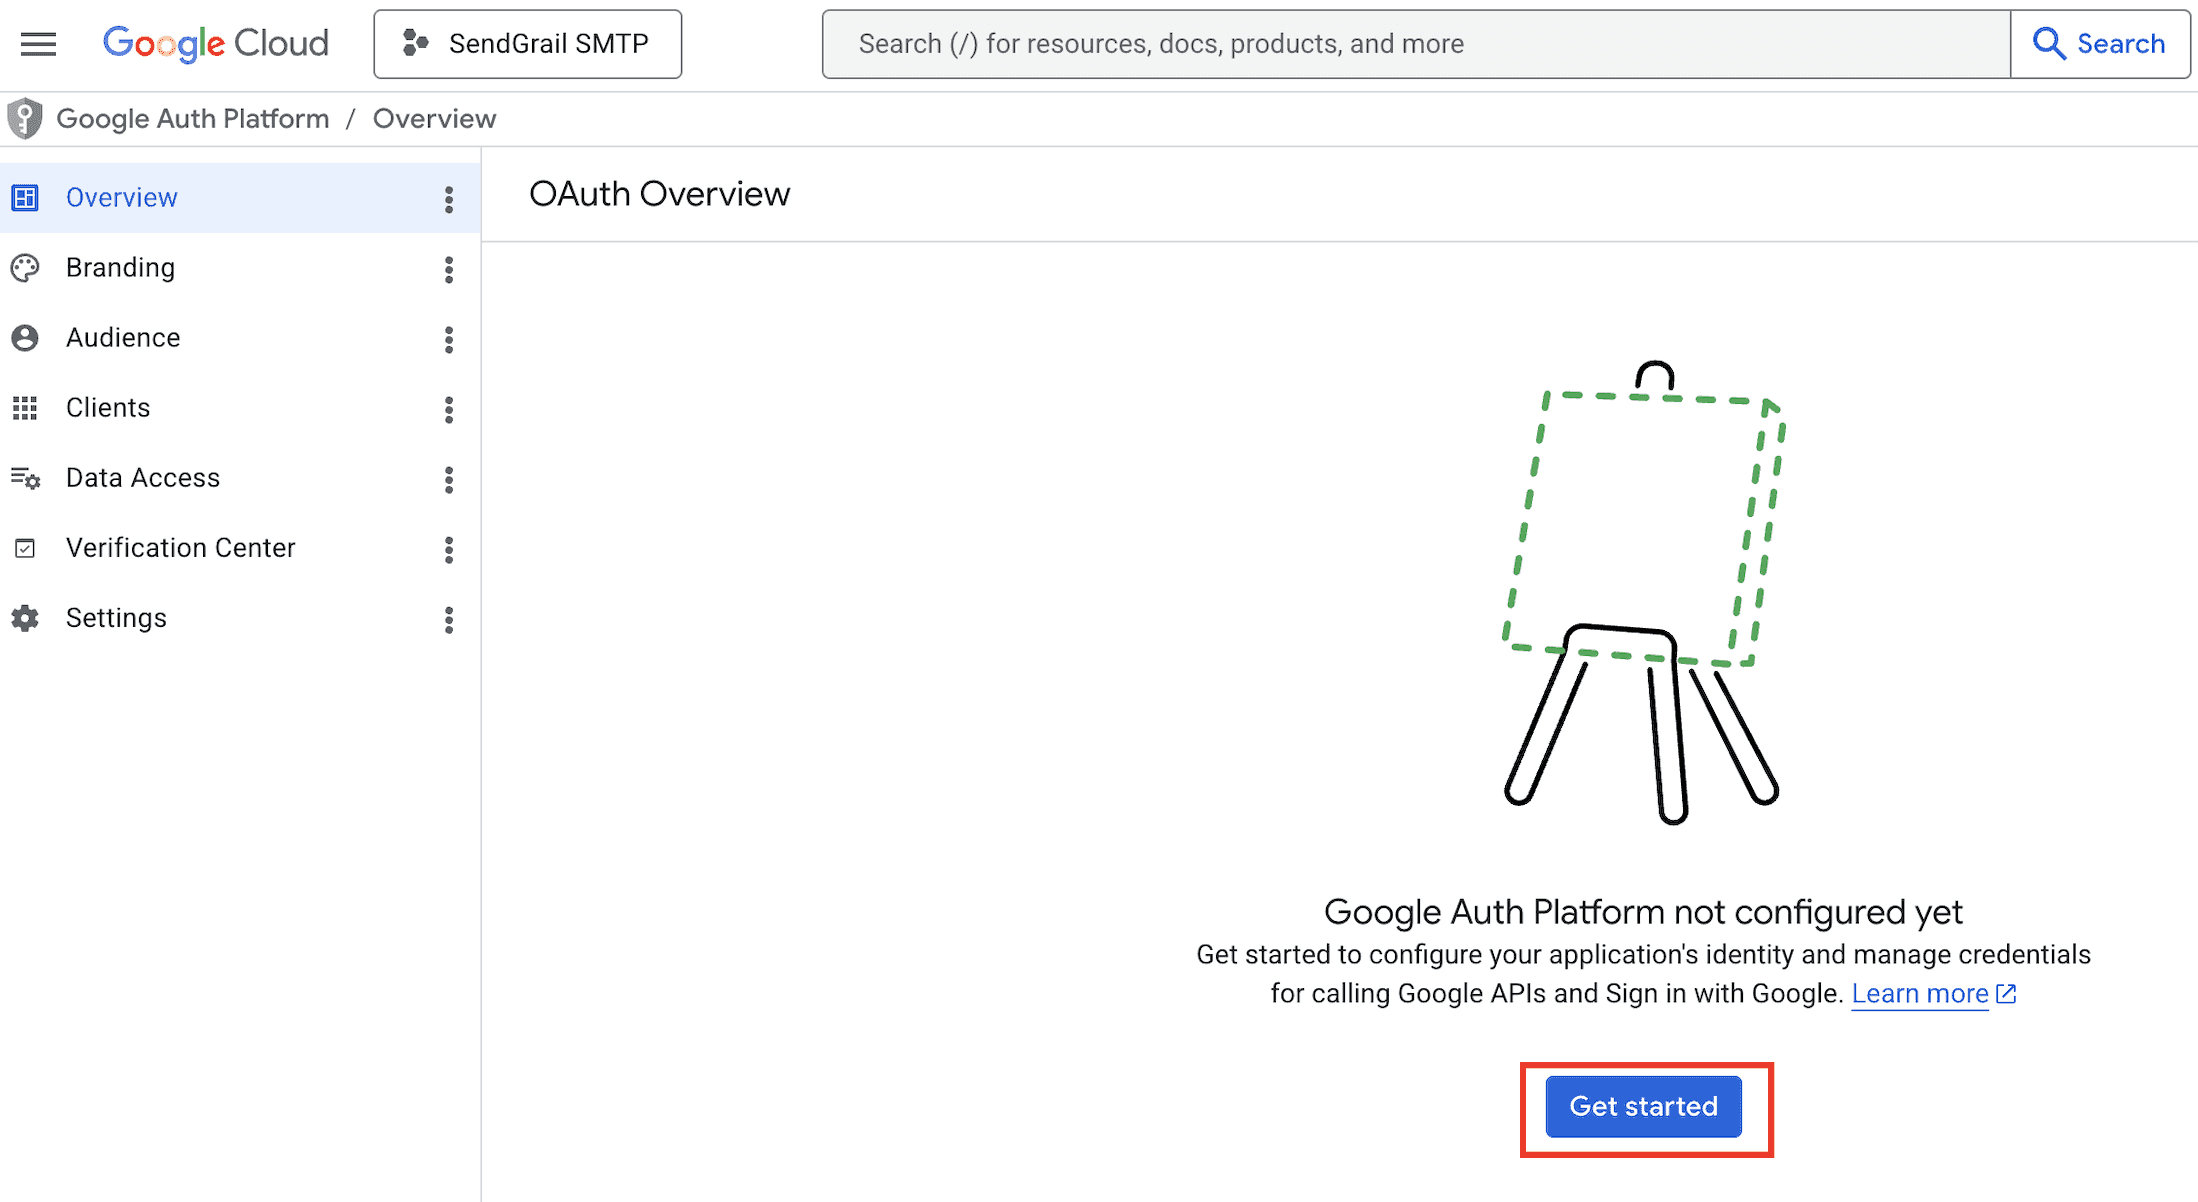
The OAuth Overview page shows "Google Auth Platform not configured yet". Click Get started.
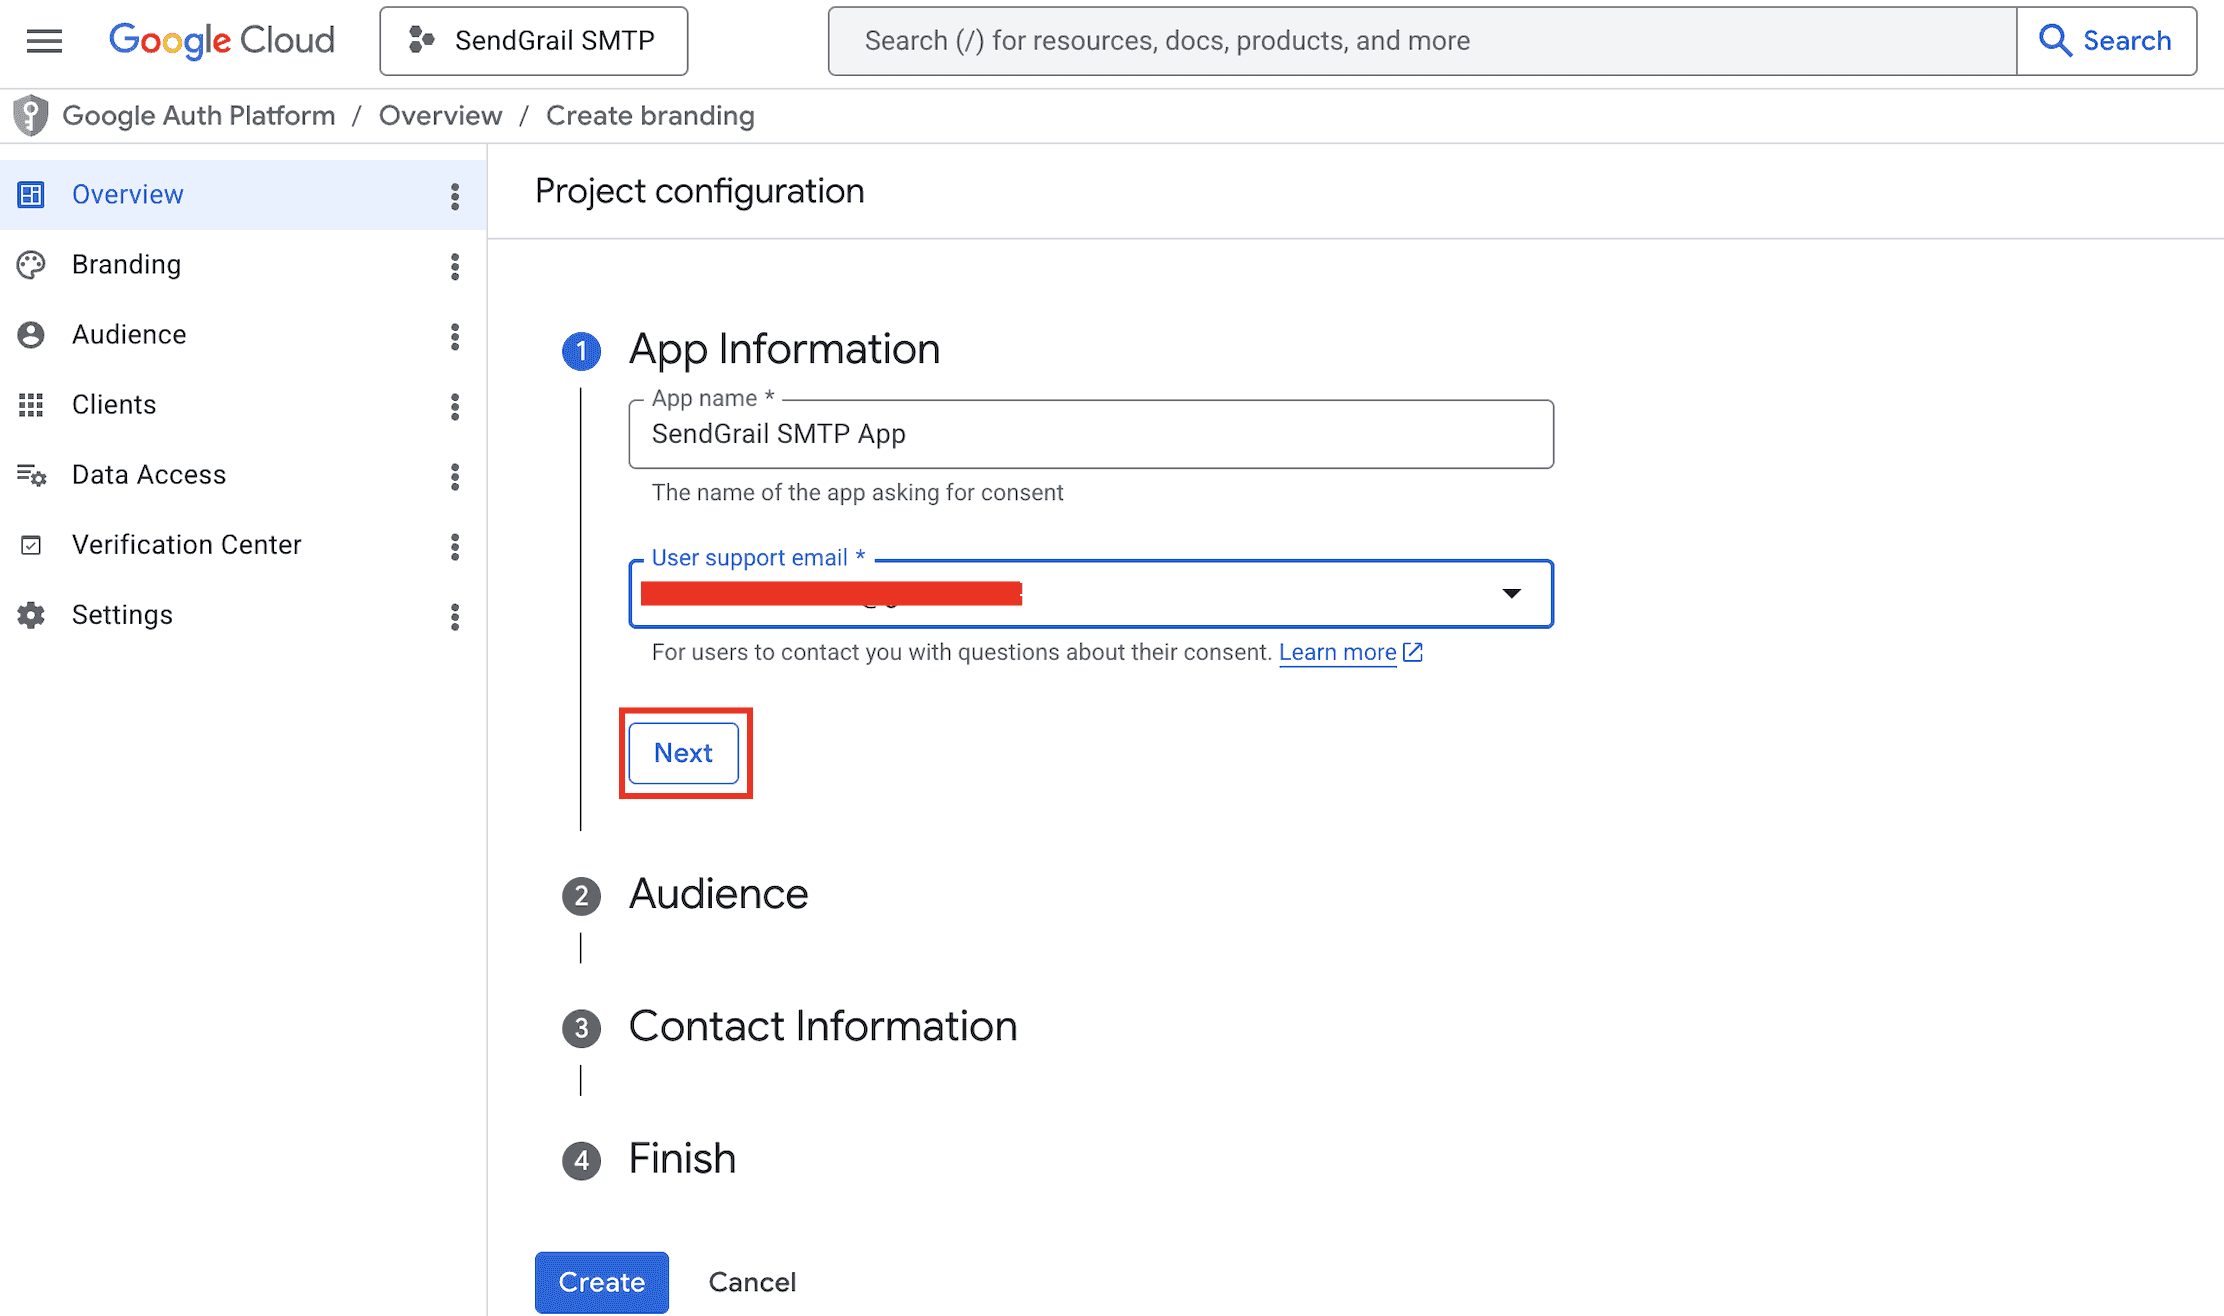
App Information
Fill in:
- App name:
SendGrail SMTP App(or your site name). - User support email: the email Google should show users if they have questions about your app.
Click Next.
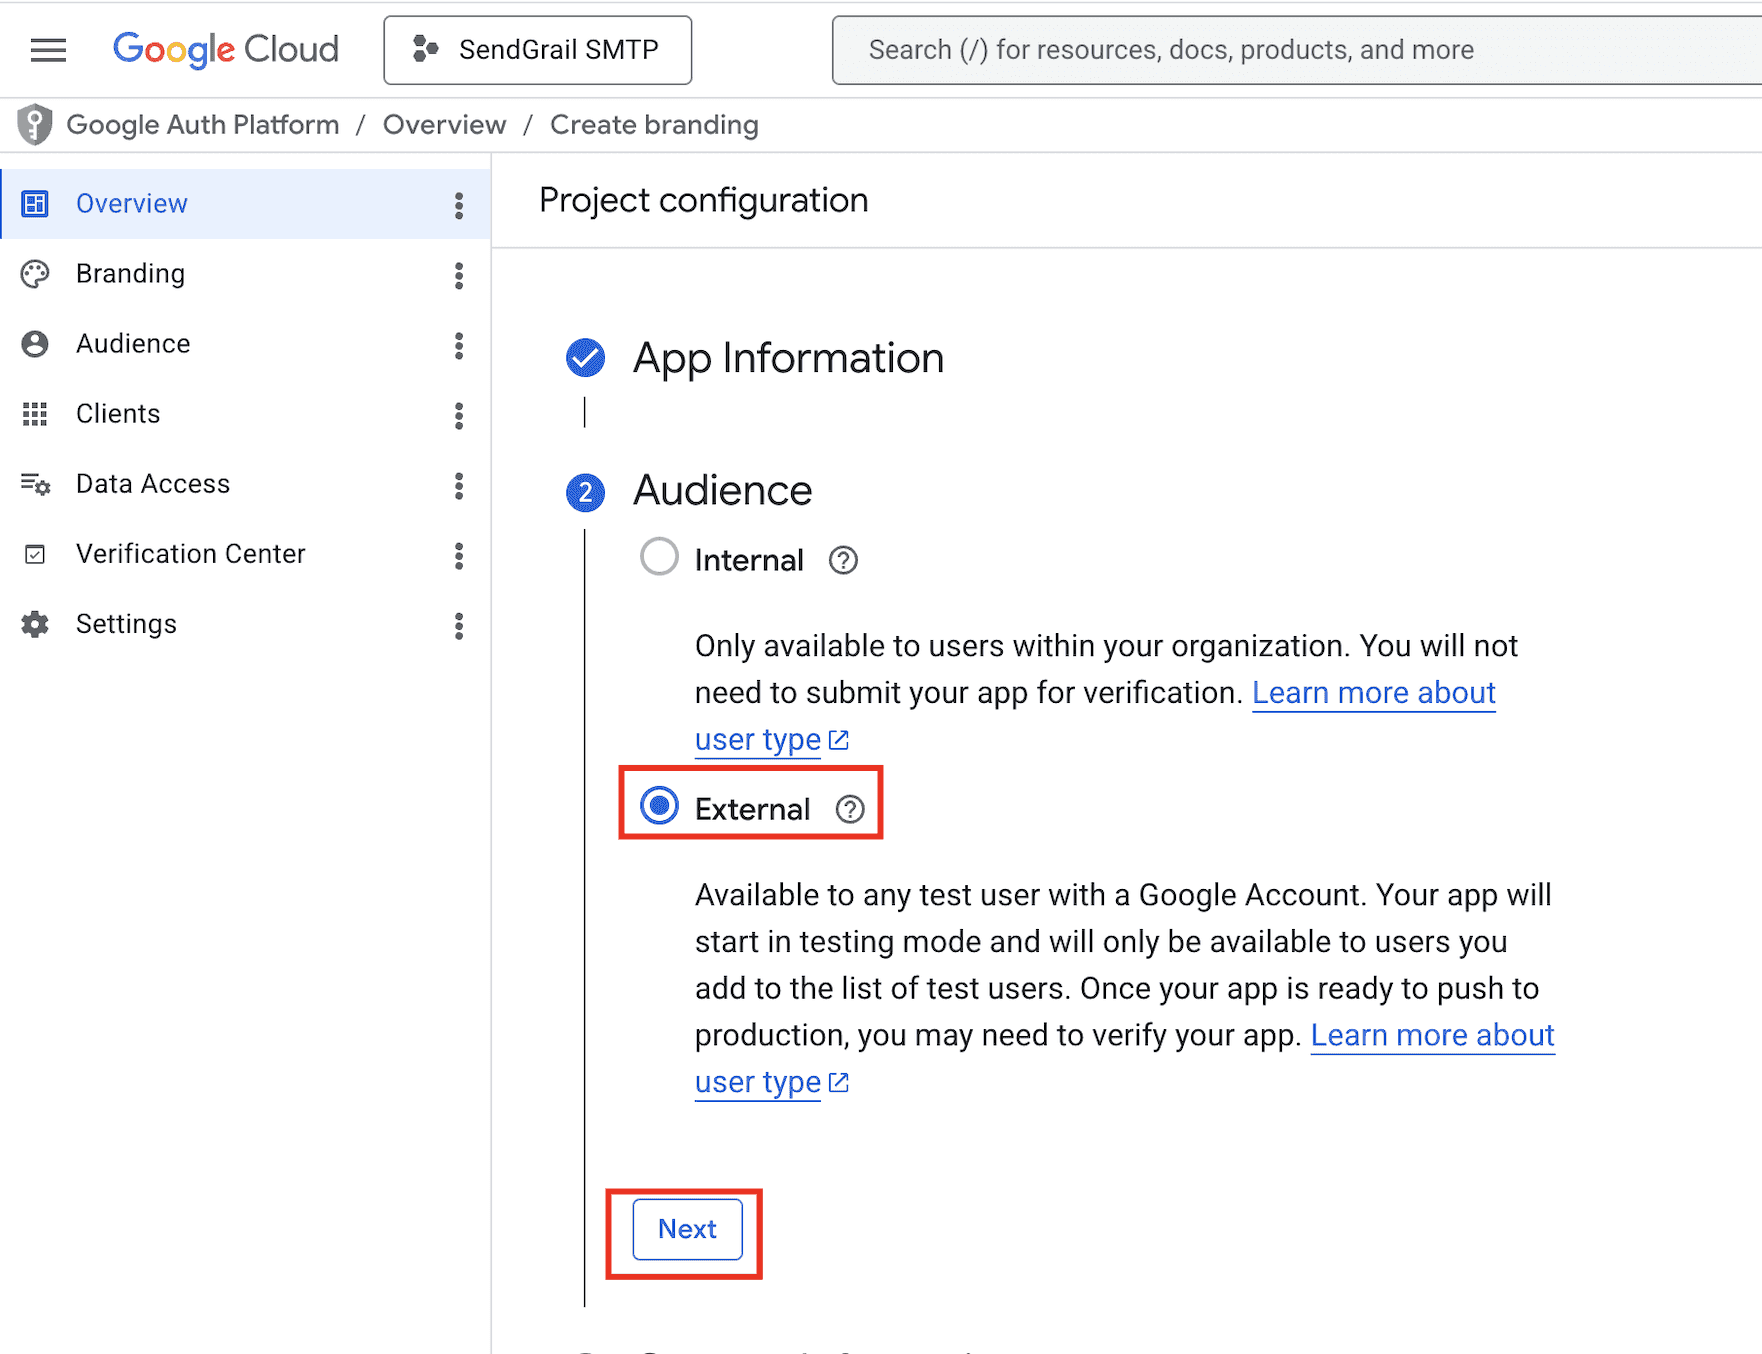
Audience — pick External
Pick External. This is correct for both personal Gmail and Workspace accounts unless you're in a Workspace organization and want to restrict to in-org users only (then pick Internal).
Click Next.
Internal vs External
Internal (Workspace only) avoids the 7-day token expiry and skips Test Users — but blocks personal Gmail authorization. External works universally but starts in Testing mode where refresh tokens expire weekly until you publish or verify the app.
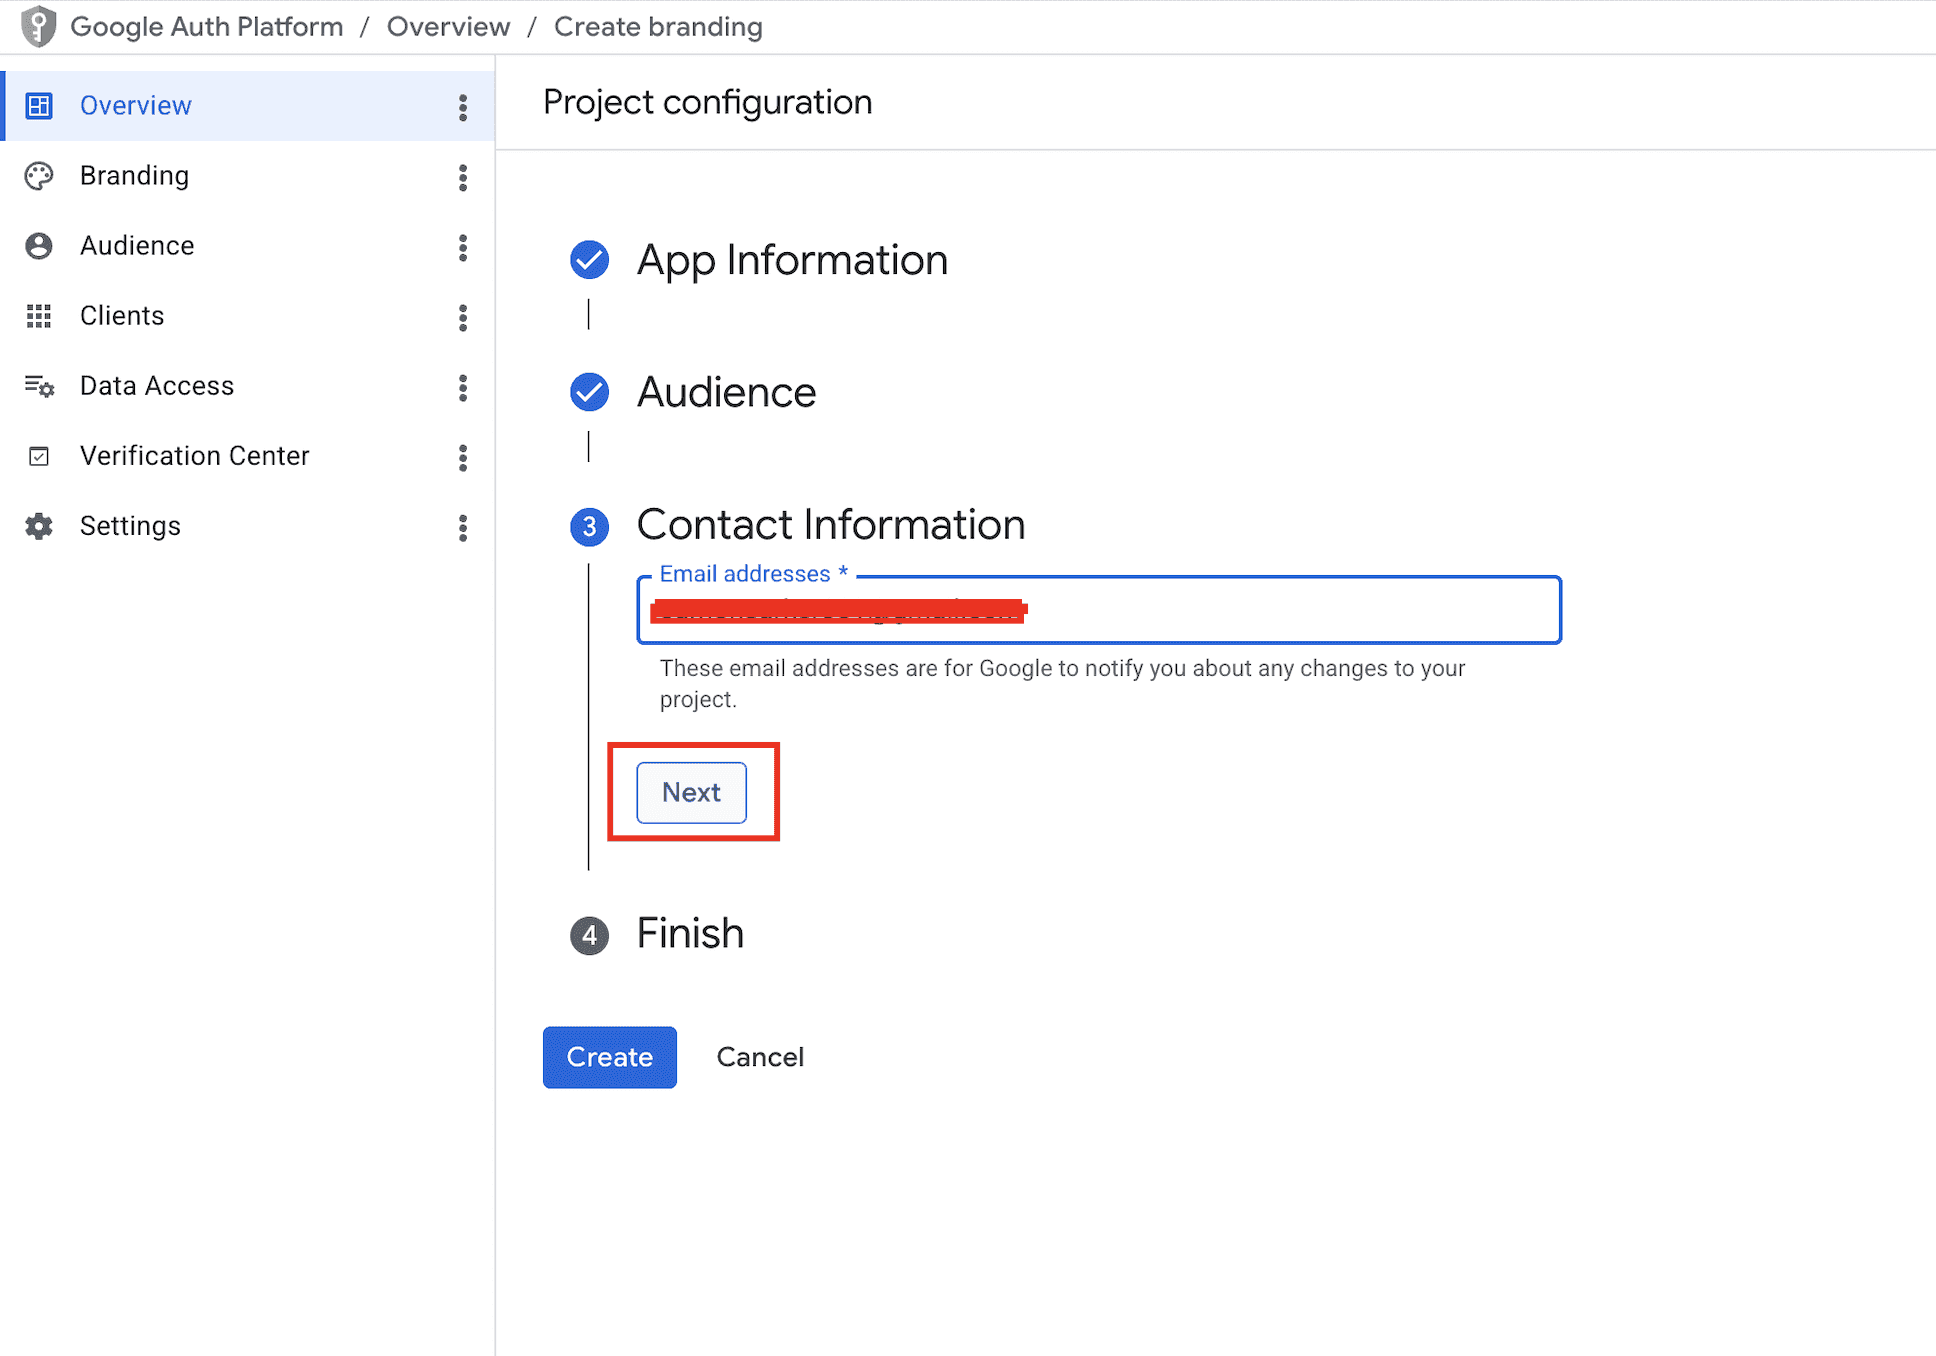
Contact Information
Enter the email Google should use to notify you about project changes (usually your own Google account email). Click Next.
Agree to the API Services policy
Tick the I agree to the Google API Services: User Data Policy checkbox and click Continue.

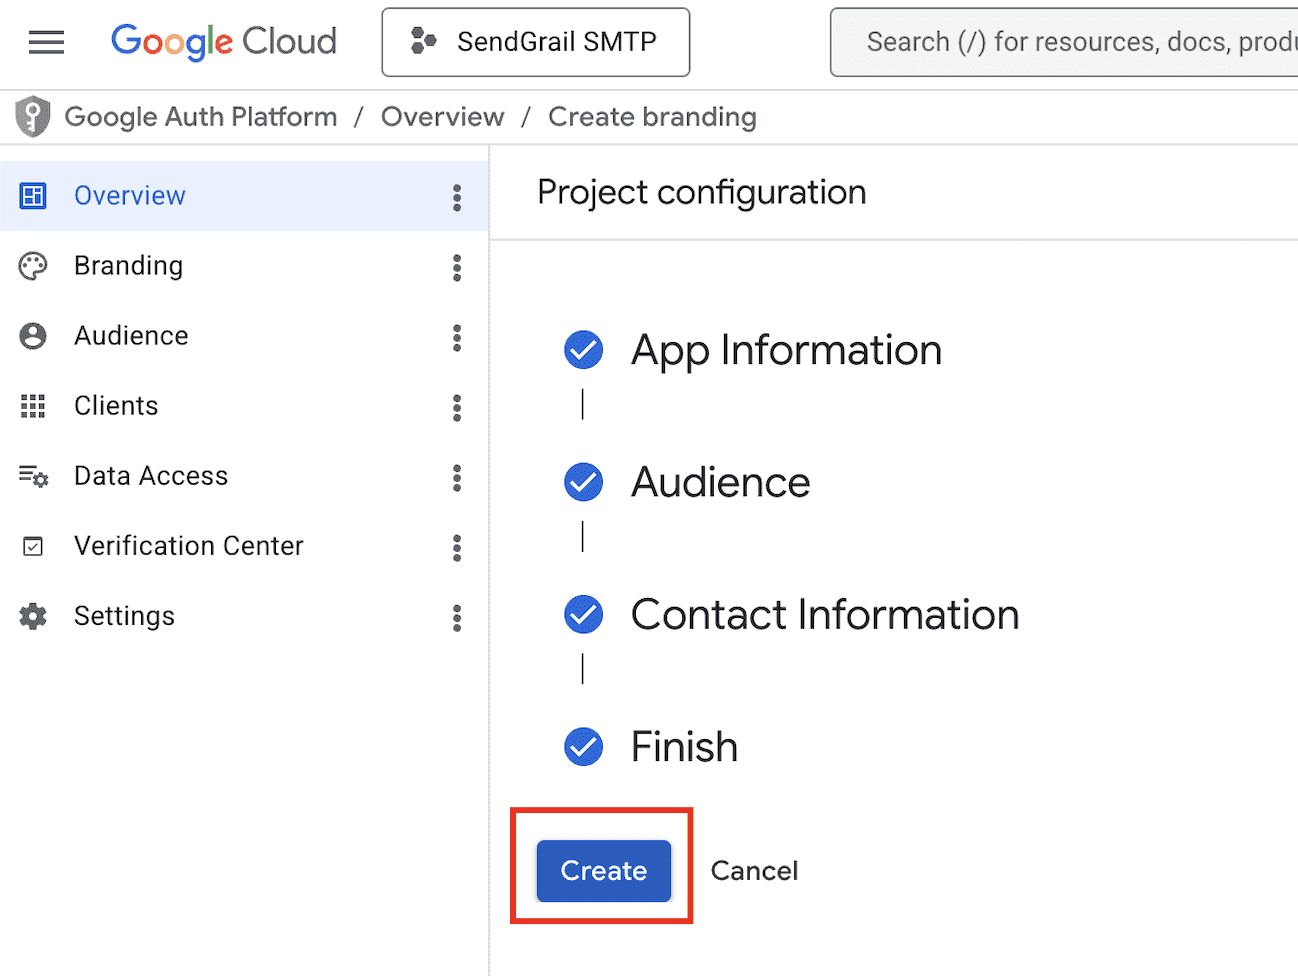
Create the consent screen
All four steps now show checkmarks. Click Create to finalize the OAuth consent screen.
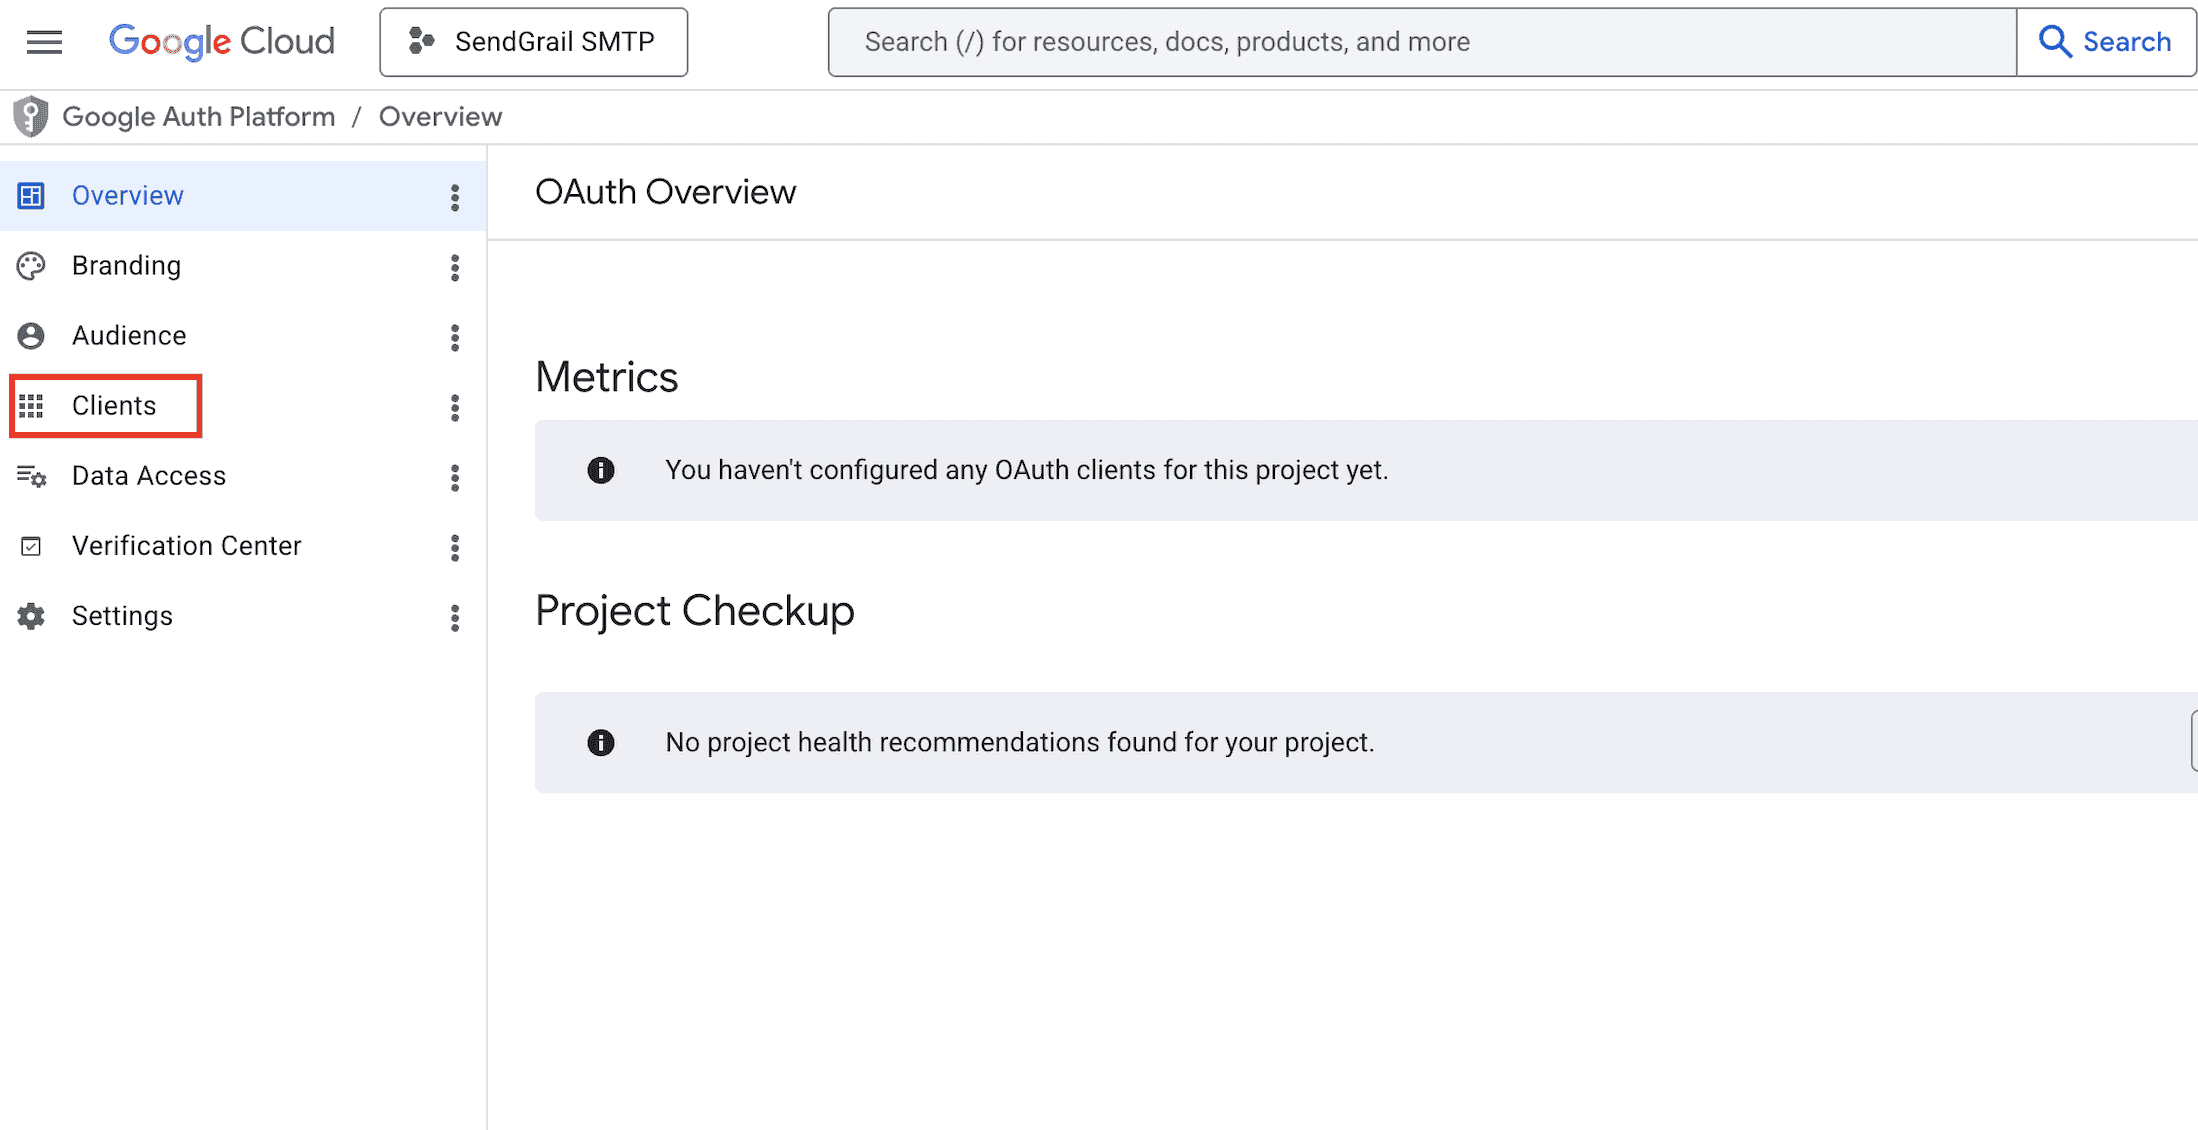
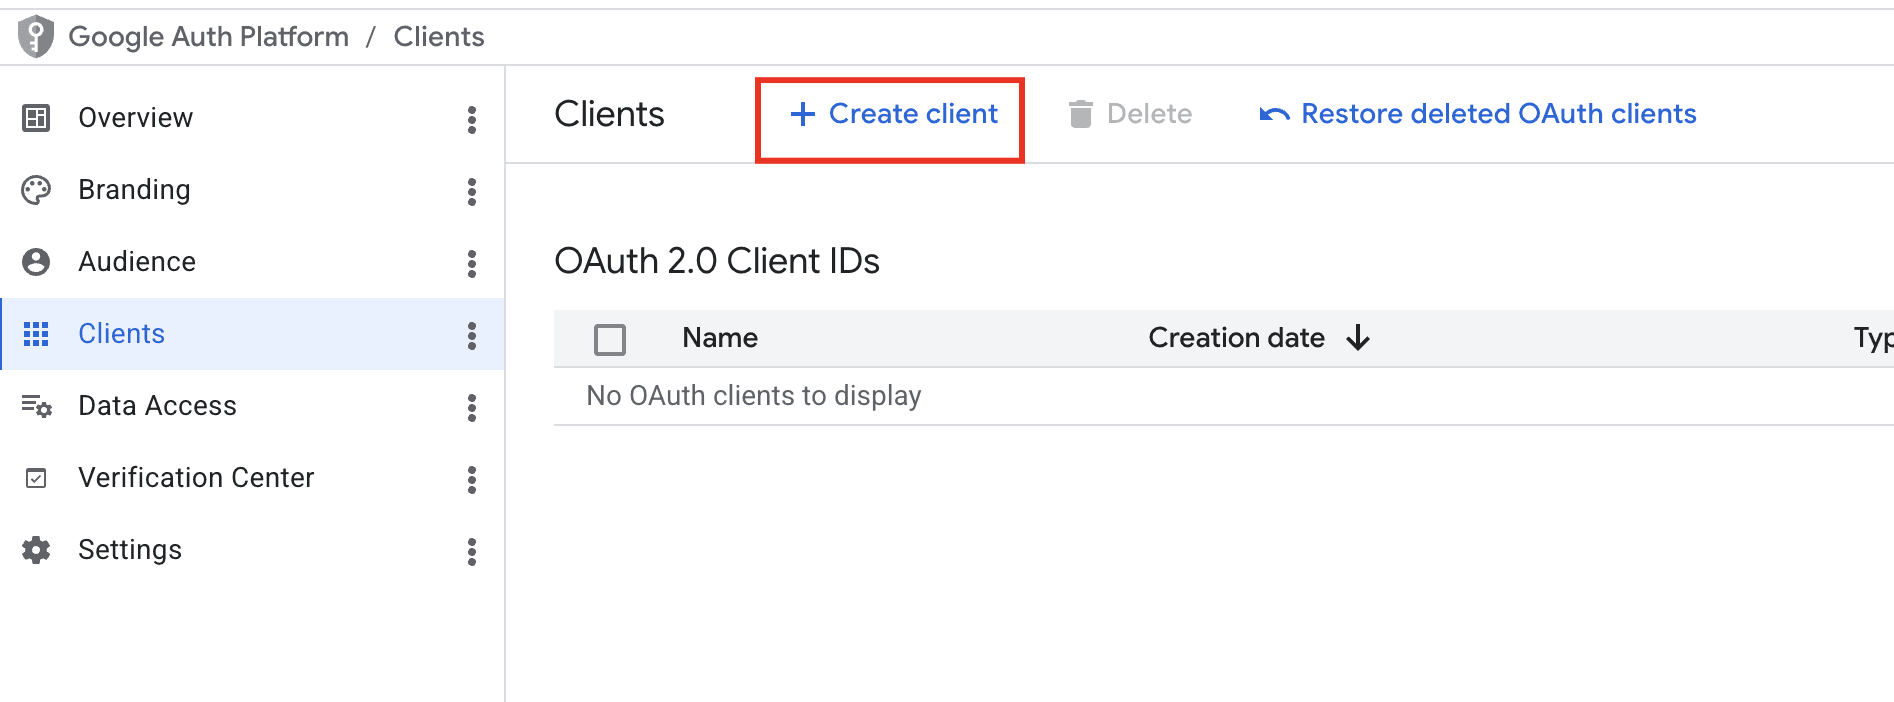
Open the Clients tab
In the Google Auth Platform left sidebar, click Clients. The page shows "You haven't configured any OAuth clients for this project yet."
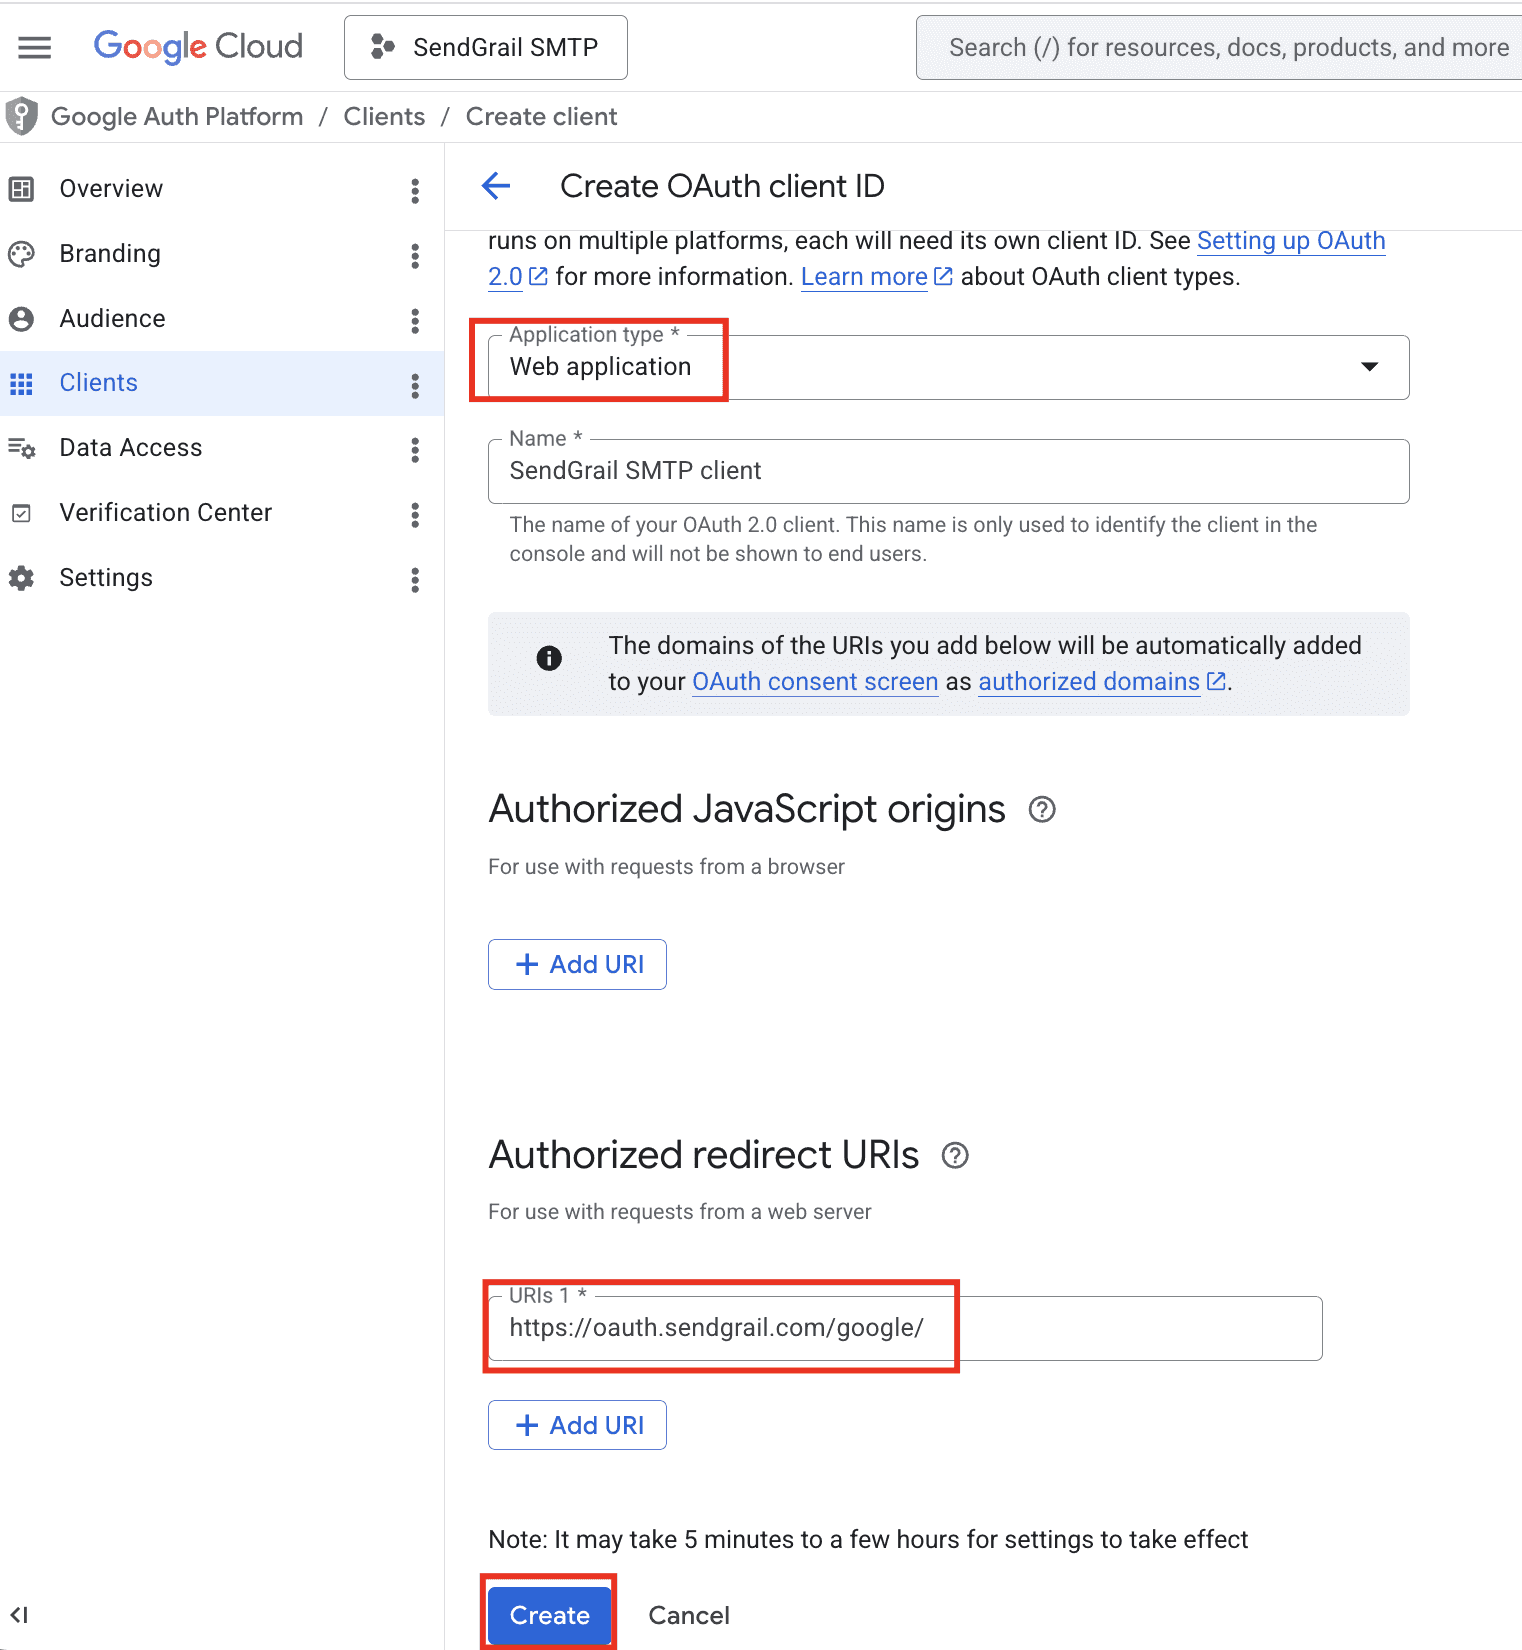
Configure the OAuth client
Fill in:
- Application type: Web application.
- Name:
SendGrail SMTP client(or anything). - Authorized redirect URIs: paste the redirect URI shown in SendGrail's Add Connection form. It looks like
https://oauth.sendgrail.com/google/— SendGrail uses a centralized OAuth proxy that forwards the callback to your WordPress site.
Click Create.
Redirect URI must match exactly
Google rejects the OAuth flow with redirect_uri_mismatch if there's any character difference — including a missing trailing slash. Copy-paste verbatim from SendGrail.
Copy the Client ID and Client secret
Google displays the Client ID and Client secret in a one-time dialog. Click each copy icon and paste both into a notes app (you'll need them in the SendGrail step). Click OK when done.
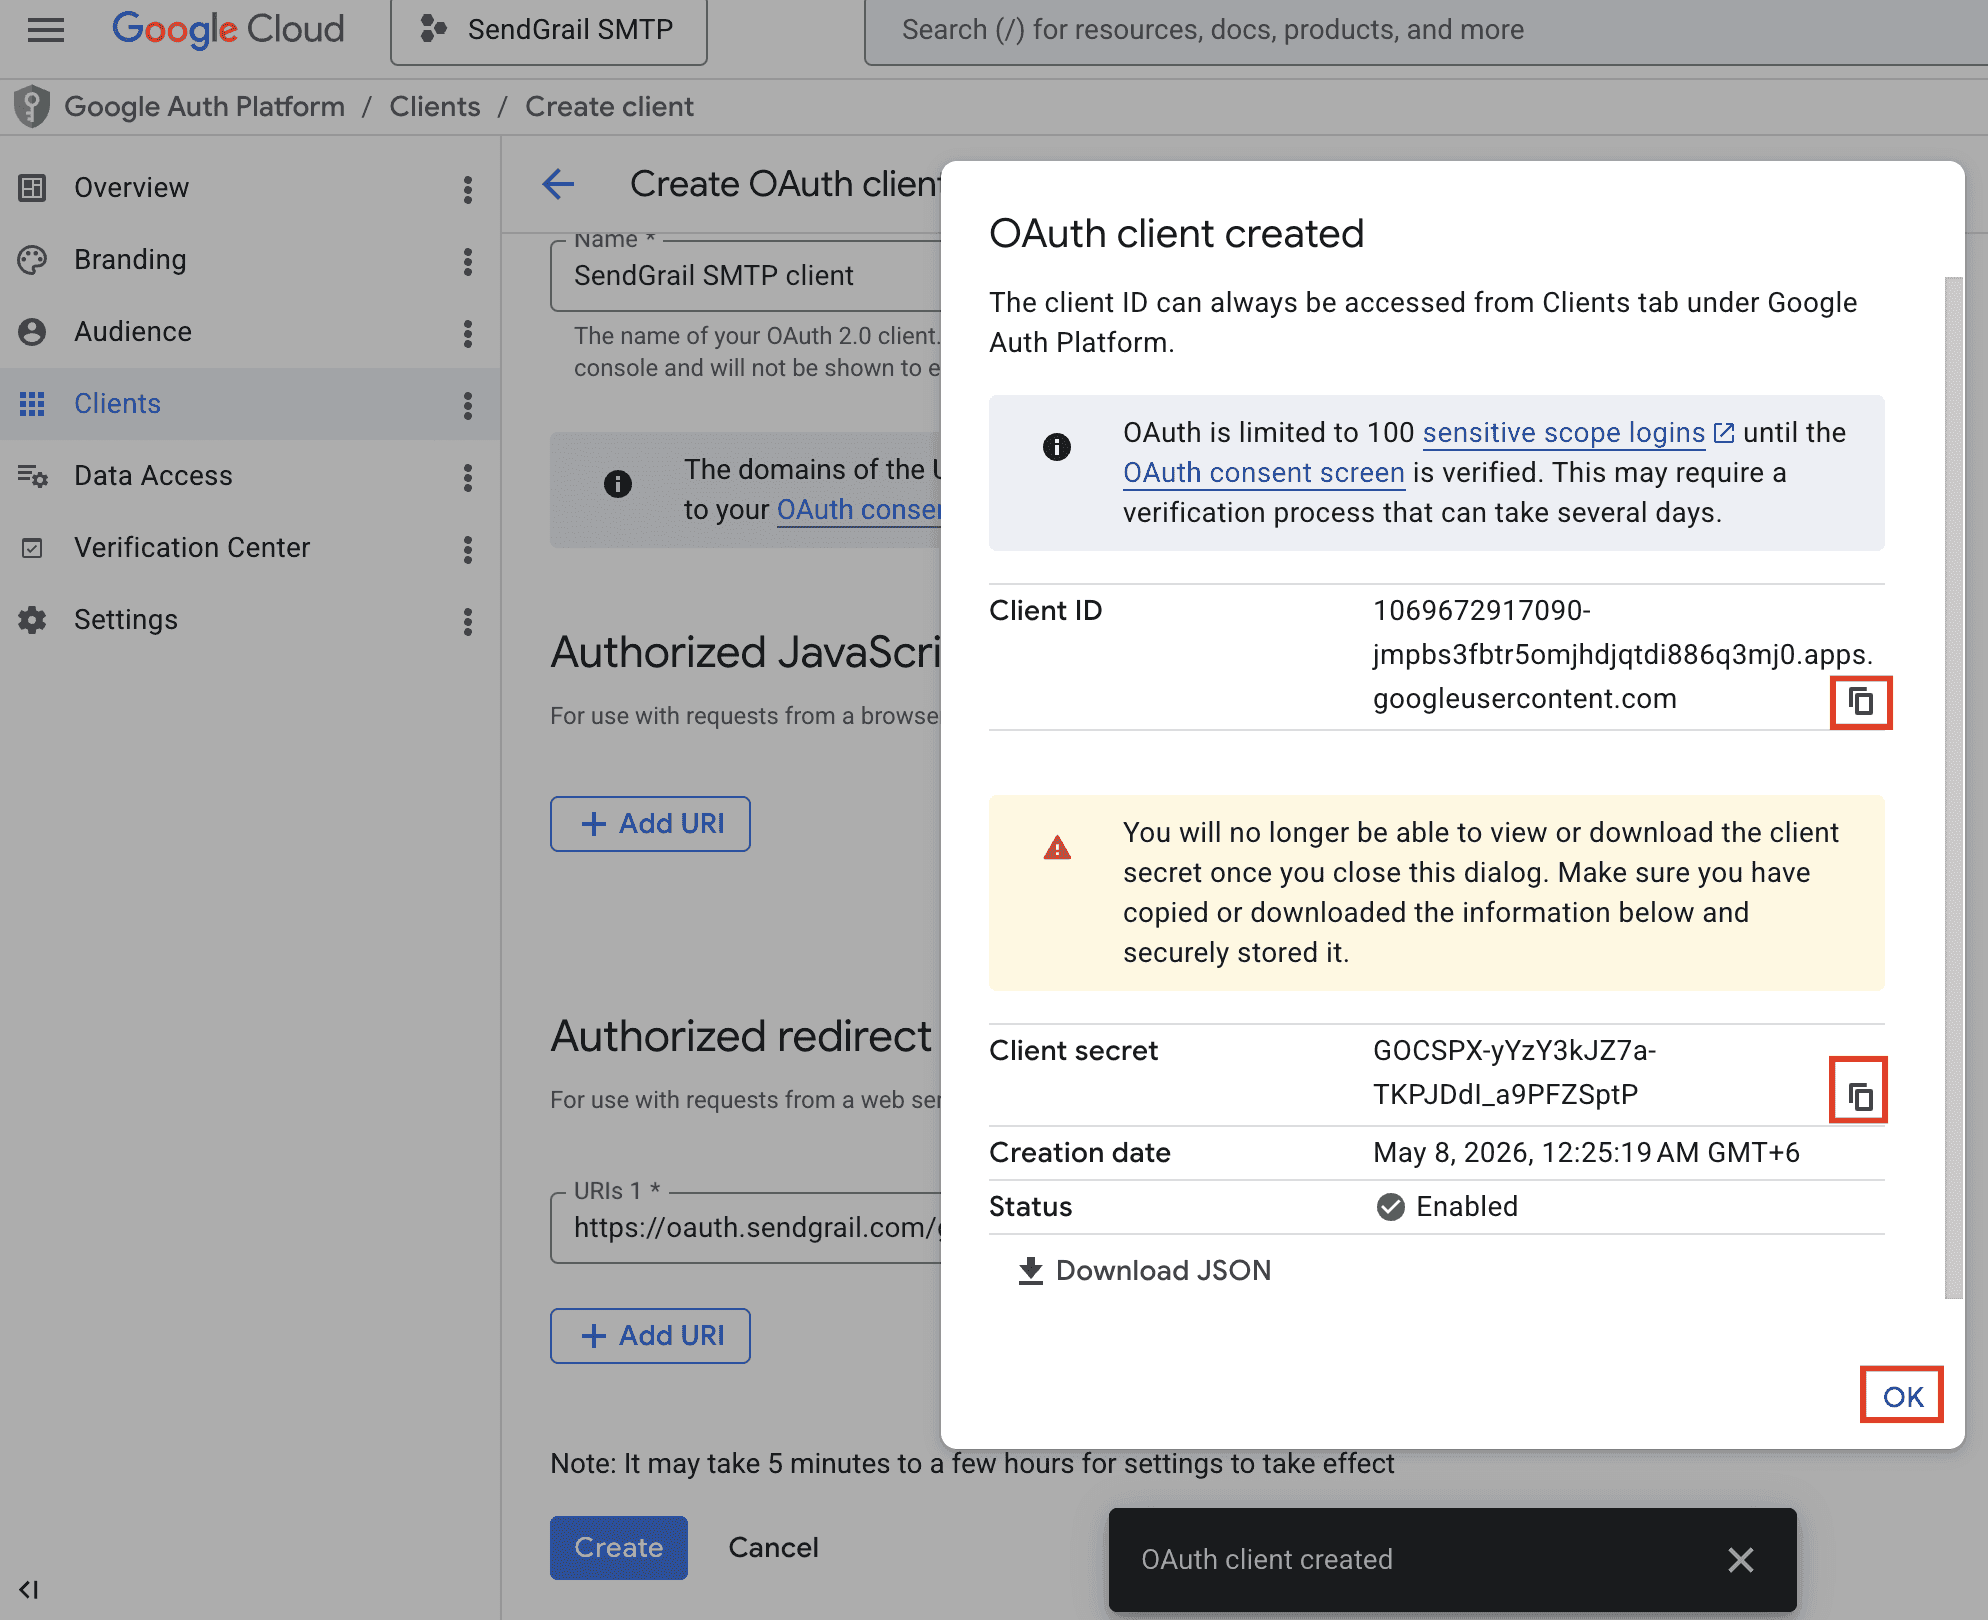
You can only view the secret once
Once you close this dialog, the Client secret is hidden permanently. If you lose it, you'd have to delete the OAuth client and create a new one.
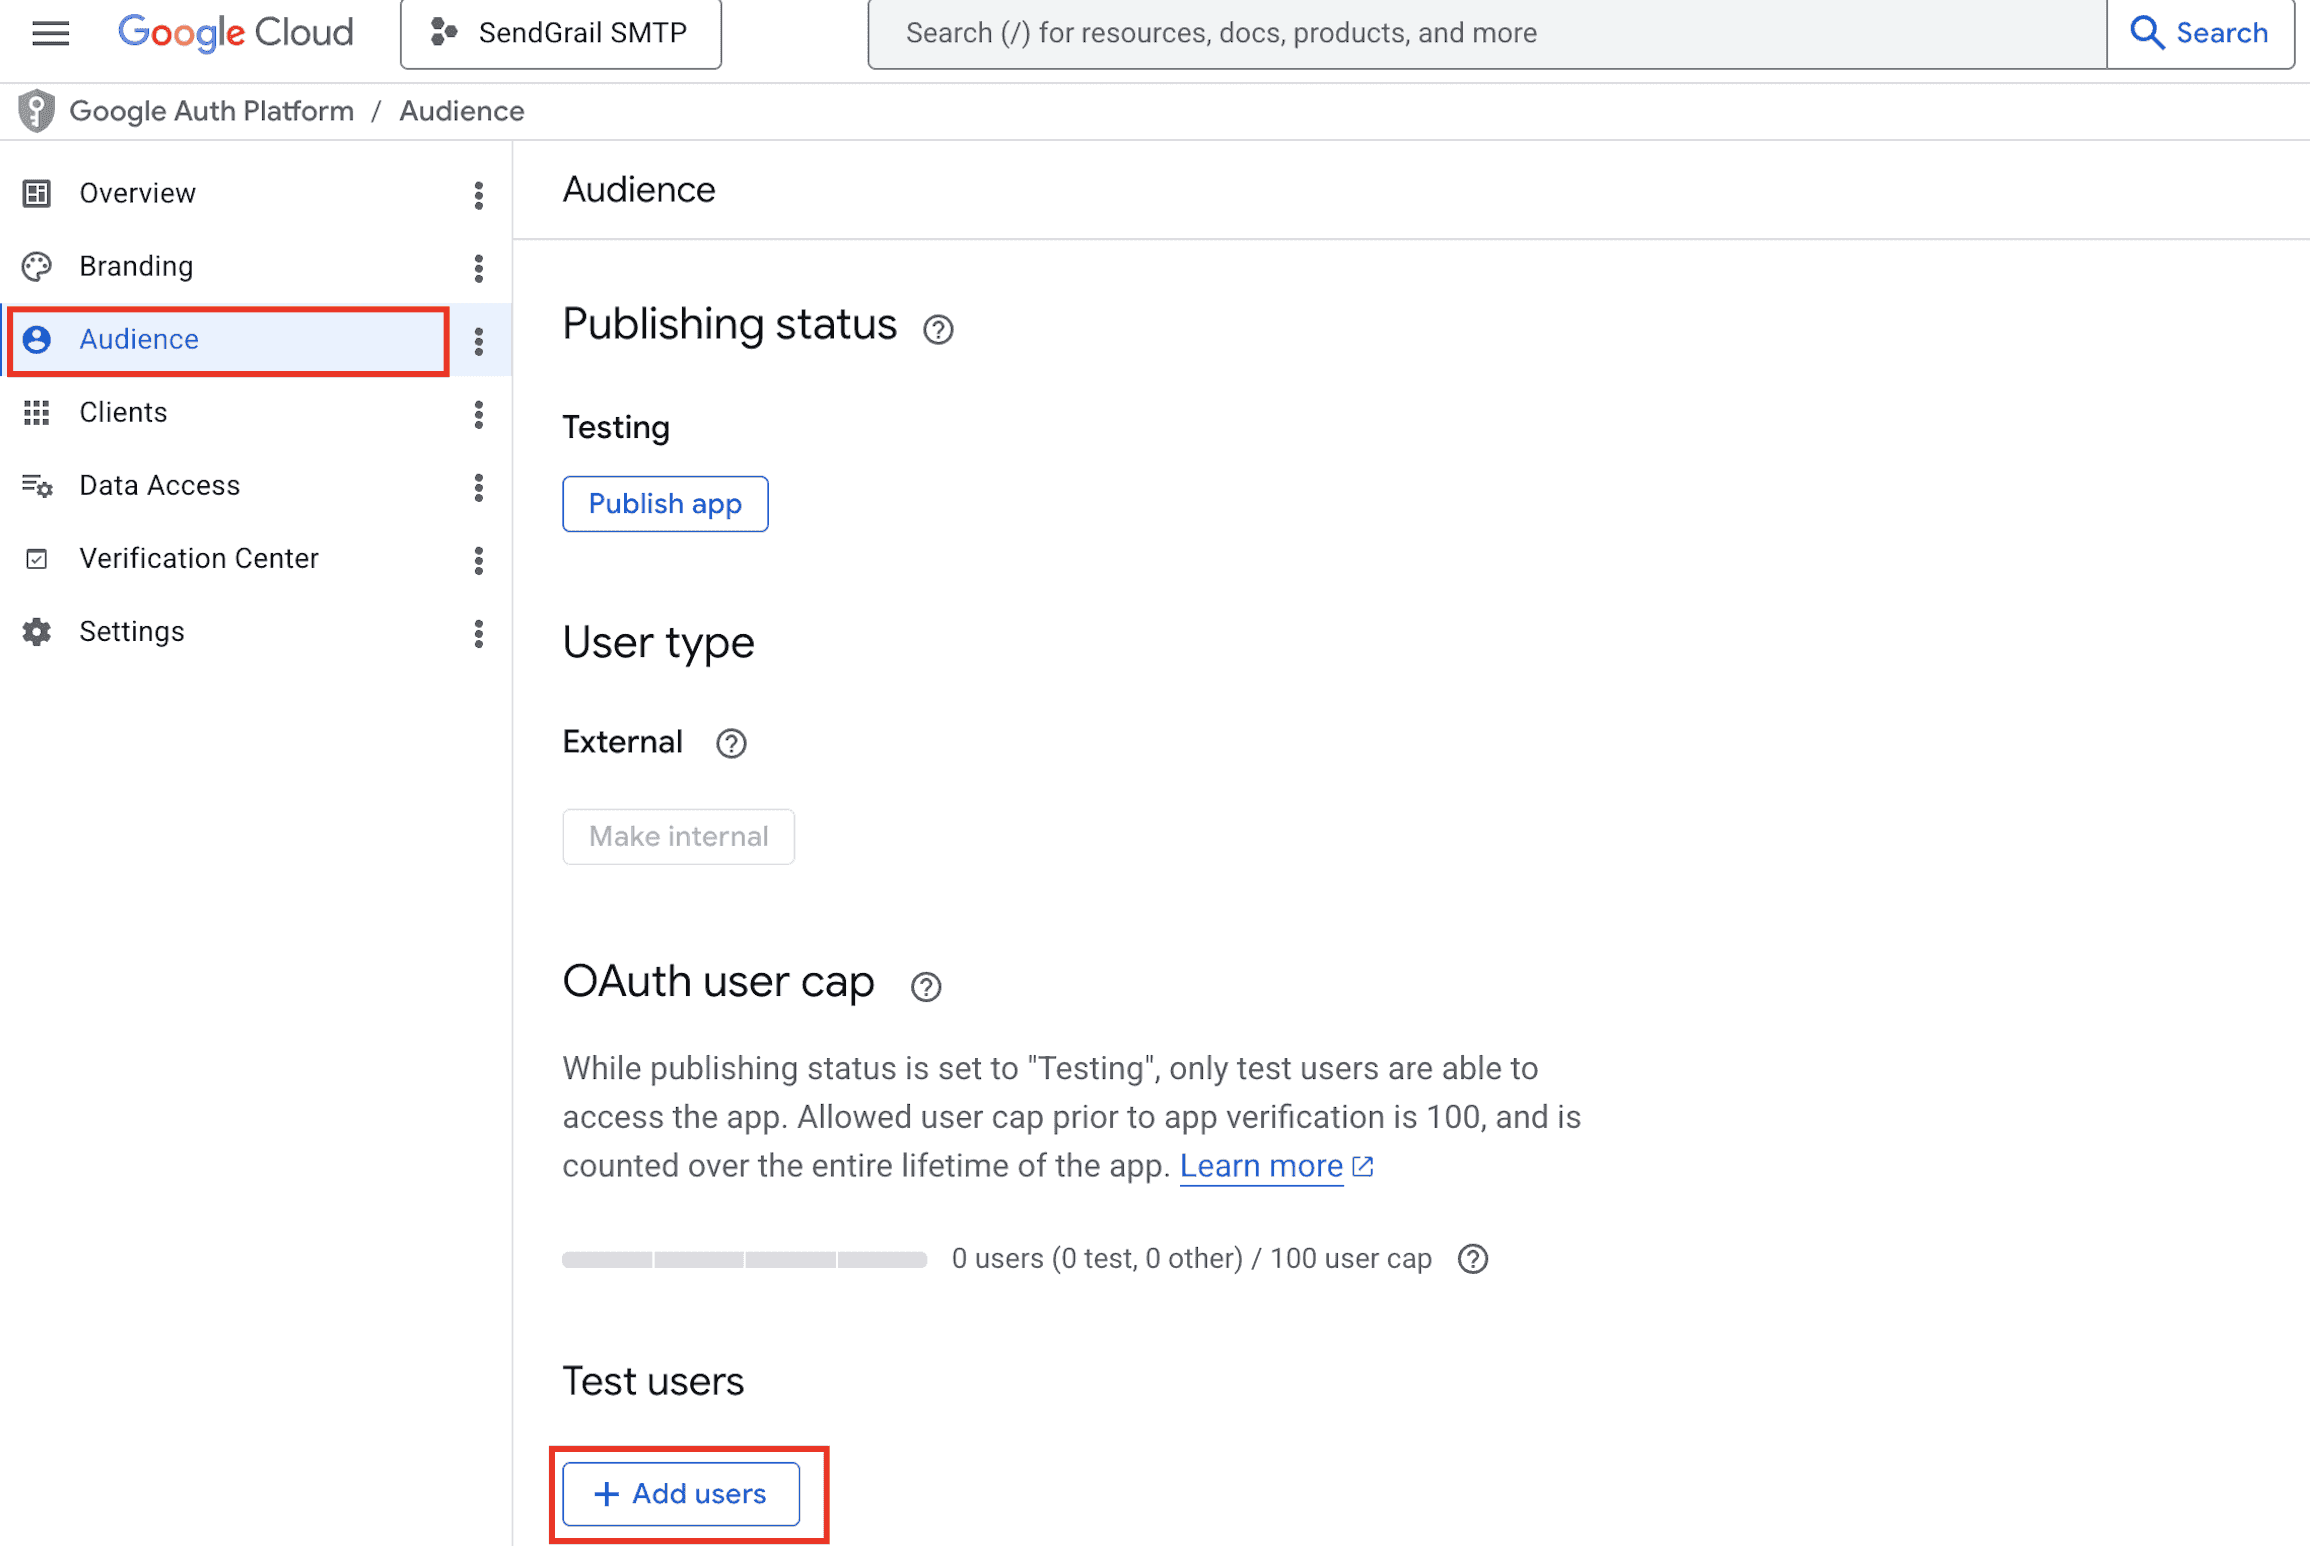
Add yourself as a Test User
While your OAuth app is in Testing mode, only listed Test Users can authorize it. In the Google Auth Platform left sidebar, click Audience, scroll to Test users, and click + Add users.
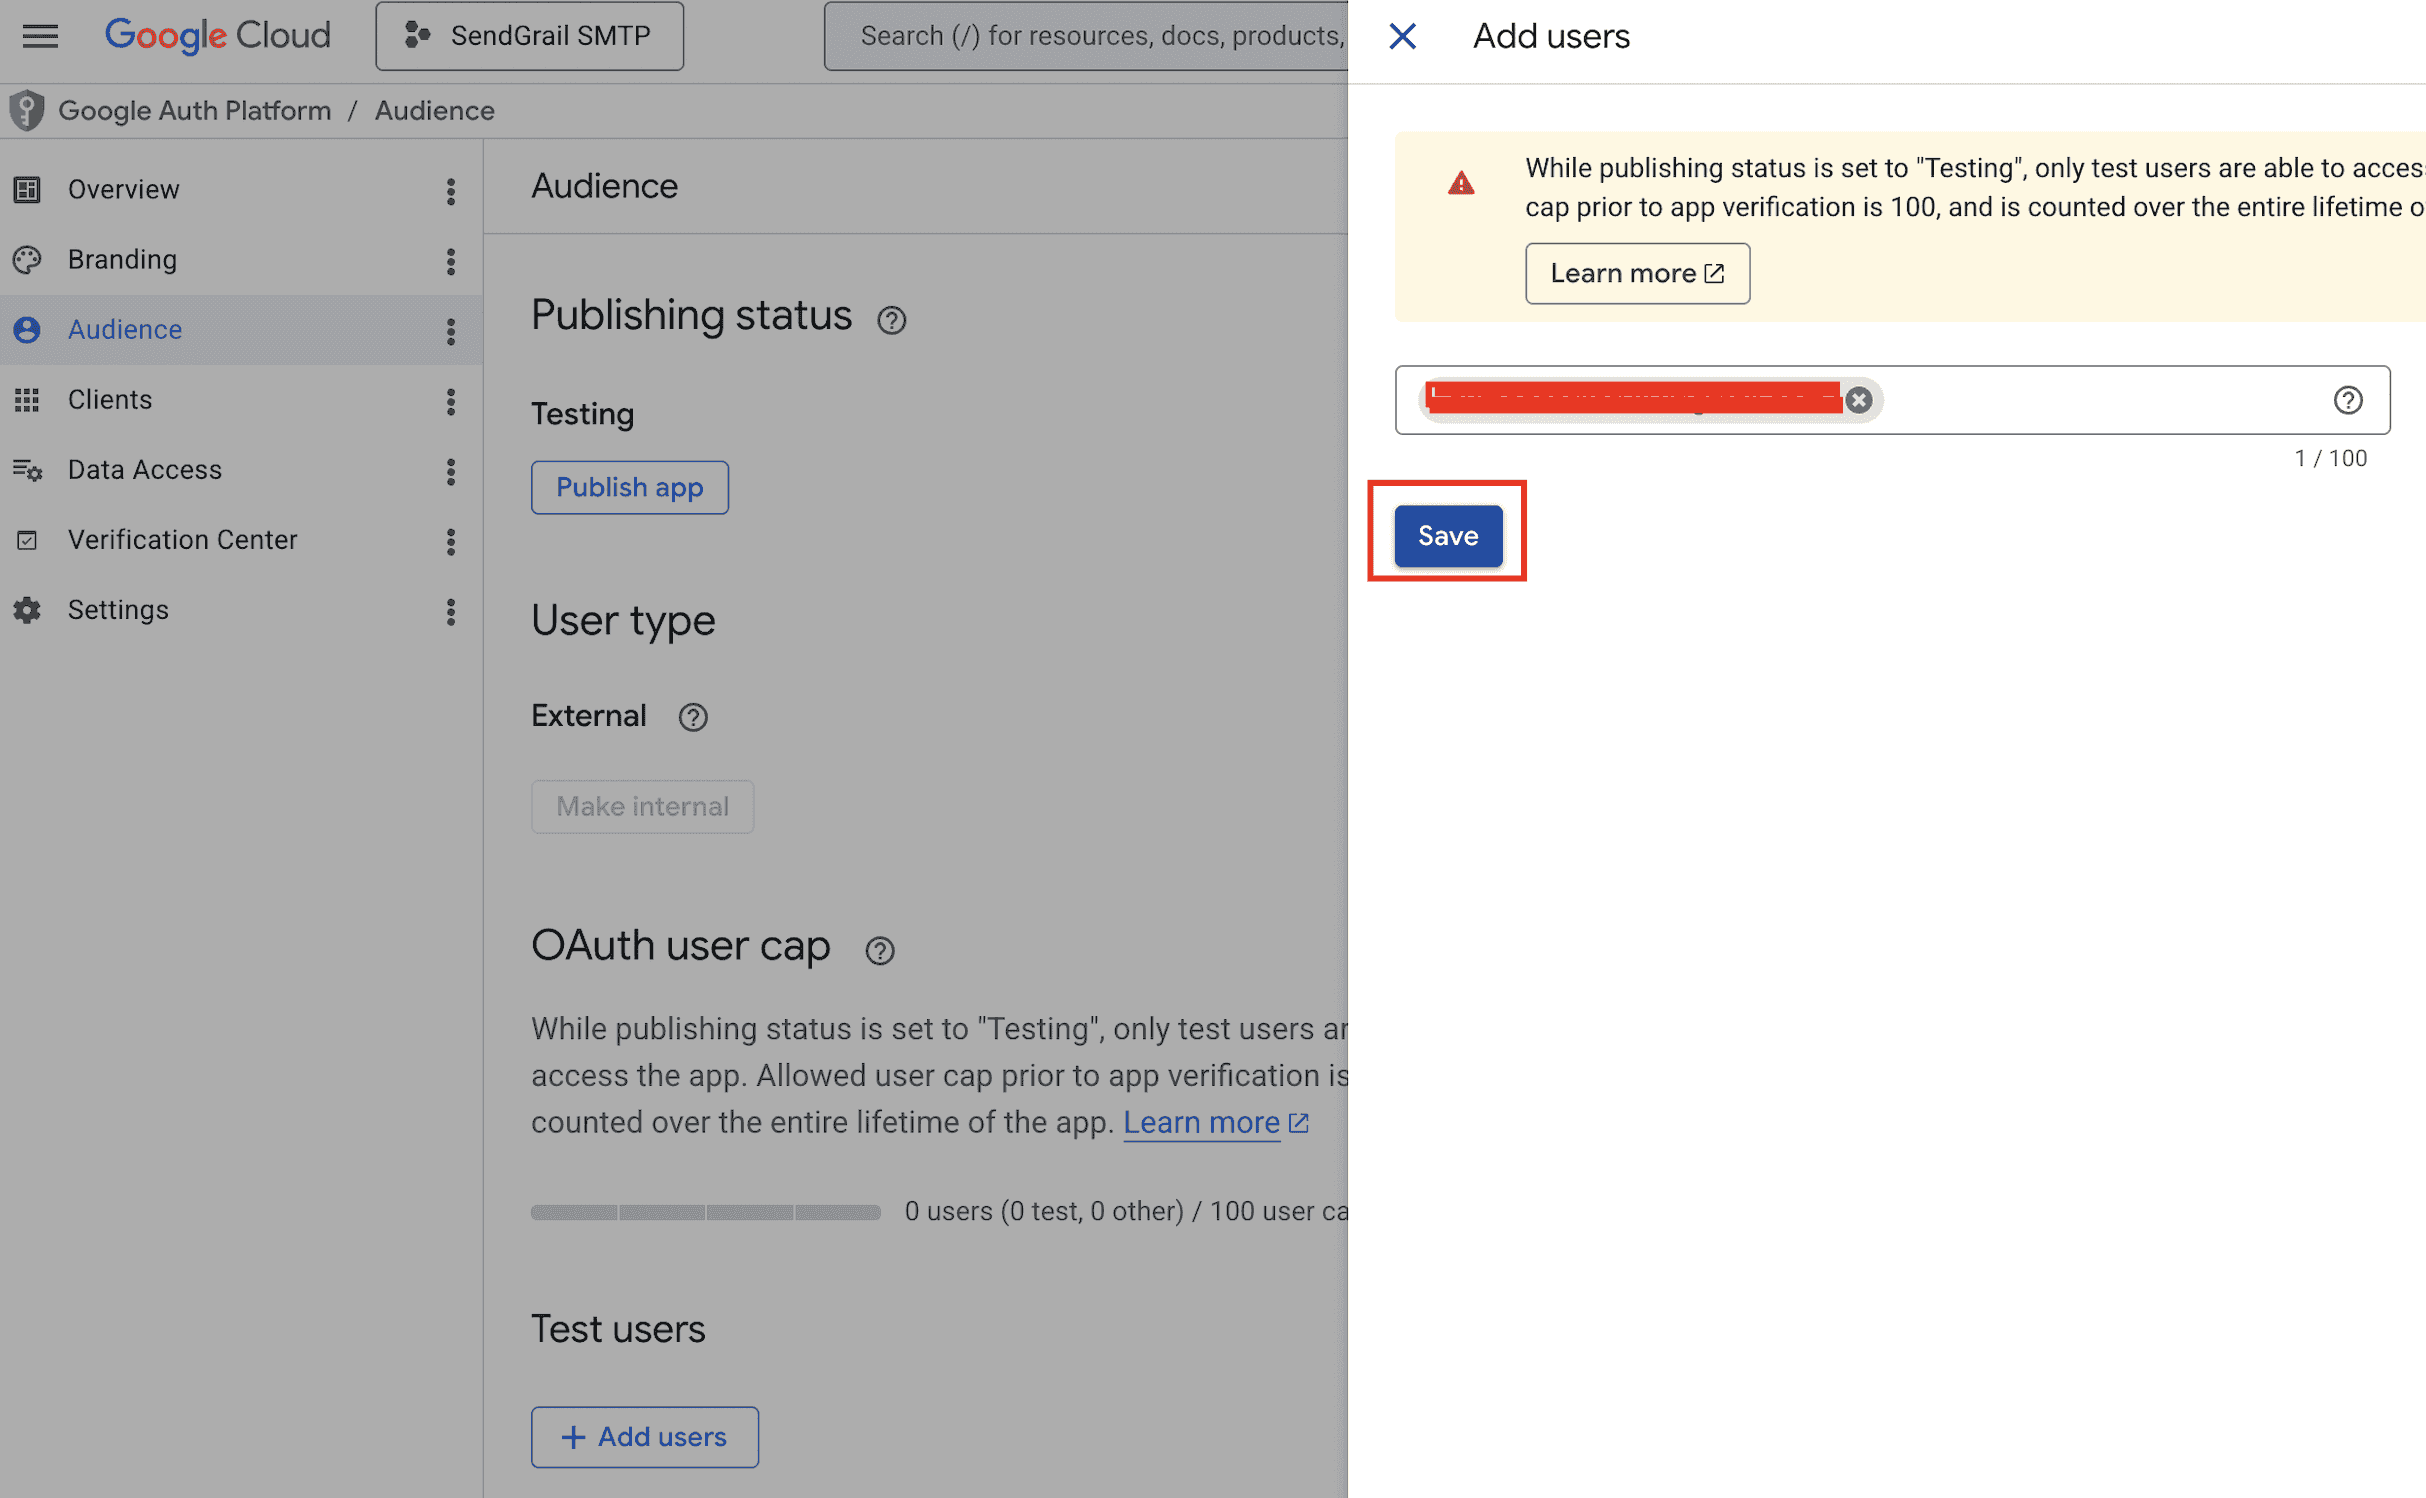
In the side panel, enter the email address of the account you want to send from and click Save.
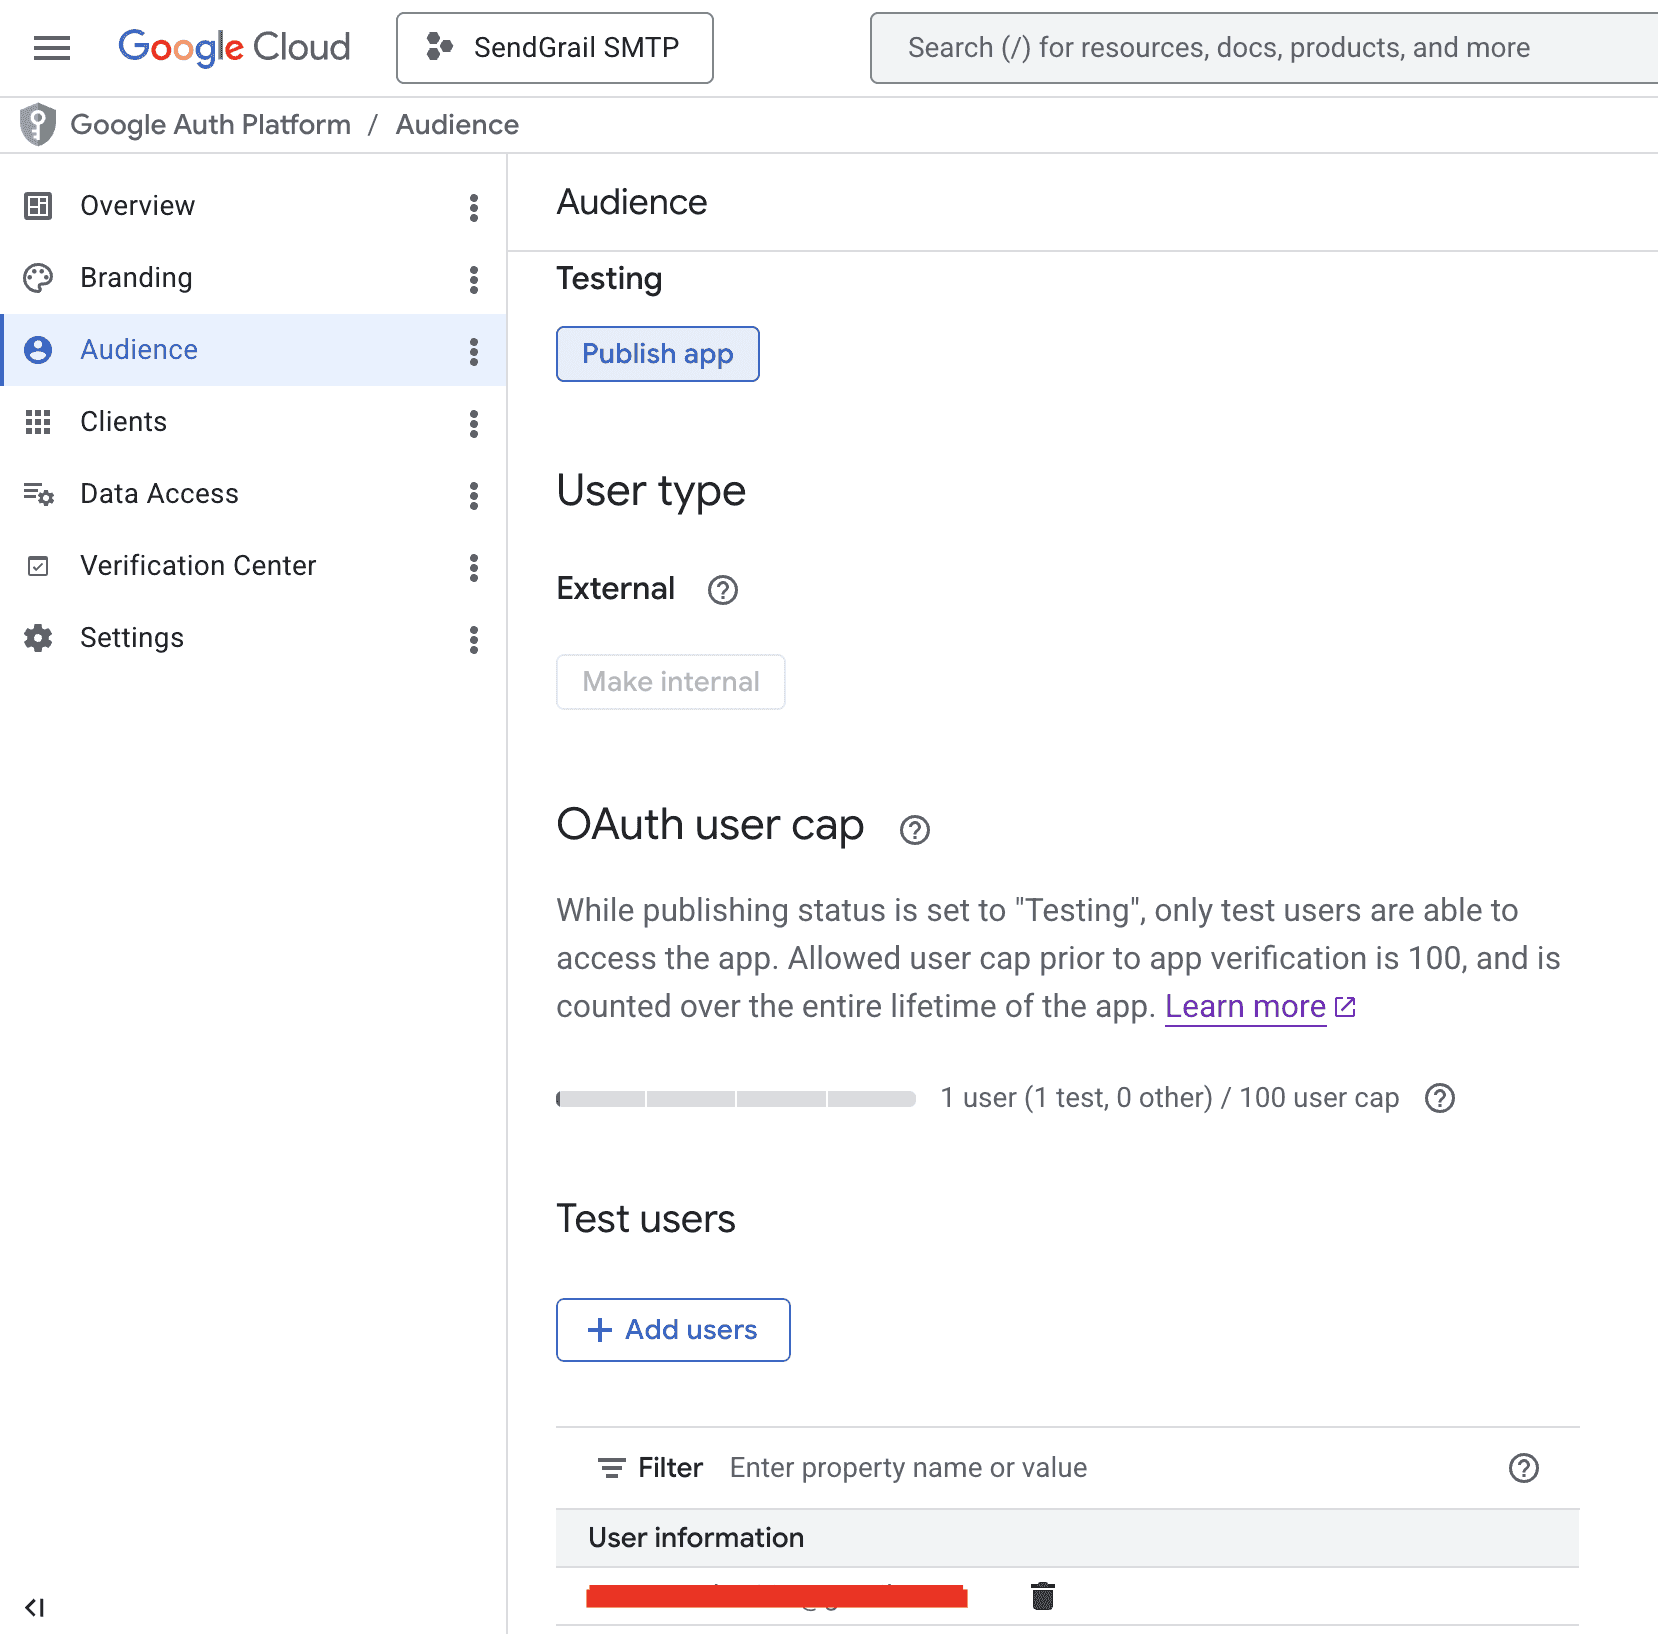
The user appears in the Test users list. The OAuth user cap line will now read "1 user (1 test, 0 other) / 100 user cap".
(Optional) Publish the app
Test Users get refresh tokens that expire every 7 days. To remove that limit, click Publish app under the Publishing status heading. The app moves to In production — refresh tokens then last indefinitely.

When to publish vs stay in Testing
Stay in Testing if you'll only ever authorize one or two of your own accounts — re-auth weekly is mildly annoying but takes 10 seconds. Publish if you want a permanent setup. Publishing only requires app verification when you request sensitive scopes (like reading mail) — the gmail.send scope SendGrail uses is non-sensitive, so publishing is instant and free.
Add the connection in SendGrail
WordPress admin → SendGrail → Connections → Add Connection → pick Gmail / Google Workspace → switch to OAuth 2.0.
Fill in:
- Connection Name:
Workspace Gmail(or any descriptive label). - From Email: the Google email address you added as a Test User.
- From Name: display name shown to recipients.
- OAuth Client ID: paste from step 17.
- OAuth Client Secret: paste from step 17.
Click Save.
Authenticate
On the saved connection, click Authenticate. A new tab opens to Google's OAuth consent screen.
Pick the Google account that matches your From Email and approve the requested permissions (Send email on your behalf). If you see a "This app isn't verified" warning, click Advanced → Go to SendGrail SMTP App (unsafe) — this is expected while the app is in Testing mode.
Google redirects back to SendGrail and the connection flips to Connected.
Test
SendGrail → Test Email → pick this connection → send to yourself. Should arrive within seconds.
Token rotation
OAuth refresh tokens don't expire (in normal use). Access tokens auto-rotate every 60 minutes — SendGrail handles this transparently. You won't need to re-authorize unless:
- You revoke the OAuth client in Google Cloud Console.
- The Workspace user removes app access at myaccount.google.com/permissions.
- Your Workspace admin disables third-party app access organization-wide.
- You change the OAuth Client ID or Secret on the connection.
Troubleshooting
Error 400: redirect_uri_mismatch
The Authorized redirect URI in your Cloud Console OAuth client doesn't match what SendGrail sent. Open Google Auth Platform → Clients → SendGrail SMTP client, and paste the redirect URI exactly as shown in SendGrail's connection form (no missing trailing slash, exact protocol). Save and retry.
Error 403: org_internal
The OAuth client is set to Internal but you're authorizing with an account outside the Workspace org. Switch the consent screen to External in Google Cloud Console, or authorize with an in-org account.
Access blocked: Authorization Error
The OAuth client is in production-publish mode but hasn't passed Google's verification. For self-hosted apps that only your team uses, keep the consent screen status as Testing and add your Workspace users as Test Users in the OAuth consent screen settings.
Token refresh fails after a few weeks
If you're in Testing mode, Google rotates refresh tokens every 7 days. Either:
- Add a Brand to the consent screen and submit for verification (production mode → tokens never expire), or
- Move to Internal for Workspace-only access (no expiry, no verification needed).
failedPrecondition: User has not enabled access
Your Workspace admin has restricted third-party app access. Ask them to enable Gmail API access for your account, or whitelist your OAuth client at admin.google.com → Security → API Controls.
Emails send but show as "via" some other domain
Gmail's "Show original" header trace will display via Sendgrail SMTP Project or similar — this is expected and matches the Cloud project name. Recipients usually don't see this. If it's noticeable, rename your Cloud project to your brand name.
Multiple Workspace mailboxes
You can authorize multiple Workspace accounts against the same OAuth client. Each becomes a separate connection in SendGrail with its own refresh token. Useful if you want different mailboxes for support / sales / marketing emails routed via Email Routing rules.
What's next
- Email Routing — route specific emails through this Workspace connection while others go elsewhere.
- Failure Alerts — get notified in Slack/Telegram if OAuth tokens stop working.
- Test & Simulate — preview which connection an email would use without sending.