Appearance
Zoho Mail
Zoho Mail via OAuth + API
Send through your Zoho Mail / Zoho Workplace mailbox using Zoho's official Mail API. No SMTP password — OAuth tokens rotate automatically.
Why API and not SMTP?
SendGrail's Zoho integration uses Zoho's Mail Send API over OAuth, not SMTP with an App Password. Tokens rotate on their own, no plaintext credentials are stored, and you don't need to keep an SMTP password in your WordPress database.
Prerequisites
- A Zoho Mail / Zoho Workplace account (free or paid).
- WordPress admin access.
- Your Zoho region / data center — Zoho hosts mailboxes per region (US, EU, IN, AU, JP, CN, CA) and the OAuth flow must use the matching region. If you're not sure which one you're on, jump to step 5 first to confirm it, then come back to step 1.
Quick region check
Sign into your Zoho Mail webapp and look at the URL. mail.zoho.com → com (US), mail.zoho.eu → eu, mail.zoho.in → in, etc. Use that region throughout: register the OAuth client on api-console.zoho.<region> and pick the matching region inside SendGrail.
Step-by-step
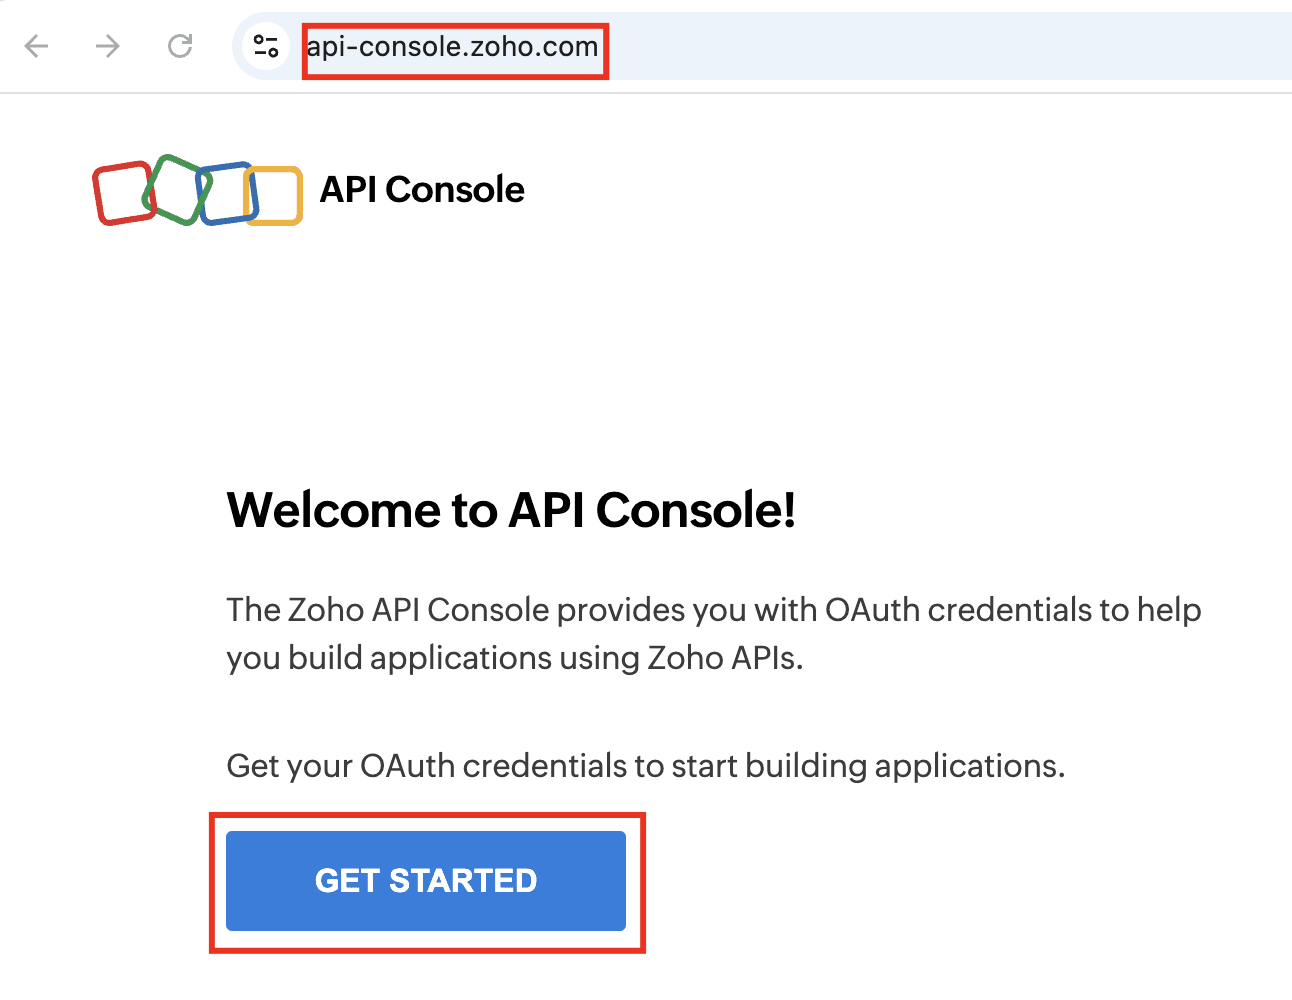
Open the Zoho API Console
Go to the API console for your region and click Get Started.
Sign in with the same Zoho account that owns the mailbox you want to send from.
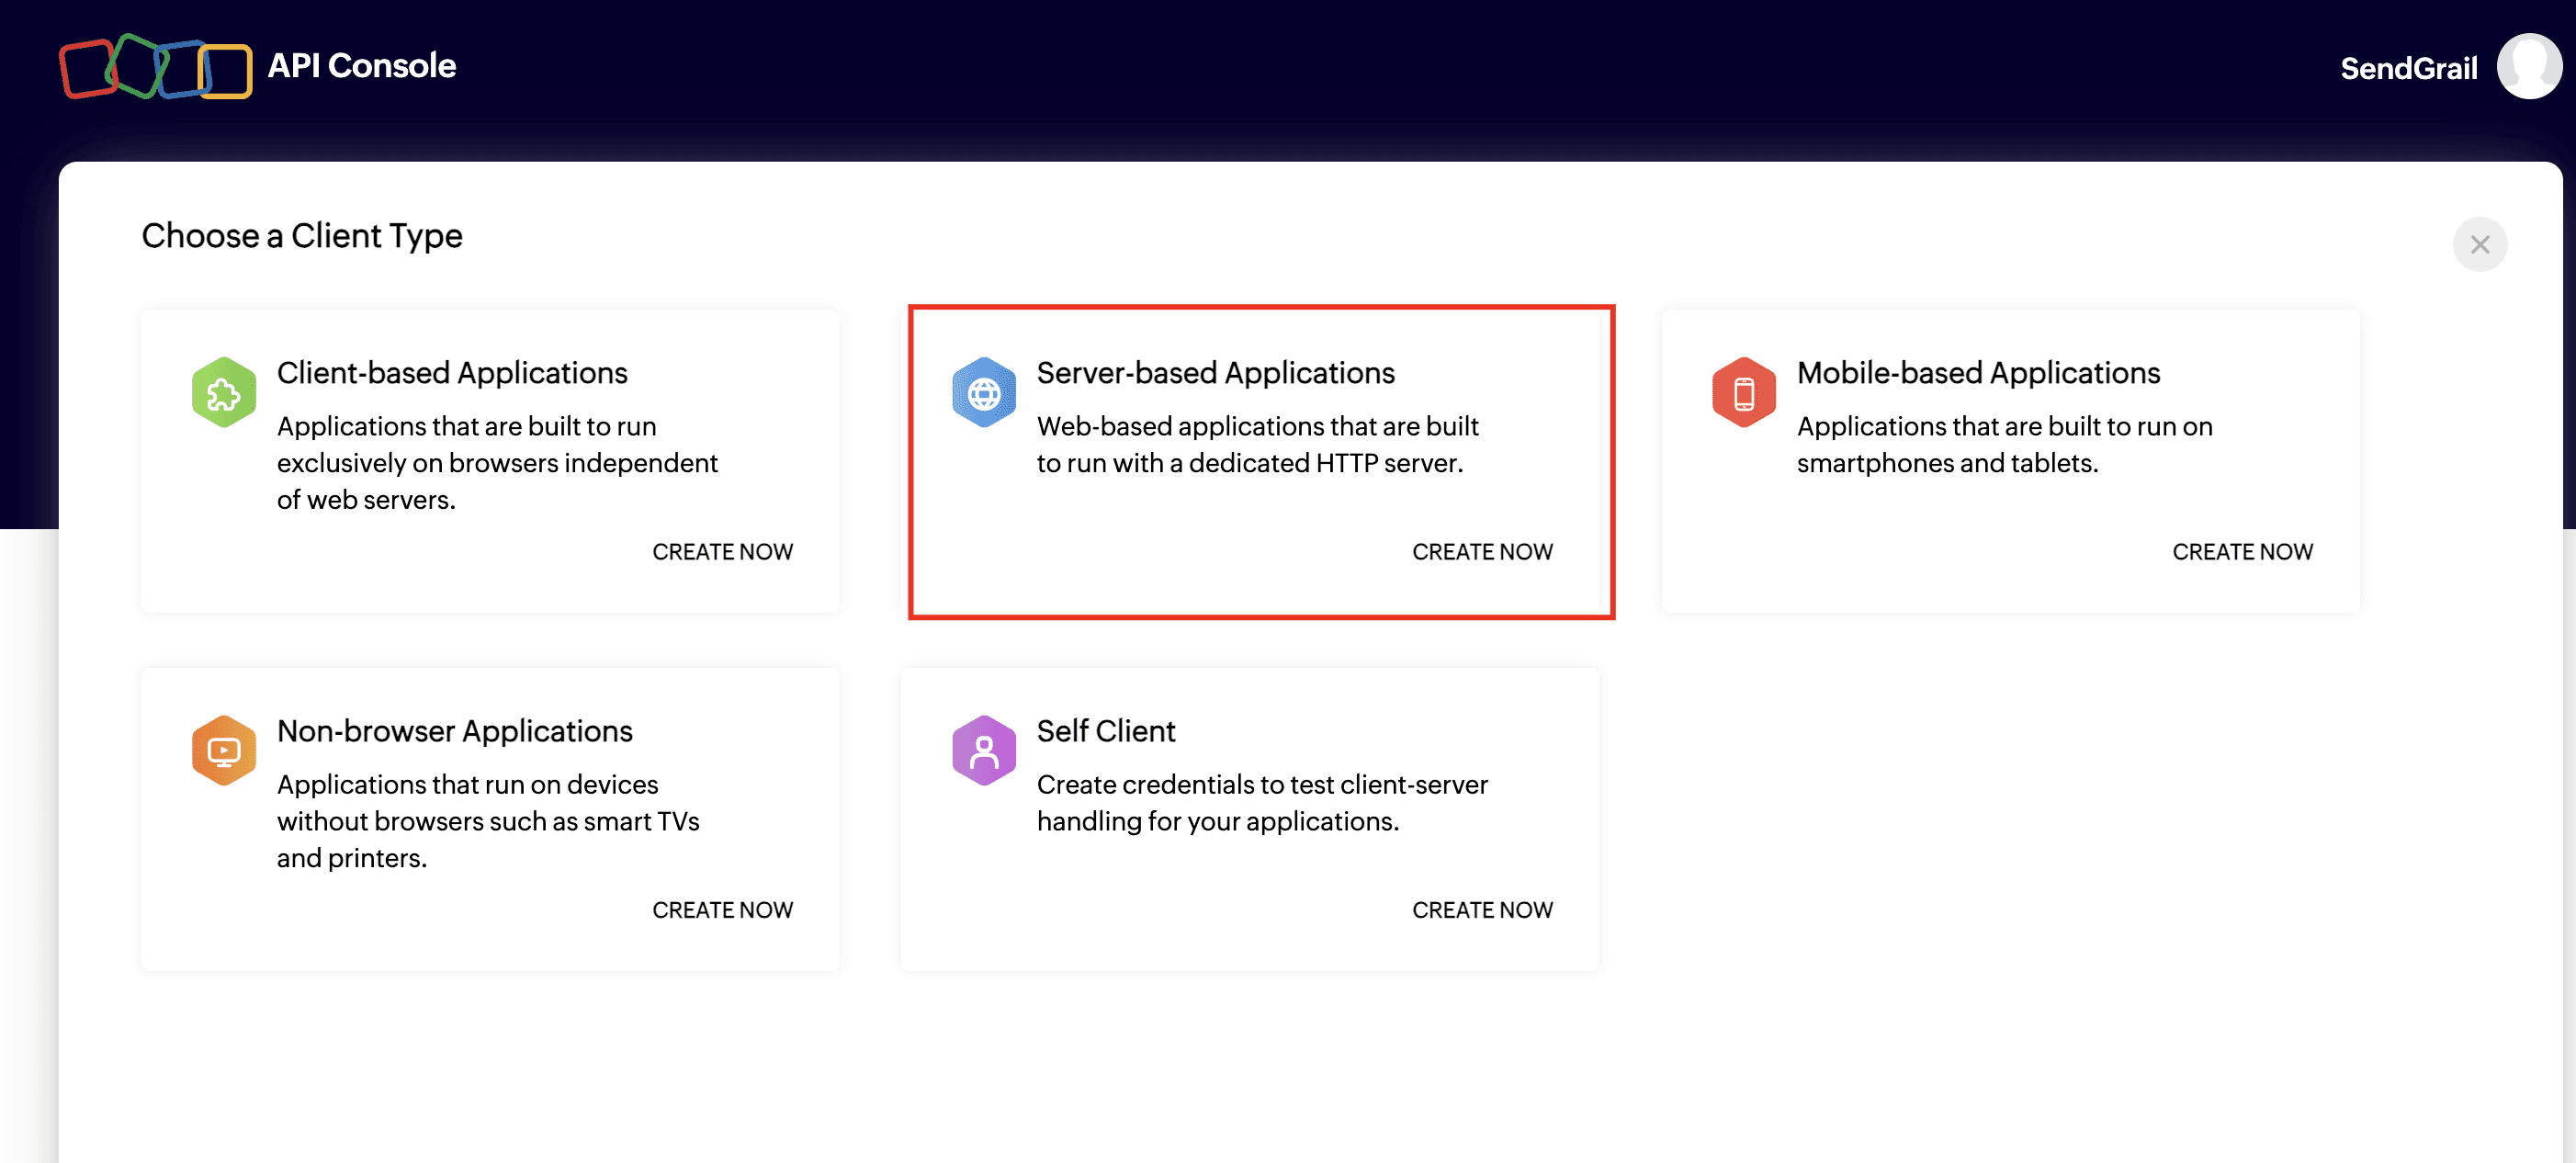
Pick "Server-based Applications"
From the Choose a Client Type screen, click Create Now under Server-based Applications — that's the right type for SendGrail because the OAuth flow runs server-side from your WordPress site.
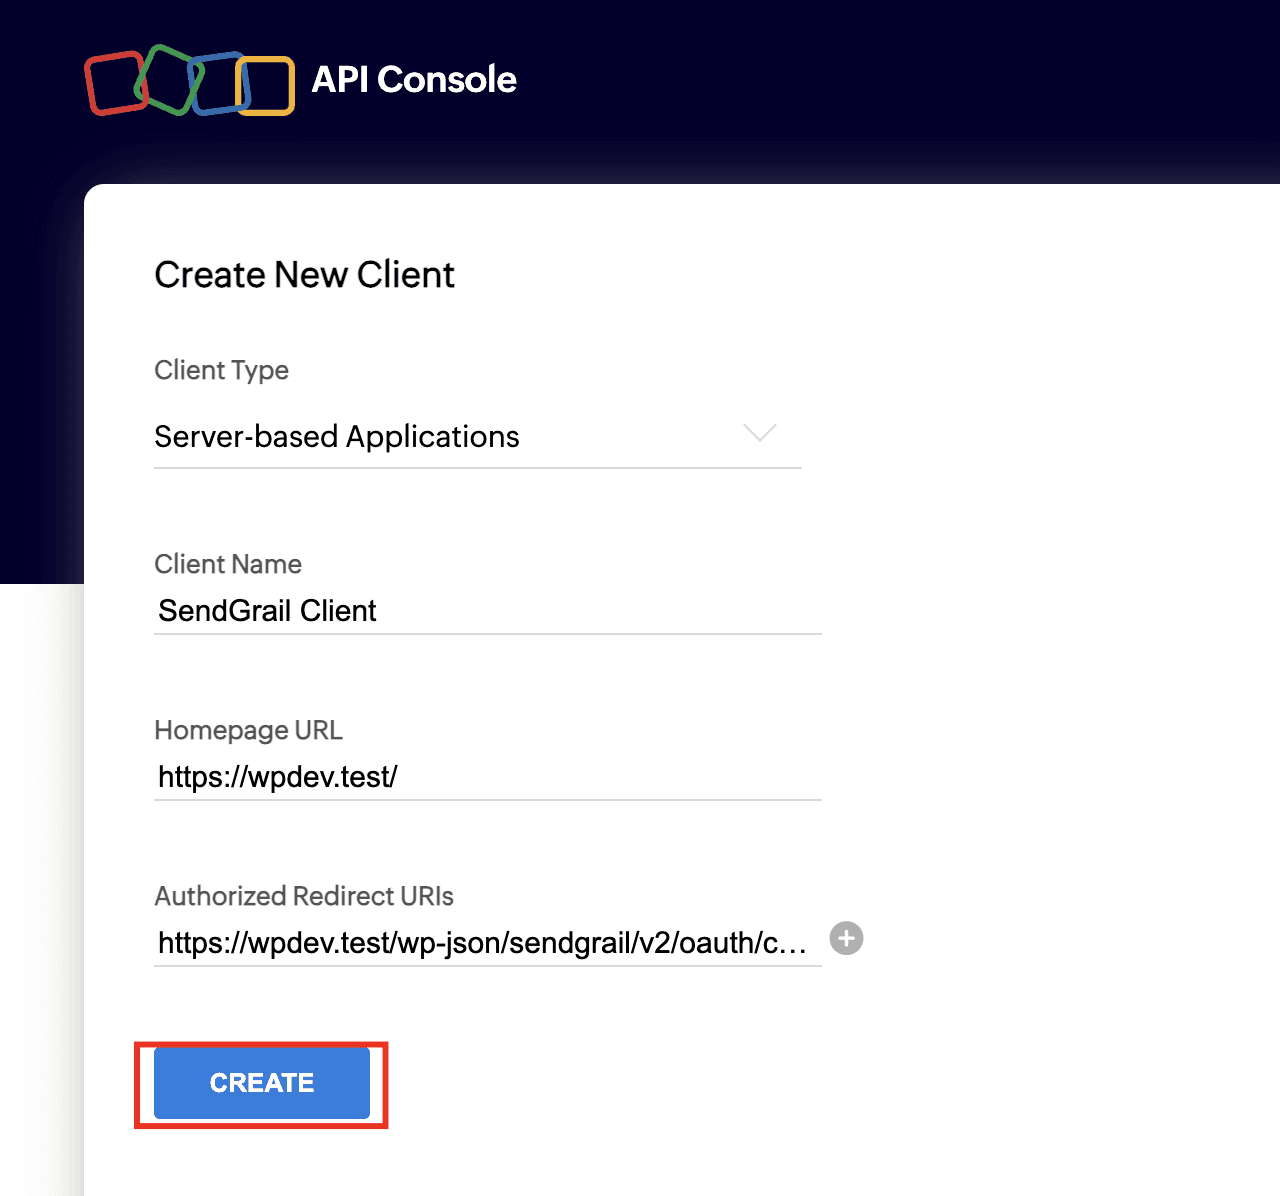
Create the client
Fill in the form:
- Client Name:
SendGrail Client(or anything descriptive). - Homepage URL: your WordPress site URL (e.g.
https://example.com). - Authorized Redirect URIs: copy this from SendGrail's Add Connection screen — it appears after you pick Zoho Mail as the provider. Paste it verbatim.
Click Create.
Redirect URI must match exactly
Zoho rejects the OAuth flow with Invalid redirect URI if there's any mismatch — including a trailing slash or http vs https. Copy-paste the redirect URI verbatim from SendGrail.
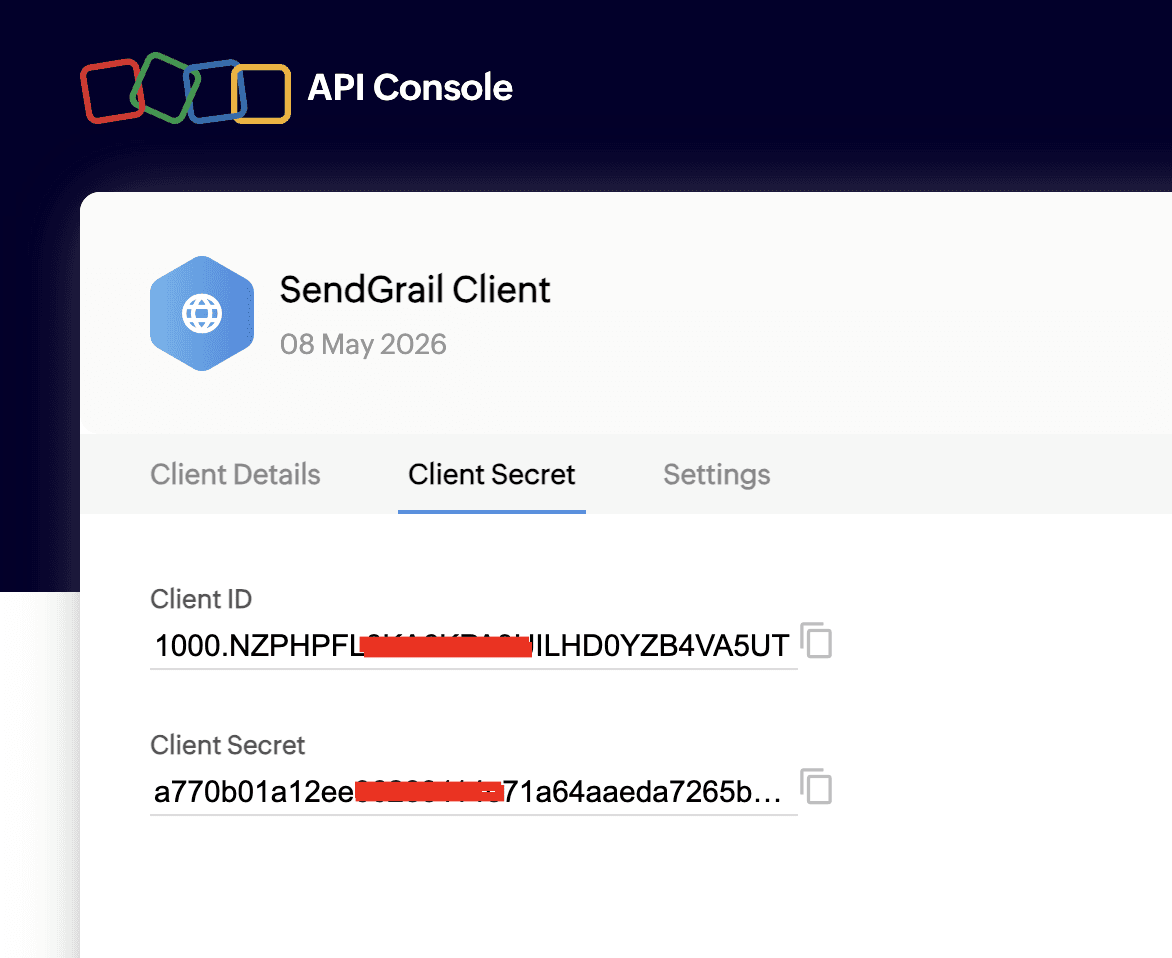
Copy the Client ID and Client Secret
After the client is created, open the Client Secret tab. Copy both the Client ID and Client Secret — you'll paste them into SendGrail in step 8.
Treat these like passwords
Anyone with both values can request access tokens for your client. SendGrail encrypts them at rest in wp_options, but never paste them into shared chat, screenshots, or commits.
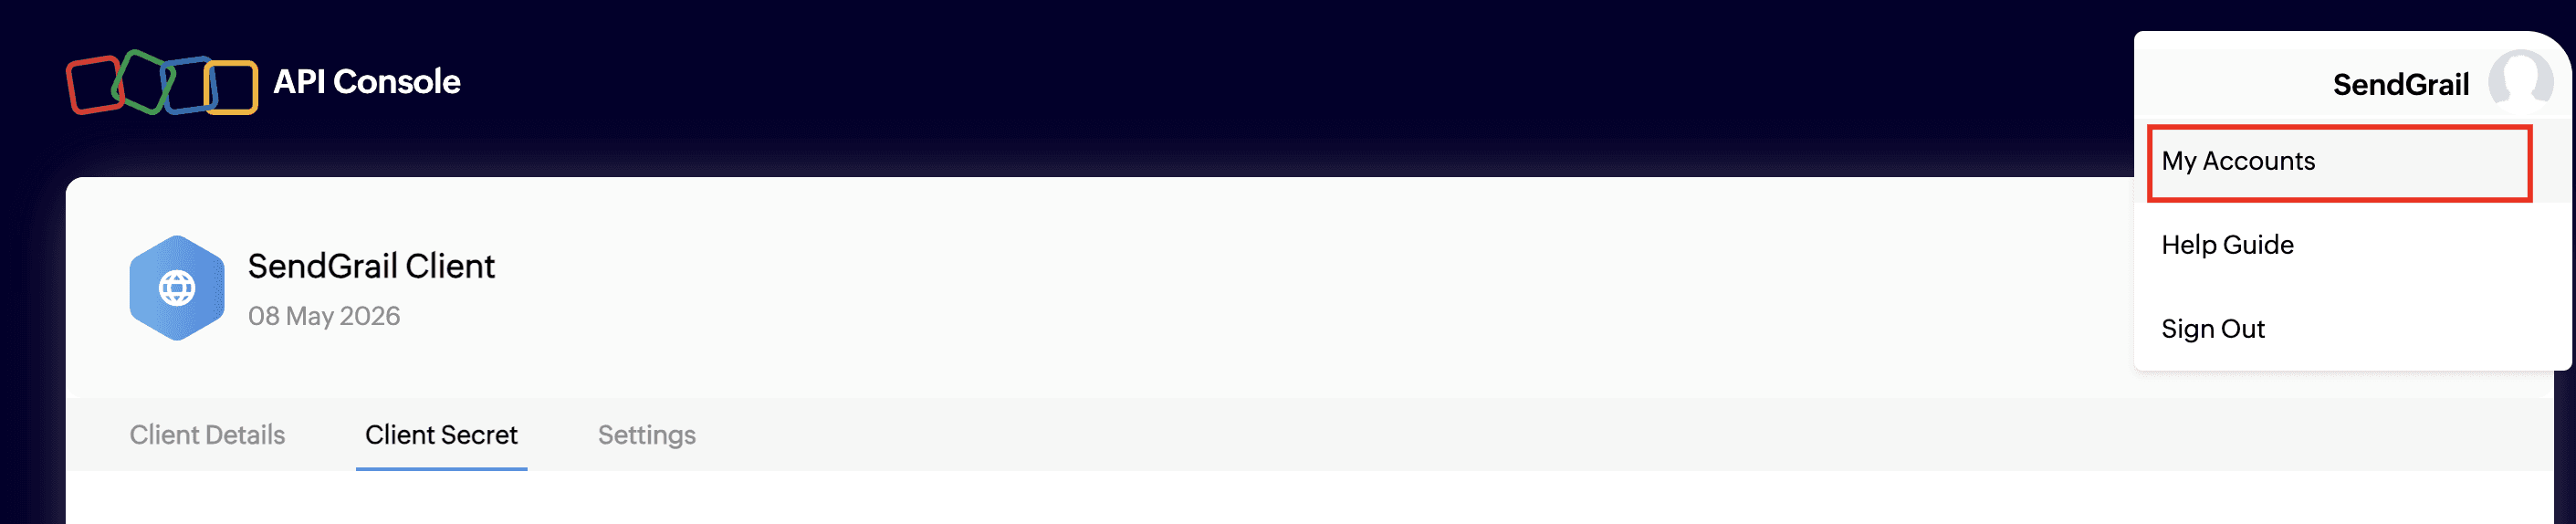
Open your Zoho profile
Still in the API Console, click your avatar (top-right) and choose My Accounts. This opens accounts.zoho.<region> where Zoho tells you which data center your account lives in — that's the region SendGrail needs.
Click your profile avatar
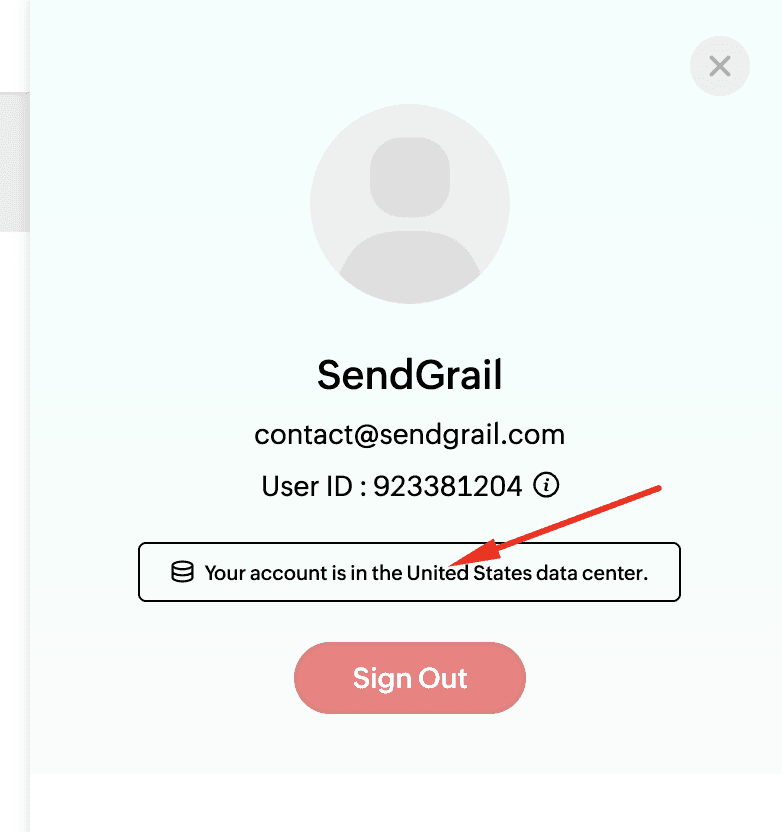
On the Accounts page, click the round avatar in the top-right corner to open the profile card.

Note your data center
The profile card shows the line "Your account is in the United States data center" (or whichever region applies to you). That's your Zoho region — write it down.
Map data center → SendGrail region
| Data center label | SendGrail region |
|---|---|
| United States | com |
| Europe | eu |
| India | in |
| Australia | com.au |
| China | com.cn |
| Japan | jp |
| Canada | ca |
Add the connection in SendGrail and authenticate
In WordPress: SendGrail → Connections → Add Connection → pick Zoho Mail. Fill in:
- Connection Name:
Zoho(or any descriptive label). - From Email: your full Zoho email address.
- From Name: display name shown to recipients.
- Region: the one matching your data center from step 7.
- OAuth Client ID: from step 4.
- OAuth Client Secret: from step 4.
Click Save, then Authenticate with Zoho. A new tab opens on Zoho's consent screen — tick the I allow SendGrail Client to access the above data box and click Accept.
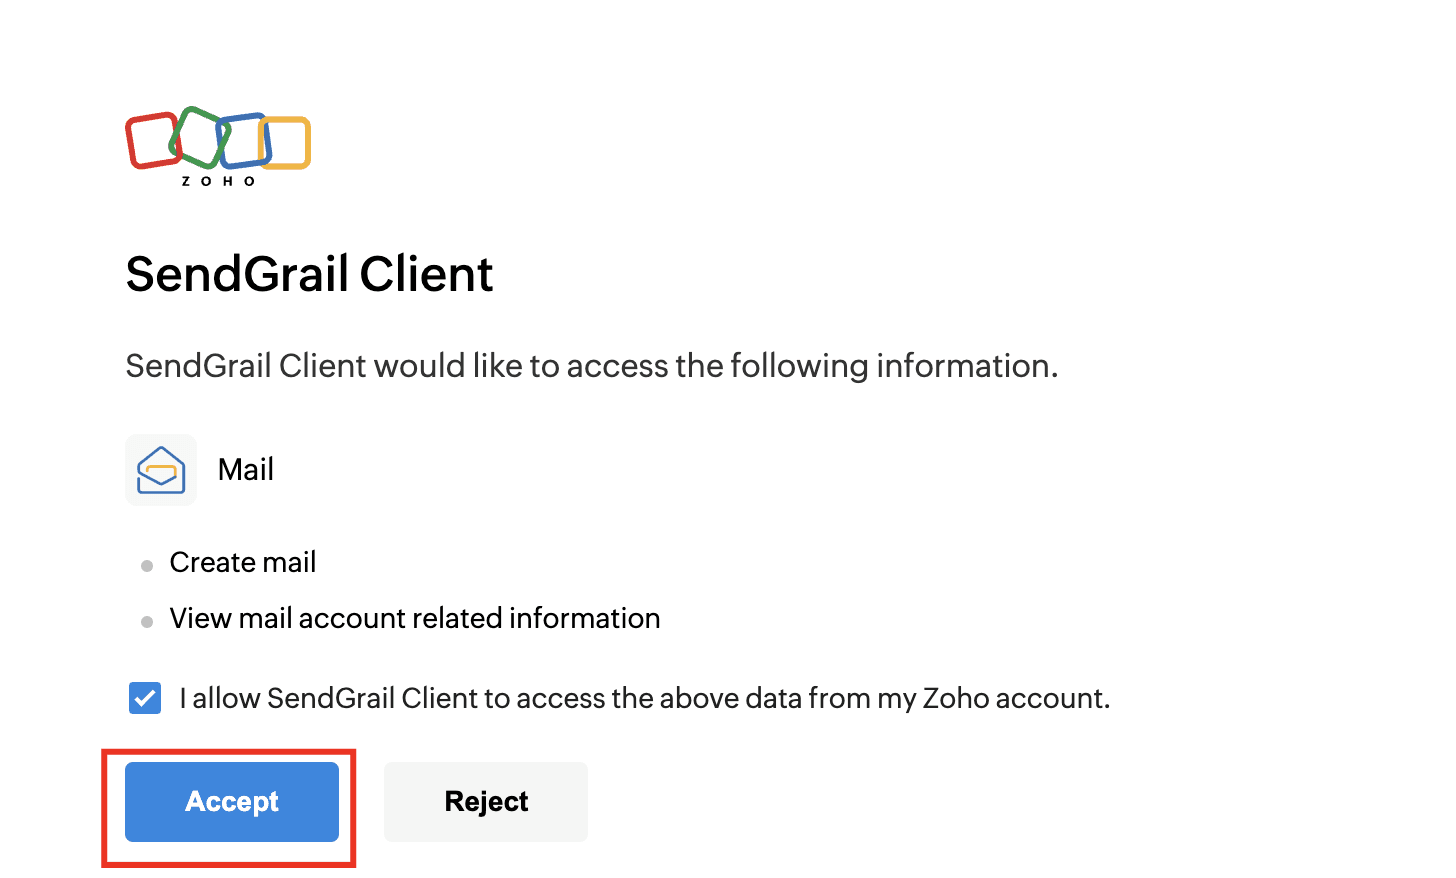
Zoho redirects back to SendGrail and the connection flips to Connected in green.
Scopes used
SendGrail requests only the minimum scopes needed to send mail:
| Scope | Why |
|---|---|
ZohoMail.messages.CREATE | Send email on your behalf via the Mail Send API. |
ZohoMail.accounts.READ | Read the account's accountId (required by the API). |
SendGrail does not request messages.READ — it cannot read your inbox or any existing mail.
Test the connection
SendGrail → Test Email → pick this connection → send to yourself. The message should arrive within seconds. If it fails, check the Logs page for the API response body — Zoho's error messages are usually self-explanatory.
Troubleshooting
Invalid redirect URI
The Authorized Redirect URI in your Zoho client doesn't match what SendGrail sent. Open the client in api-console.zoho.<region>, click Settings, and paste the redirect URI exactly as SendGrail shows it. No trailing slash, exact protocol.
Invalid client after authenticating
Wrong region. Your Zoho mailbox lives in (say) the EU data center, but the OAuth client was created on api-console.zoho.com (US). Re-create the client on the matching region's API console (see step 7) and update SendGrail's Region setting.
INVALID_OAUTHTOKEN when sending
The refresh token was revoked — usually because the client was deleted in the API console, the user revoked it from accounts.zoho.<region>/u/h#sessions/userauthtoken, or the access scope changed. Click Re-authenticate on the connection.
Recipient not allowed / send failed
Free Zoho Mail plans don't allow sending to external addresses via the API. Upgrade to Zoho Mail Standard (or Workplace Standard) to enable external delivery.
Hitting send limits
Zoho enforces per-mailbox API limits (typically a few hundred messages per day on free plans, higher on paid). If you hit them, the API returns Limit exceeded. Switch to a dedicated transactional provider for high-volume sends.
What's next
- Email Routing — route specific emails through Zoho.
- Failure Alerts — get pinged on rejections.
- Test & Simulate — verify the connection works.